Best Paint Sprayer for Cabinets – In-Depth Guide
This post may contain affiliate links. We may earn a commission from purchases made through them, at no additional cost to you.
These days DIY projects and home makeovers are all the rage, particularly with people spending so much time at home, you notice any paintwork, or wear and tear that needs to be addressed on the likes of your kitchen cabinets. Some makeovers can be very expensive and take a long time, and tackling your kitchen cabinets are an ideal way to try out your DIY skills. Most of the time the cabinets will only need a fresh lick of paint to liven them up. This article will equip you with the knowledge required to tackle your cabinets with a spray gun and which is the best paint sprayer to use on your cabinets.
Benefits of Using a Sprayer to Paint Your Kitchen Cabinets
Using paintbrushes and rollers to paint your cabinets can be expensive and will take a lot of time to do something relatively simple. Using a paint sprayer is a more cost-effective option that will also make the job go faster. A paint spray will provide you with a stunning finish, the equipment lasts for long, and it is super easy to clean up.
An added benefit to using a spray gun is you can adjust the sprayer to your needs which means reduced wastage and paint spillage. A paint spray turns the project into a quick job which means you can then move on to your next project. That being said it is all dependent on whether you have selected the correct fittings and spray gun for your project. In addition, your painting skills will be put to the test as you work with the spray gun and learn how to handle it.
Like with any DIY project there are several important decisions you will need to make in terms of equipment purchases. When dealing with your kitchen cabinets the first step is to decide which is the best type of paint sprayer for your needs.
The Four Types of Paint Sprayers
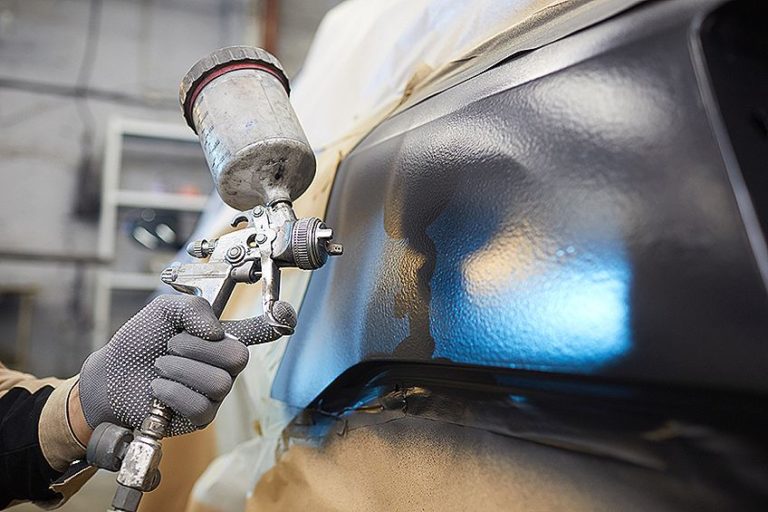
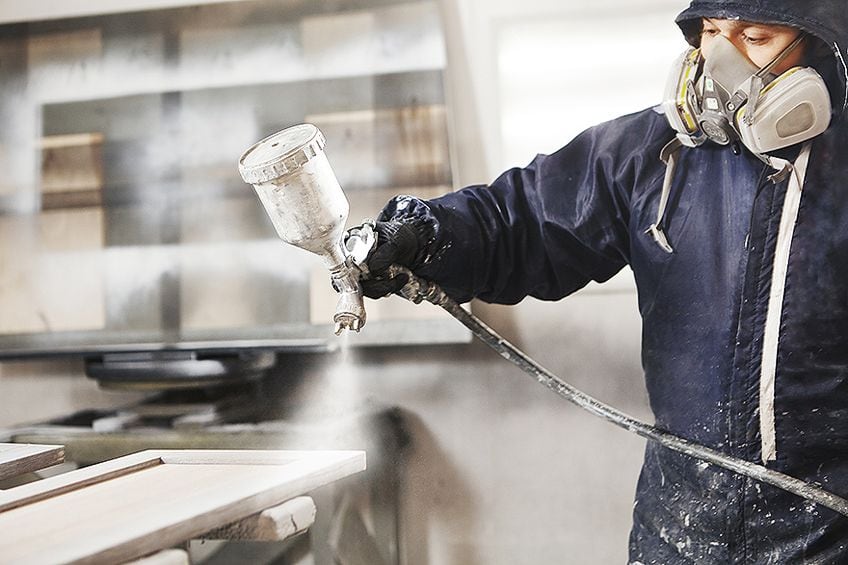
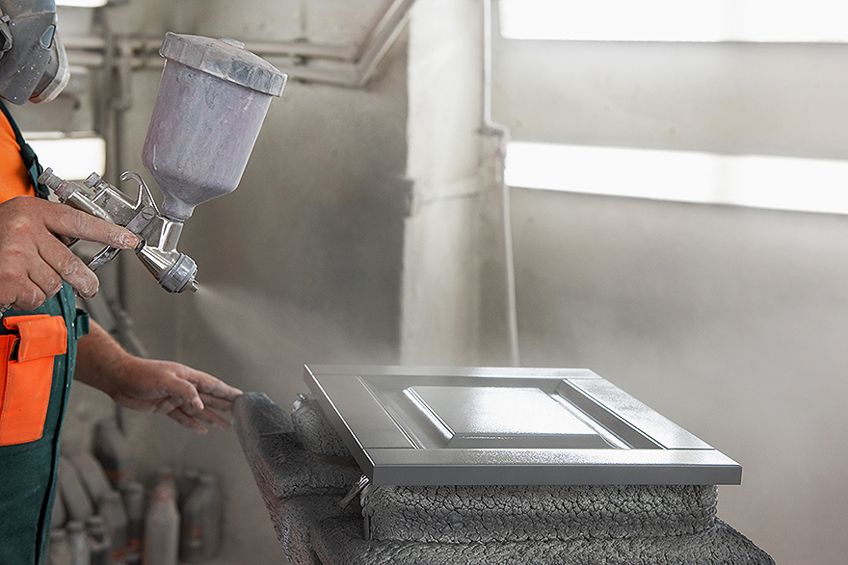
The first thing you need to know when selecting a paint sprayer for cabinets is how the set-up works. A paint sprayer has a paint canister that holds the paint you wish to apply. The canister is connected to a nozzle which you use a trigger mechanism to operate. When using a paint sprayer, you will produce coats of paint that are even. The result is a beautifully smooth finish which is why paint sprayers are such a popular option for DIY projects.
While a paint sprayer can give you stunning results your ability to use the equipment does play a role as well.
There are a variety of different paint sprayers available in the market, they can be grouped into four categories which are compressed air, HVLP (High-volume low-pressure), LVLP (low-volume low-pressure), and airless paint sprayers. We will go into a little more detail for each of these options.
Compressed Air Paint Sprayers
A traditional form of a paint sprayer is the compressed air version which disperses a thin layer of paint with the use of a spray gun that is connected to a high-pressure hose, which in turn is attached to a pressurized tank. The compressed air sprayer can be quite expensive to purchase all the elements required but you can always hire one from the hardware store.
This option will offer you a professional finish and is considered the best paint sprayer for cabinets, sadly this option can take time to use as you will be required to apply several layers of paint as opposed to other equipment which will not require many layers of paint to be applied.
This option can also be hard to control due to the force and pressure which is exerted by the air compressor that is required to disperse the paint. Paint can also be unnecessarily spread cause a lot of mess but you can address this problem by trying out different nozzles to see which pattern and flow work best for you and your project’s requirements.
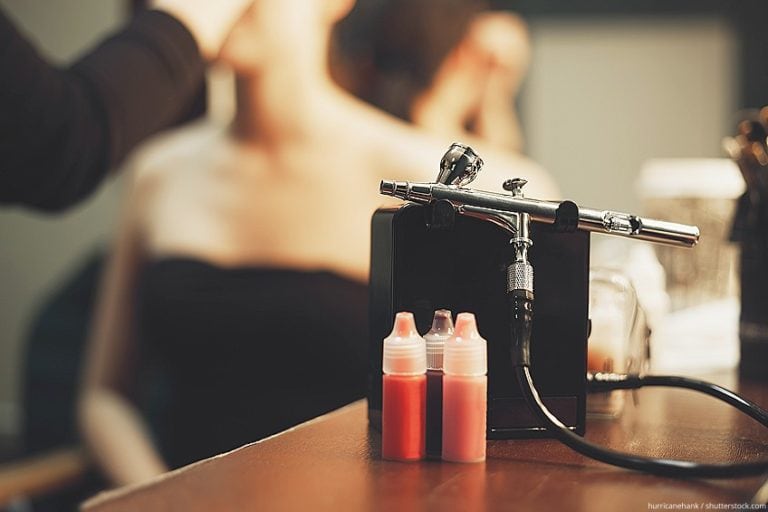
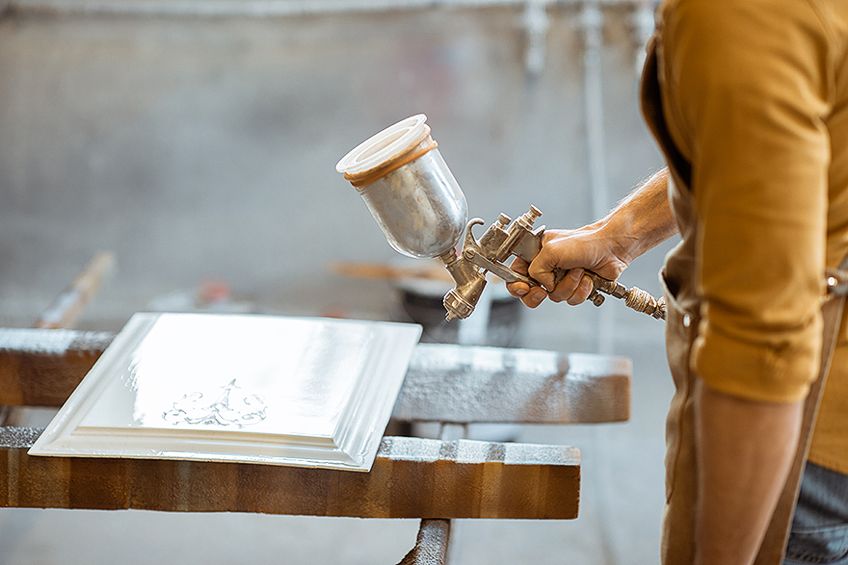
The Best Handheld Paint Sprayer: FUJI Spray Gravity Spray Gun
This is the best option when it comes to a handheld paint sprayer, and while it is an advanced piece of equipment that is preferred by professionals, it is easy enough to be used by anyone. This device is less likely to clog thanks to the sprayer being stainless-steel and therefore it is easy to clean up. You will have a reduced risk of overspray thanks to it being simple to control the sprayer.

- The convenient side pattern control knob to adjust the size of the fan pattern
- Non-Bleed Spray Gun for less blowing around of shop dust
- High-Efficiency Air cap installed for even less overspray and superb atomization
- You can easily adjust the spray pattern thanks to the convenient side knob
- Provides a finish with is of professional quality
- The handle is ergonomically designed
- Thanks to the stainless-steel sprayer there are fewer clogs
- You can purchase the canister in different sizes
- Cannot be used to apply clear finishes or liquids
- They can be harder to change and understand the settings
HVLP (High-Volume Low-Pressure) Paint Sprayer
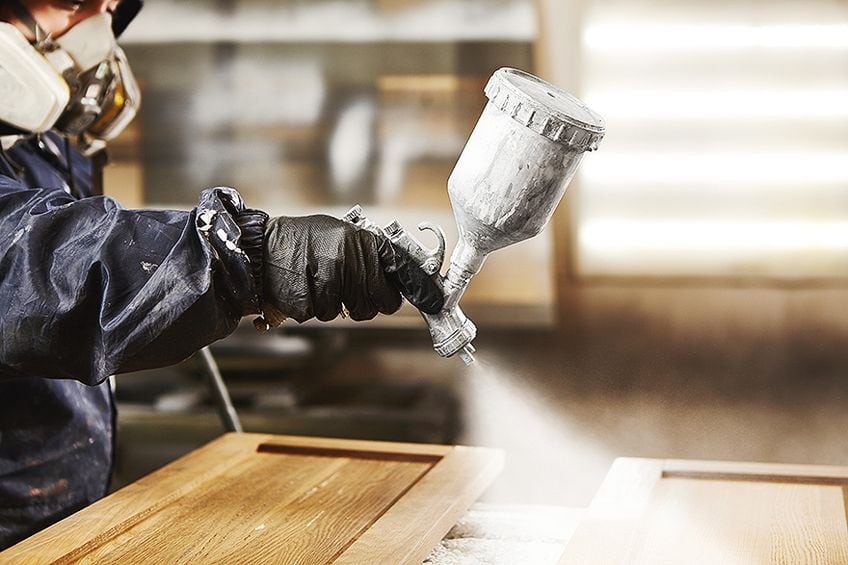
This unit uses a built-in electric turbine which then sprays the paint, it is a more affordable option and the device does not require an air compressor. These are powerful devices but are best suited for smaller projects, like a kitchen cabinet refurbishment. The risk of overspray is decreased with this type of sprayer thanks to the condensed nature of the unit, so your painting will be more accurate and there will be significantly less spillage. You will probably have to thin out your paint before you can use it in this type of device but you will get all the information you require in the owner’s manual.
The Best HVLP Paint Sprayer: YUZES HVLP Spray Gun
The YUZES HVLP Spray Gun is a versatile tool designed for automotive, house painting, furniture, DIY projects, varnish, and top coat applications. It includes 1.4mm, 1.7mm, and 2.0mm nozzles for various paint viscosities and finishes, along with an air regulator and water oil separator for precise control and clean results. The 600cc cup provides ample capacity, minimizing interruptions for refills during larger painting tasks. Ideal for both professionals and DIY enthusiasts, this spray gun ensures efficient and high-quality paint application across different surfaces.

- Includes 1.4mm, 1.7mm, and 2.0mm nozzles, providing flexibility for various painting tasks, from automotive to furniture and DIY projects
- Equipped with an air regulator and water-oil separator, ensuring precise control over air pressure and clean, smooth paint application
- Features a 600cc cup, reducing the need for frequent refills and improving efficiency during larger painting jobs
- Versatile Nozzle Options
- Precise Control
- Large Capacity
- Learning Curve
- Cleanup
- Maintenance
LVLP (Low-Volume Low-Pressure) Paint Sprayers
These units use a compressed air system to spray the paint, but they can work on a less powerful and smaller air compressor. The LVLP can take longer to paint an area in comparison to the HVLP spray gun, as it creates smaller spray patterns. They also waste less paper as they produce less overspray. You will have to thin out certain paints but as always consult the owner’s manual for further details.
The Best LVLP Paint Sprayer: InoKraft D1 LVLP Air Spray Gun Premium Kit
The InoKraft D1 LVLP Air Spray Gun Premium Kit is an ideal choice for automotive and home DIY painting projects. It features 1.3mm, 1.5mm, and 1.7mm nozzles, catering to various paint types and project needs. This kit includes essential paint sprayer accessories and is designed for easy use, making it suitable for both beginners and experienced painters aiming for professional-quality results.

- This kit includes everything needed for car and house DIY painting, with additional paint sprayer accessories for enhanced versatility
- Comes with 1.3mm, 1.5mm, and 1.7mm nozzles, providing options for different paint types and project requirements
- Designed for user-friendly operation, making it suitable for both beginners and experienced painters looking for professional results in automotive and home painting projects
- Versatile Nozzle Options
- Comprehensive Kit
- Ease of Use
- Kit is costly
- Cleanup
- Learning Curve
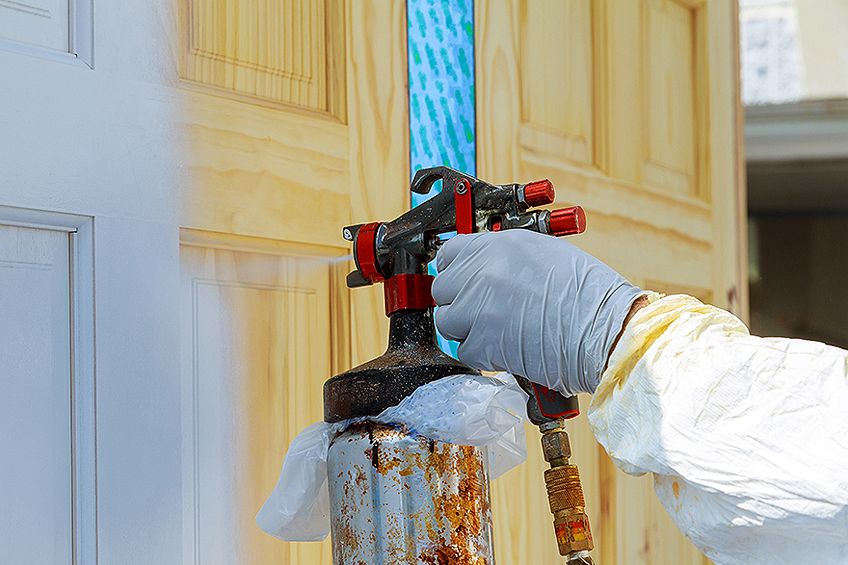
Airless Spray Gun
This type of unit uses an electric motor to spray the paint and can pump paint through the tip and hose at a decent pressure of up to 3000 psi. this unit will apply the paint in thicker coats which means you need fewer layers to complete the job which of course saves you time and money. Sadly, the strength of the spray can result in a lot of oversprays which means the paint is wasted. This is a good option if you are working on a bigger project.
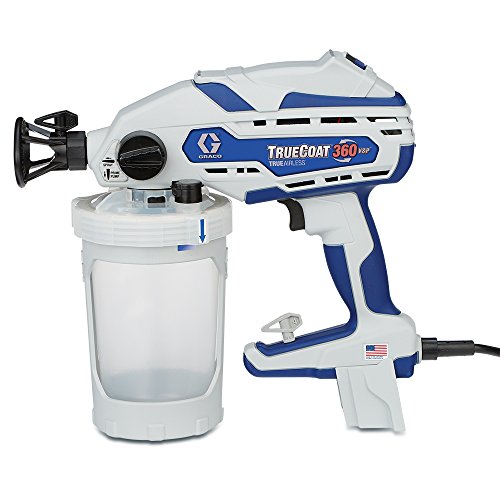
The Best Airless Paint Sprayer: GRACO TrueCoat Handheld Paint Sprayer
This unit is simple to clean and the nozzles can be unclogged with ease. thanks to the airtight VacuValve technology this airless paint sprayer can be used in any direction which means you can even spray upside down (great for ceilings!).
- Variable speed control lets you determine the pace for ultimate control
- Durable storage case protects sprayer and keeps tips and accessories organized
- Stainless Steel Piston Pump allows you to spray paint unthinned at high pressure
- You can spray in any direction
- Using bag liners, it is simple to clean
- Comes with its storage case
- You will not have to thin the paint first
- The nozzle is simple to unclog
- You will have to refill the paint often
- It can take a long to refill the paint
How to Spray Paint Cabinets: Things to Take into Consideration
It is all good and well to know about the different paint sprayers available but you will also need to have the relevant knowledge about the features these devices should offer so that you will be able to complete your paint project. The units’ features are linked to the task at hand so you need to have a detailed plan for your project before you invest in a spray gun.
Project Size
You will first need to access the size of the project as each paint spray gun has different paint capacities and different levels of force with which to disperse the paint. You do not want to have to constantly have to stop and refill your paint canister. If you have not selected the correct spray gun for your needs you will find yourself wasting time and paint. We suggest for a small project such as your kitchen cabinets, that a low-volume handheld spray is the best option.
Spray Regulation
How you wish to regulate the paint that is sprayed in your next decision, airless spray guns for example have a tip that diffuses the paint, while HVLP sprayers have an adjustable air cap. The amount of paint that will be released is dictated by the size of the tip which will also determine the size and shape of the pattern. To ensure you reduce clogging and achieve a stunning professional finish you will need to use the correct tip.
You require a tip that gives you the perfect amount of paint being sprayed, not too much and not too little. You may have to play around and experiment a bit to get the desired settings on your spray gun.
Compressed Air or Airless?
You will need to decide if you want an electric spray gun or a manual one, the two options use an electric pump and compressed air respectively. It is easier to clean an air-powered sprayer and it has a higher transfer rate while the compressed air gun offers you flexibility in regards to adjustment of the spray’s intensity. Either option when used correctly will give you stunning results.
The Relationship Between Power and Paint Output
The output will be higher if the sprayer has more power, if you are tackling a larger job that just needs a simple coat, then a sprayer with more power makes sense as it can produce a large spray pattern. Such a unit does not always work on a smaller project such as your kitchen cabinets as you will end up with overspray due to too much paint being released.
The Amount of Pressure Needed
The majority of paint sprayers have a control that you can use to adjust how much pressure is released by the sprayer. This is important as too much pressure can lead to spraying which is a waste of paint and creates a mess, while with too little pressure the paint will come out blotchy ad uneven. You are looking to provide sufficient pressure to atomize the coating you are spraying and this is all dependent on the liquid’s viscosity. You ideally want a spray that has adjustable pressure so you can adjust it to suit your needs.
The Paint Capacity
You ideal want a high capacity for holding pain so that you do not have to stop the whole time and refill the canister. An airless spray gun can pull the paint directly out of the can, while an HVLP sprayer normally has a cup that is attached to the sprayer. An airless spray gun has therefore got the biggest capacity.
Ease of Use
HVLP sprayers are considered the easiest to use as they are simple to control and adjust, they are perfect for smaller projects, and do not produce overspray. What it gets is that it is also a complete set-up so you will not have to purchase additional equipment like an air compressor to use the device. If you have a large-scale project an airless compressor is a good option as it is powerful, but does produce a lot of oversprays. If you already have an air compressor then we suggest using an LVLP spray gun which is great for smaller projects.
How to Paint Kitchen Cabinets with a Spray Gun
Now that you know how to determine which spray gun to select you can begin painting your kitchen cabinets, here are some simple steps to follow to achieve stunning results.
STEP 1: Clean
You will need to start by cleaning the cabinets and deciding whether the cabinets are in good enough condition to be refurbished, or it is time to simply replace them completely. Takedown the cabinets and lay them out across a work area and then using warm water and dish soap wipe them down. Ensure that any grease marks or dirt are removed otherwise the paint will not adhere correctly. Once wiped down then rinse the soap off using clean water and dry the pieces completely. Cover the hinges with tape so that the hinge holes do not become damaged and blocked.
STEP 2: Remove and Label
When you remove the cabinets to clean them you will want to label each piece as you remove it and ensure all the pieces are stored safely. You will have an easier time putting the cabinets back together if you have labeled them. We suggest placing the label on a portion of the cabinet that won’t be painted such as the hinge hole, just care that your labels do not fall off.
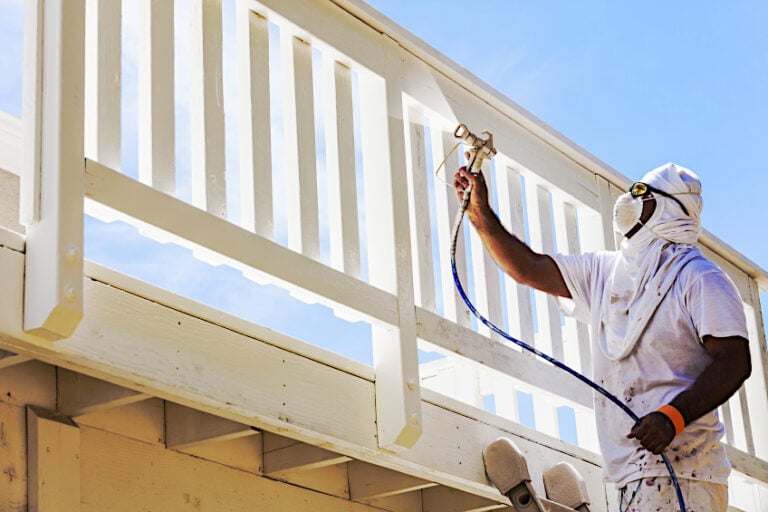
STEP 3: Protect the Area
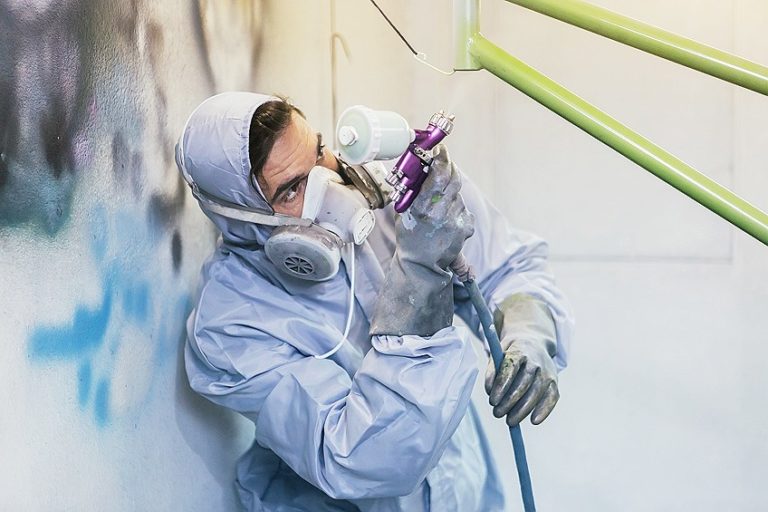
Once the cabinets have been removed you will need to clean the area and surfaces where the cabinets will be reattached to. When you are happy that those areas have been sufficiently cleaned you can mask off the ceilings, flooring, and walls, and any appliances in plastic sheeting. There is always a risk of overspray so rather cover the countertops, floors, windows, and doors. Ensure where you are working has sufficient ventilation so that the paint fumes do not build up and wear the relevant safety gear to protect yourself from fumes and paint splatter.
STEP 4: Perform Repairs
If there are any areas of the cabinets which require repairs this is the time to address them, any problem areas need to be sanded and smoothed out. If when you are done you wish to re-attach the hinges and handles in different places than before you will then have to block out the pre-existing holes. If there are any holes, scratches, or dings you can use spackling compounds to fix them. Always clean away any dust you may create when addressing the repairs before moving on to the next step.
You can use a stain-blocking primer to prime the cabinets remember to stain both sides of the panels, allow the one side to dry completely before you flip it over, and tackle the other side.
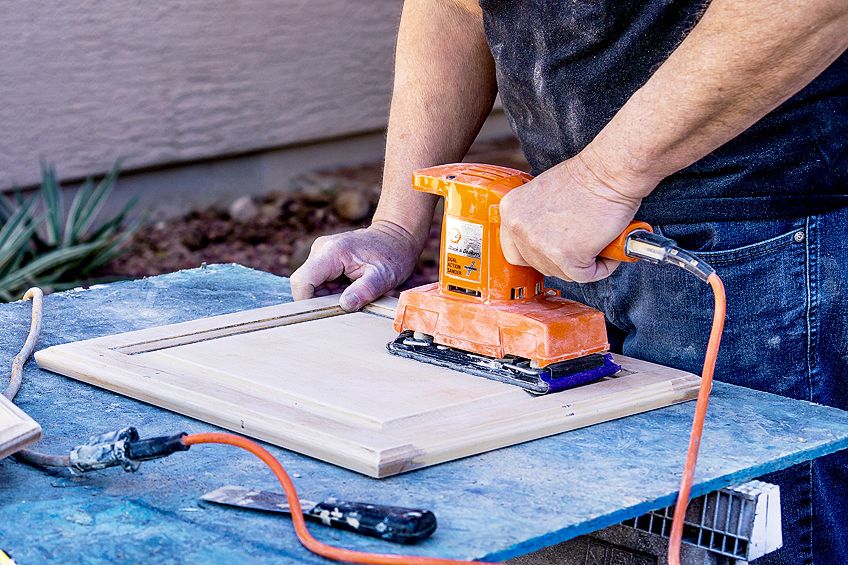
STEP 5: Sand It Down
Take fine-grit sandpaper and in the direction of the grain of the wood sand the doors down. When you have finished wipe away all dust particles so that the dust does not settle on your paint. Ensure that you dust down not just the cabinets after sanding but also your work area.
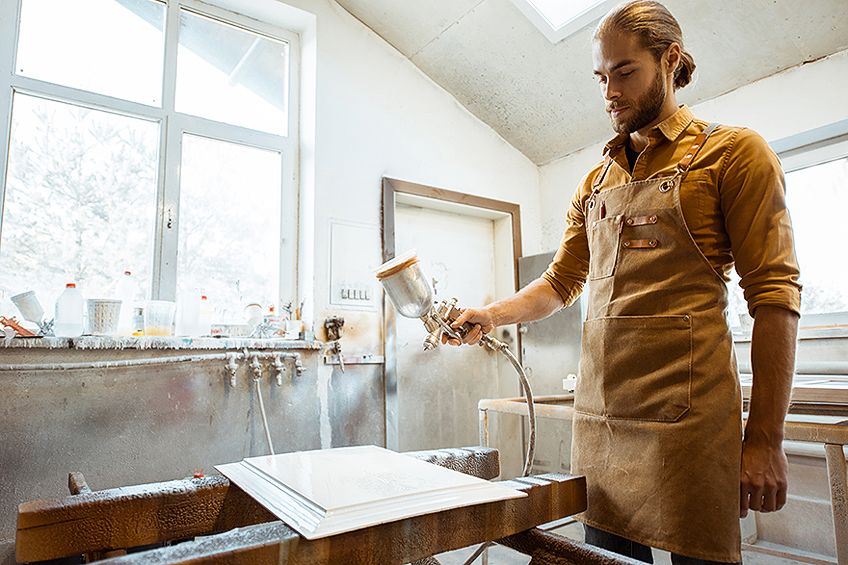
STEP 6: Paint Your Cabinets
Decant your paint into a bucket and if necessary thin it out. Using a paintbrush, you can then paint the frames, and once done you can switch over to a spray gun. If there are any uneven brush strokes or marks do not worry as the spray gun will smooth it out when you are painting the other areas of the cabinets.
STEP 7: Practice Makes Perfect
With anything you will get better at with a little practice, we suggest you practice with the spray gun before you use it on your cabinets. Keep in mind that you are not a professional and it is ok if you make mistakes what is important is how you handle the mistakes and work going forward.
STEP 8: Touch-Ups
When you have finished spraying should you notice any areas of uneven paint or paint that is running you can use a paintbrush to touch it up before it dries. If the paint is already starting to dry and get sticky rather wait until it is completely dry, sand the area down, and then repaint the area. you could always buy a paint pen in which you can store some of the paint to use for any touch-ups that may be required in the future.
STEP 9: Reassemble
When you have completed the painting of your kitchen cabinets it is time to reassemble them. Take care when reattaching the door hinges so you do not scratch the freshly painted surface. If you do cause a scratch do not panic it is simple to fix.
After reading this article, you are now set to begin revamping your kitchen cabinets by yourself. Depending on the extent of your project, and your budget, there are a variety of different paint sprayers that you can buy.
Frequently Asked Questions
Why Can I Not Just Paint Over the Existing Paint?
The paint needs to be able to adhere to the surface and dirty old paint is not going to make that possible. In addition, you want to achieve an even coat of paint so you require a smooth work surface to work with, to the eye your cabinets may look smooth but they are probably not. Rather do a proper job!
What Size Tip Is Best Suited for Spraying Kitchen Cabinets?
Using a small tip will help you avoid overspray, to create a 6-inch fan you can use a 311 sized tip. If your sprayer has a cap, you can adjust the sprayer as needed so that you get your desired results. If you are using a kit that has several fittings or tips, we suggest you experiment with them first before beginning your project.
How Can I Tell Which Paint Is on My Cabinets Currently?
You can take a cotton ball that has been soaked in isopropyl alcohol and wipe it across the existing paint. If no color residue is given off then the paint is oil-based, if the color does rub off then the paint is latex.
How Should I Prepare the Cabinets?
You will need to start by removing the cabinets and cleaning them thoroughly, ensure all grease marks are removed. If any grease or dirt is not cleaned off these spots can make it hard for the paint to adhere to the surface. When you have finished cleaning the cabinets and dried them off you can then sand down any imperfections and where necessary fill them up. When you have finished this you can then apply the primer and allow it time to dry before you can begin painting. When you have finished painting and are happy with the results allow time for the cabinets to dry before reassembling and reinstalling them.
Do I Need to Wash the Spray Gun After Every Use?
You should ideally wash your painting gear at the end of each day to ensure that there is no damage caused to the equipment. If you are doing a project that is taking several days you can simply put your gear into a plastic bag and leave it in the fridge. The paint will not dry thanks to the cold temperature, but allow the gear sometime in the morning to thaw out before using it again.
What Pro Tips Do You Have For an Amateur Spray Painter?
This isn’t that simple of a question to answer as there is a lot of information but to summarize a few tips to help are as follows. To begin with do not allow your paint to dry during the painting process, make sure the paint’s lid is closed when not in use. Ensure that your paint is mixed sufficiently before you begin pouring it into the spray gun’s canister. Make sure that your surfaces have been prepared correctly before you start painting which means they have been thoroughly cleaned, sanded down, and dust removed, and primer has been applied and allowed to dry. When you do start painting ensure you work from top to bottom, spraying evenly, and try to avoid overlapping.
Why Should I Use a Spray Gun Instead of a Paint Roller?
While we are all used to working with a paint roller or paintbrush that does not mean they are the best options. It can be hard to maneuver them in hard-to-reach, tight spaces and then can cause lines in the paint. To achieve an even finish and to tackle any tricky corners a spray gun is the perfect option. You simply have to set up the gun, begin spraying and you will immediately see stunning results. It is always recommended that you practice working with a spray gun first to get the hang of it before tackling your desired project.

Larissa Meyer is a 32-year-old mother from Michigan and creative spirit since childhood. Her passion for painting and drawing has led her to an education as an illustrator and a career as a freelance graphic designer. She has a Bachelor of Fine Arts in Illustration and a degree in Graphic Design. Larissa is a talented artist who is able to master a wide range of styles and techniques to bring her artistic vision to life. Her greatest passion is currently fluid painting and epoxy resin art. As a mom of two kids, Larissa also understands the importance of fostering creativity in early childhood. She uses her experience and knowledge to help other parents inspire their children and develop their artistic skills as well.
Learn all about Larissa Meyer and Fluid Painting.