Acrylic Pour Techniques – A Guide on Different Fluid Painting Methods
This post may contain affiliate links. We may earn a small commission from purchases made through them, at no additional cost to you.
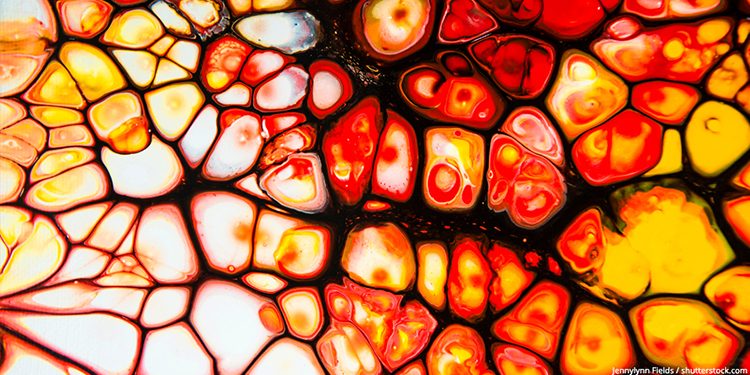
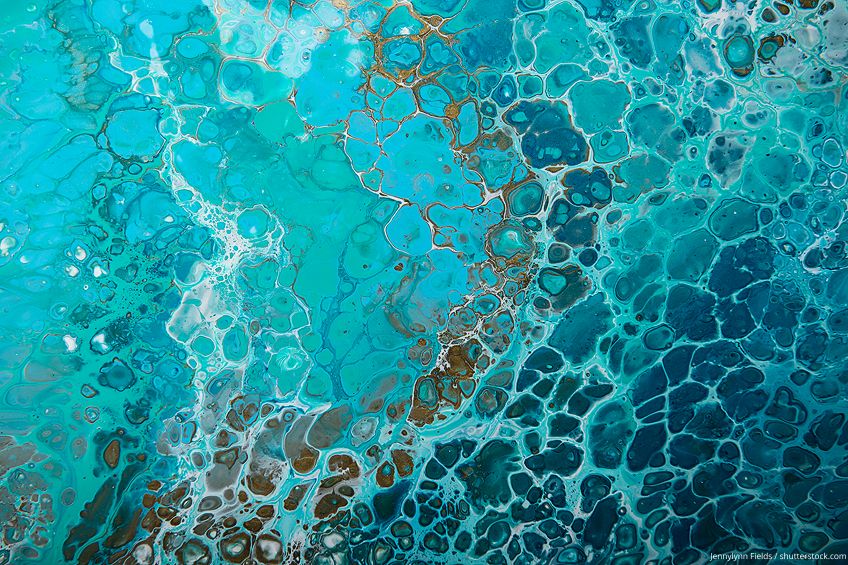
Using acrylic pouring techniques will allow you to apply high fluidity paint in various ways to a canvas or other substrate of your choice. This fluid painting technique is extremely enthralling and the various methods can lead to vastly different results. The tutorial that follows will demonstrate and outline various acrylic pouring methods and show their application in detail.
Table of Contents
- 1 What Is Acrylic Pouring?
- 2 Acrylic Pouring Techniques
- 2.1 Puddle Pour
- 2.2 Dirty Pour
- 2.3 Flip Cup
- 2.4 Bottle Bottom Puddle Pour / Flower Pour
- 2.5 Tree Ring Pour / Swirl Pour
- 2.6 Wing Pour
- 2.7 Swipe Technique
- 2.8 Air Swipe / Dutch Pour
- 2.9 String Technique
- 2.10 Chain Pull
- 2.11 Balloon Smash
- 2.12 Balloon Dip Pour
- 2.13 Strainer or Colander Pour
- 2.14 Dip
- 2.15 Reverse Dip
- 2.16 Injection Pour
- 2.17 Blob Painting
- 2.18 Fractal Dendrites
- 2.19 Wreck-a-Ring Pour
- 2.20 Ghost Pour
- 2.21 Wave Pour
- 2.22 Starburst Swipe
What Is Acrylic Pouring?
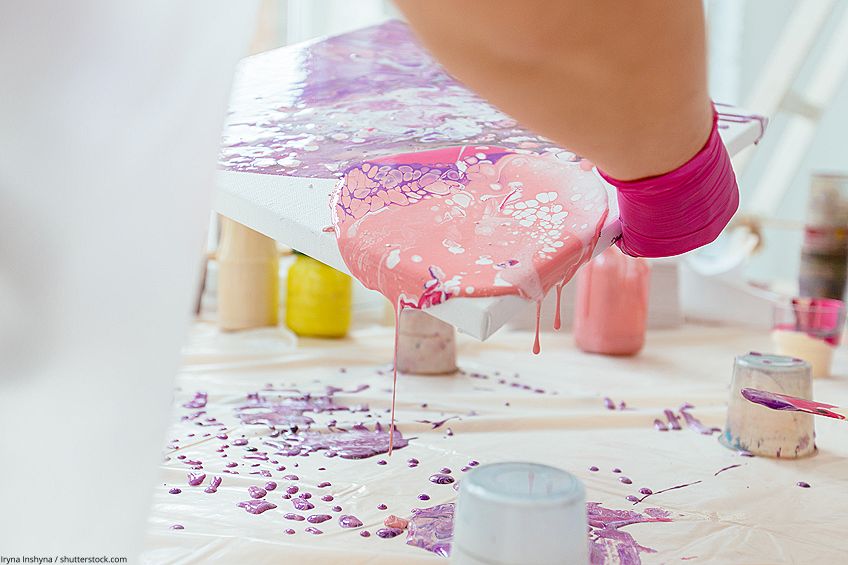
Let us take a look at a technique that uses fluid painting, known as acrylic pouring. Before applying the paint to the surface of the canvas, we first combine our various shades of acrylic with a pouring medium. Without the use of a brush, you apply the paint by pouring it straight upon the canvas. Moving the point from which you are pouring will vary the course of the paint’s flow.
The magic of fluid painting happens before your very eyes without the requisite of being experienced or highly skilled as an artist. All you require is the free time and the necessary tools to be able to immerse yourself in this enjoyable creative process. There are various paint pouring techniques used to pour your fluid art painting, and in the article that follows, we discuss nearly all of them in detail.
Are you new to using acrylic pours? Take a look at our guide to acrylic pouring before you move on. You will also require various materials for each of the pouring methods covered in this fluid art painting guide, a list of which can be found in this acrylic pouring supplies article.
Acrylic Pouring Techniques
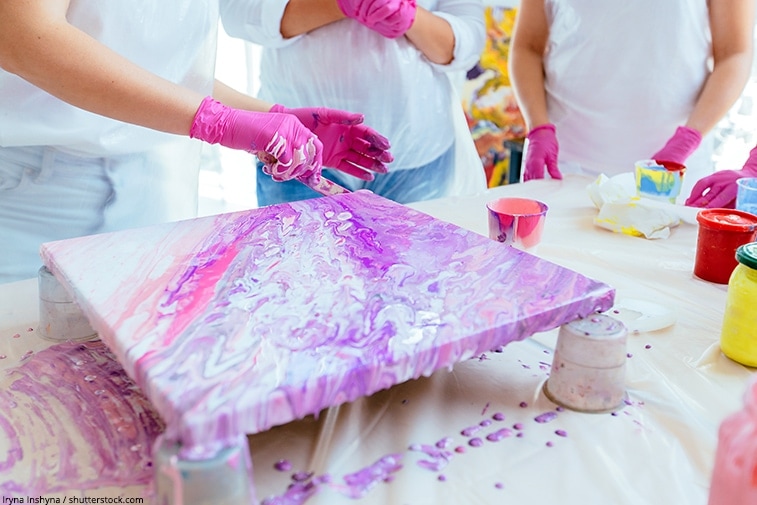
Different acrylic painting ideas allow us to make use of the different acrylic pours available, or even combining them once you have mastered the methods. Although they all make use of the same paint medium and mixing process, each of these individual acrylic pour techniques has their own idiosyncrasies within the pouring method.
So make sure you are well-familiarized with the details of each step of the technique you are attempting, rather than following the guidelines while you work. This will allow a smoother creative process, ensuring that the only mishaps are mistakes of learning in the colorful designs you produce. The following list of techniques will show you how to do pour painting, and give you a good idea of where to start, whether you have previous experience with fluid painting or not.
Puddle Pour
Using puddle pour requires each separate color to be poured onto the canvas sequentially. Select the base color carefully to allow each of the colors that follow to complement the last as you layer the paint.
- Mix each color separately, combining each with a pouring medium (such as Liquitex) and water using an approximate ratio of one part color, one part medium, and less than one part water (1:1:<1), which can be adjusted according to the desired consistency. You can also add two or three drops of silicone oil to each color for more effective cell formation.
- Each color is then poured upon the center of the painting surface in a sequential fashion.
- The canvas is then tilted repeatedly to allow the paint to evenly run over its surface. The creativity of the end product is determined by the application of this technique.
Dirty Pour
Dirty pour painting is a method that requires your pouring each of the colors into the same receptacle to be applied to the canvas together.
- Mix each color separately and combine each with a pouring medium and water, using an approximate ratio of 1:1:<1. Add a few drops of silicone oil to each color for better cell formation.
- Once individually mixed, each color is then layered into the same container.
- Perhaps stir this final mixture ever so slightly to allow the colors to bleed into one another.
- Gently and gradually pour this mixture over the surface of the canvas.
- Then, tilt the canvas canvas repeatedly so that the paint can run over the surface evenly. The way you tilt the canvas will determine the look of your end product.
Flip Cup
This method, known as flip cup, has a very similar approach to dirty pour painting. However, this technique calls for the paint mixture to be placed on the canvas and then lifted from the surface, allowing the layers of each color to be more closely interwoven.
- Mix each color separately and combine each with a pouring medium and water in 1:1:<1 ratio. You can add a two to three drops of silicone oil to each color combination in order to improve the formation of the cells.
- Once individually mixed, each color is then layered into the same container.
- Place the container upright on the surface of the canvas.
- Slowly raise the container from the canvas.
- If you desire more cells, hover momentarily over the canvas using a heat gun, Bunsen burner, or hot-air dryer.
- You must then move and tilt the canvas over and over again, as this allows the paint to run evenly across the surface. The final result will depend on your tilting techniques.
Bottle Bottom Puddle Pour / Flower Pour
The acrylic pour techniques used in bottle bottom pour necessitates that you apply the color to the canvas from the base of a PET bottle, allowing the elevated part of the bottle’s base to create a pattern resembling a flower. You are also able to alter the final pattern by how the canvas is tilted afterward.
- Combine each color, pouring medium, and water in separate containers. Cells are not used for this method, so no silicone is required.
- Add a base color layer to prevent the flower pattern from covering the whole canvas. This will also allow the paint to flow more effectively onto the surface.
- Use a spirit level to ensure that the canvas is level, as this will prevent the pattern you apply from running.
- Using a pair of scissors or a utility knife to cut the bottom from the PET bottle.
- Stand the bottom of the PET bottle inverted upon the canvas, and then sequentially pour each color over the bottom of the bottle in conservative amounts.
- The paint will flow over the grooves of the bottle, producing a pattern on the canvas that resembles a flower.
- Once the resulting pattern is satisfactory, take care in removing the PET bottle from the canvas.
- You can now focus on covering the center of the canvas, pouring various colors in order to fill the empty circle where the PET bottle stood.
- Add accents using a fine-haired brush, moving inwards from the edges of the canvas or outwards from the center.
- Tilt the canvas to alter and warp the image to your satisfaction.
- Multiple bottom bottle pours can also be added onto the same canvas.
Tree Ring Pour / Swirl Pour
This method of fluid painting, known as swirl pouring, produces a pattern resembling the growth rings found on a tree stump. This occurs when the paint application is performed with care in a circular motion.
- Combine each color separately with a pouring medium and water in a 1:1:<1 ratio.
- Sequentially pour each color into the same container.
- To produce the appearance of a tree’s growth rings, pour the paint from the container very gradually and evenly upon the canvas in a wide, concentric and circulated motion.
- The canvas must then be tilted repeatedly so as to allow the “growth rings” to spread evenly over its surface.
Wing Pour
This method, known as the wing pour, is a variation of the swirl pour where instead of tree rings, it produces a pair of wings. This recently discovered technique is recommended for an intermediate level user with some previous experience with acrylic pours.
- Combine each individual color with a pouring medium and water in an approximate mixing ratio of 1:1:<1.
- The first color added to the pouring container will fall in the most central region.
- The next color added to the mix will appear outside the first color, within the wings. To create a distinctive visual effect, re-add your first color choice into the second.
- Now pour a contrasting color into the mixture, keeping only to the very edges of the container, as this forms an essential part of the process.
- Add an additional color to the mix, which will appear to outline the shape of the wings.
- If you chose to apply another color, re-add a dash of the first color to the mix.
- Lift the closest edge of the canvas and begin pouring the paint mixture into the central area in a gradual, even stream upon the surface. The angle created by lifting the canvas causes the paint to move away, creating the shape of the wings. This process will require refining to become more intuitive.
- To separate the pair of wings visually, move the container towards you while pouring to the edge of the canvas.
You should now have completed your wing pour design. This is one of the slightly more advanced acrylic pours, so it may require careful repetition to master the process.
Swipe Technique
This fluid painting method, known as the swipe or wiping technique, can be applied solely or in combination with other paint pouring techniques. Using this method produces fluid color patterns and makes the cells more vivid in appearance. To achieve this, the paint is wiped using a spatula or damp cloth.
- To wipe the colors effectively requires the correct tools. You can use a spatula, painting knives, or even a moist paper towel.
- Remember to use silicone drops with the colors, and apply the paint to the canvas in combination with the puddle pour or flip cup technique.
- Next, apply the silicone-free paint mix to the canvas.
- Using an applicable instrument, create cells by dragging the individual colors over the others.
Air Swipe / Dutch Pour
The air swipe method of pouring differs to the swipe method in that the only tool used in the application is a hairdryer. This creates enthralling, ghostly color patterns that resemble smoke.
- Colors are poured sequentially into a separate container. Next, the canvas is placed centrally, face down over the container, and flipped while holding the cup to the paint surface.
- To allow the colors to settle, leave the container to stand.
- Next, the negative color can be applied around the flip cup and the edges of the canvas. Make use of a painting knife if necessary in order to ensure that this is smooth and evenly spread.
- Carefully lift and lower the flip cup repeatedly so as to allow the pattern to be evenly spread across the canvas.
- Move the position of the spread of color by tilting the canvas if you wish.
- Use a cold air hairdryer with a concentrator nozzle and spread the paint outward from the central pattern to mix it with the negative color.
Dutch Pour with Lacings / Shelee Art Bloom Technique
This particular form of Dutch acrylic pours is known as the SheleeArt bloom technique. This method is extremely complex and revered as elite among paint pouring techniques. Correct execution requires a practiced hand and, most importantly, the right application procedure.
This pouring method also makes use of air to spread the colors over the canvas, but this time using a straw. It differs to the traditional Dutch pour in the means of applying the paint to the surface and the detailed variety of cells it produces. The intricate lacings are created only with a highly complex recipe, combined with the use of various media types.
String Technique
This method is not strictly a type of acrylic pour, although the string technique is often used in fluid art painting.
- Prior to mixing the colors, place several strands of sisal string in loose coils of roughly 20 to 30 cm in length into the empty pouring container, as this will allow the string to soak in as much of the paint mixture as possible.
- Mix each color separately by adding a pouring medium and water according to the approximate ratio of 1:1:<1.
- Next, layer the colors into the pouring container as normal.
- Alternatively, the colors can also be mixed in separate containers and applied to the string using a spatula. This way, it is easier to place your colors upon the canvas but more difficult to achieve steep color gradients.
- A good quantity of highly contrasting color paint is now spread across the surface.
- Each paint-soaked strand is then dangled onto the canvas, causing it to twist from side to side.
- Once finished, you can remove each strand from the canvas surface. How these are removed can produce unique patterns in the process, which can be further manipulated as desired.
Chain Pull
Identical in procedure to the string pull, but simply using a chain instead. Your resulting design will vary, as it is affected by the style or gage of the chain used. Chains found in costume jewelry, Mardis Gras beads, or pull-and-plug chains are ideal for this purpose.
Balloon Smash
The balloon smash method is, as its name suggests, a relatively straightforward procedure. Apply an initial thin layer to the canvas, followed by some poured puddles, and then smash a partially inflated balloon into them. This technique produces patterns with an almost floral character. You can use this method in combination with other acrylic pour techniques like flip cup and puddle pour in order to produce various textures and points of focus in your fluid art painting.
Balloon Dip Pour
The balloon dip pour technique requires the use of a sizable container with low sides, such as a baking dish, cake or pie pan, a plate, or a paper plate.
- Thinly apply a layer of paint over the canvas, covering it with one color. Using black or white is perfect for beginners making their first attempt at this method.
- Choose between pouring your colors straight into the previously mentioned container, or by using the dirty pour method.
- Now, dip an inflated balloon in the paint mixture and blot the canvas in different areas.
- Keep repeating the process until you have successfully covered the canvas and the painting is completed.
Strainer or Colander Pour
Of the more advanced acrylic pours, the strainer or colander pour is the most widely used by artists. The method consists of using a dirty pour, except instead of applying the paint mixture straight upon the canvas, the paint instead filters through a colander or strainer placed on the canvas. As it flows from the strainer, the paint produces a kaleidoscopic color effect.
This method is more effective using a colander or strainer with larger holes, or even the catchment ring from a citrus juicer. As the paint is rather thick, smaller holes block the flow and cause the colors to blend, losing the effect you are aiming for.
- Assemble your colors separately and pour them into the same container as you normally would when using the dirty pour or flip cup method.
- Allow yourself sufficient room to work by situating the canvas centrally in the workspace and then standing the colander in the middle point of the canvas. It is possible to move it elsewhere, but remember that this area will become the central focus point of the final design. Changing the colander’s position will alter your final composition.
- Go ahead and pour the mixed colors in the middle of the colander.
- When you have finished pouring the paint, gently raise the colander so that the colors drip onto the canvas.
- Once the stream of paint stops, remove the colander from the surface. Do so carefully to prevent paint drips from landing on your work.
- The resulting image should be a kaleidoscope of color within a puddle.
- Tilt the canvas to ensure the paint covers it entirety. If you chose a round canvas, it is most effective to angle it towards and away from you before slowly spinning it to ensure complete coverage. When the entire canvas is covered, you can begin to let the paint run off the edges of the canvas. This may prove to be a time-consuming procedure, but avoid trying to hurry as this could alter your design.
- Keep an eye on the position and shape of your design as you tilt the canvas. It may have changed in the process, so be sure to do the necessary tilting to readjust centrally again.
- The painted canvas will have a bubble of color in the middle with a sequence of swirls, dots, and kaleidoscopic areas created by the colors. When you are completely happy with your design, allow it time to dry.
Dip
The dip method generates adhesion between the acrylics and the painting surface. It is a rather straightforward method and is best recommended for a novice, as although simple, it creates attractive and intriguing results.
- This pouring method requires a strong, flush surface upon which to pour the paint. A work table covered with sheets of plastic is ideal for this purpose.
- Using any of the basic acrylic pour techniques already mentioned, begin pouring your paint upon the plastic-covered surface. Ensure its surface area is greater than the surface area of the canvas you are using.
- Flip your canvas and dip it in the paint. Place it firmly for a few seconds to ensure the paint adheres effectively to the surface of the canvas.
- Continue the dipping procedure to cover the canvas sufficiently. The repeated contact with the canvas will cause the colors to mix, so avoid this or else the image will become amorphous.
Reverse Dip
As the name would suggest, the reverse dip method is a direct reversal of the dip technique. As opposed to dipping the canvas, the paint is fed onto the canvas. After this, a contact layer is placed over the canvas to mimic the suction created when using the dip method.
Injection Pour
The injection pour is sometimes referred to as a web pour or infusion pour. This method involves applying your paint to the canvas using one of the previously mentioned techniques, then using a squeeze bottle to layer a basic color, often white, beneath the paint later on the canvas. You can then tilt and stretch the image as you wish.
Blob Painting
This is a unique fluid painting method, as you actually want to prevent the paint from moving during or after application. Using blobs of your various colors allows you to gradually create layers of paint and produce a design of real depth.
Fractal Dendrites
Fractal dendrites are designs that resemble flowers, which is what this specialized method produces. A color mixture is combined in small drops with alcohol and applied to a film. It is then distributed outwards from the central area to create the desired visual effect. This method is simple to execute.
Wreck-a-Ring Pour
The wreck-a-ring pouring method is thus named for being a deviation from the tree ring pour, which gives this technique far more depth. Once you have completed the procedure of the tree ring method but before tilting the canvas, use an implement (your fingertip, or a dowel stick, whatever you have access to) and create fine, evenly spread lines throughout the paint. Now, once you have tilted the canvas, these lines will produce textured patterns in the image.
Ghost Pour
The ghost pour method is a slight variation on the swipe pour in which the different colors are applied linearly along the center of the canvas over a thinly spread base coat. The image is then swiped outwardly from the center, parallel to the rows of colors towards the edges of the canvas. Generally, you will find more than one swipe traveling across the center, creating a mirrored effect along the original row of colors.
- Start by spreading a fluidly mixed color as a base coat over the surface of the canvas.
- Then begin applying different complementary colors horizontally across the canvas.
- Use a spatula or wet paper towel to wipe over the paint from the center of the canvas, pulling towards and away from yourself.
- As an alternative, before you start swiping over the colors, add some of the thin base coat color horizontally into the center of the canvas.
- The ghost acrylic pour method is especially effective when using wider canvases.
- Adding silicone oil produces excellent cells.
Wave Pour
The wave method of pouring is a deliberate pouring technique and a variation on the swipe pour. This effect is created by applying the colors in a wave-shaped pattern on the canvas. You can then choose to swipe through the colors either from the apex of the wave or the edge of the horizon. Your starting point could be either side, with the aim being to create a swipe imitating the wave’s motion. Remember to use white for the foam, as this will also add depth.
- To begin, mix each of the colors you desire to appear in your design. We have had good results using silver, white, dark blue, sea green, and light blue, but you should feel free to explore your own color combinations.
- When you have mixed the colors, start pouring rivulets of each of the colors (except white) to create the desired shape of the wave. The shape also resembles the Nike logo. Allow the colors to bleed and overlap.
- Then use white, applying the paint around the edges of the wave shape, and ensure that the white spreads over the remainder of the canvas.
- Using a painting knife or wet paper towel, spread a thin layer of paint all the way up the wave with care so as to prevent the colors from mixing. This process can be repeated if needed in order to ensure the swipe covers the length of the wave.
- Swipe the curve of the wave into the white slightly. Doing the opposite and wiping the white toward the wave creates the appearance of foam or whitewash in the wave.
- Avoid mixing and smudging the colors excessively, as this will remove the vivid detail from the image.
Starburst Swipe
The starburst swipe method is a variation of the swipe pour, in which the layering of color is applied from the center outward, concentrically. The effect is created as you swipe small regions from the center toward the edges of the canvas.
We trust this guide will allow you to achieve impressive acrylic pouring results. Each of these paint pouring techniques can be used very effectively in combination with one another to create a myriad of exciting results. Be sure to take risks and experiment, as each of your works will have its own character.

Larissa Meyer is a 32-year-old mother from Michigan and creative spirit since childhood. Her passion for painting and drawing has led her to an education as an illustrator and a career as a freelance graphic designer. She has a Bachelor of Fine Arts in Illustration and a degree in Graphic Design. Larissa is a talented artist who is able to master a wide range of styles and techniques to bring her artistic vision to life. Her greatest passion is currently fluid painting and epoxy resin art. Larissa’s love for art and her knowledge and experience in illustration make her the perfect Creative Director for our fluid-painting.com team. She is the creative head of our team and shares her passion and knowledge with our community through articles and tutorials.
As a mother of a 2-year-old daughter, Larissa also understands the importance of fostering creativity in early childhood. She uses her experience and knowledge to help other parents inspire their children and develop their artistic skills as well.
Learn more about Larissa Meyer and about us.