Airbrush Art – Complete overview and How to Airbrush
This post may contain affiliate links. We may earn a small commission from purchases made through them, at no additional cost to you.
Artists often look for different ways to express their creativity in as many different ways as possible. At some point, many of them almost inevitably come across airbrushing as a special technique for applying paint. Would you like to know what special features the airbrush technique has to offer and what has to be considered in airbrush art? With our large guidebook including instructions, you will quickly discover that even with the airbrush for beginners, great works of art can be created.
Table of Contents
- 1 The history of Airbrush Art
- 2 What is Airbrushing?
- 3 What makes airbrush art so attractive?
- 4 What basic equipment is needed for the airbrush technique?
- 5 When is it worth buying an airbrush set?
- 6 Other important materials for airbrushing
- 7 The successful start with the airbrush art
- 8 The most important spraying techniques with the Air Brush
- 9 Instructions for your first airbrush art picture
- 10 Your health always has absolute priority
- 11 Our most important tips and tricks for the start
- 12 Airbrush for beginners: The most common mistakes
- 12.1 The used paint runs on the painting surface and unattractive color noses are formed
- 12.2 This leads to uncontrolled paint splashes
- 12.3 The hiding power of the ink used is too low
- 12.4 The ink application appears visually rather coarse-grained
- 12.5 Occurrence of dark spots and color clouds
- 12.6 The sprayed lines are irregular or have interruptions
- 12.7 The paint does not stick to the painting surface or tends to run
- 13 The airbrush technique as a hobby: Our conclusion
The history of Airbrush Art
If you take the term airbrush rather broadly, then the history of airbrush art begins very early. Archaeological research indicates that the beginning of the airbrush technique can actually be found in the Stone Age. Traces found in caves suggest that cave dwellers already sprayed coloured liquids like juices with their mouths on the walls in the Stone Age.
The first really technically mature airbrush gun was then developed towards the end of the 19th century by Francis Edgar Stanley. For the first time ever, it was possible to apply paint over large areas using airbrush technology in model making and the automotive industry.
From the 1960s onwards, airbrush art established itself in a wider range of applications and art forms.
What is Airbrushing?
The term airbrush, which originally comes from the English-speaking world, could be translated literally as airbrush. It refers to the airbrush gun as the main tool and eponym of the entire art movement, which can be explained as follows:
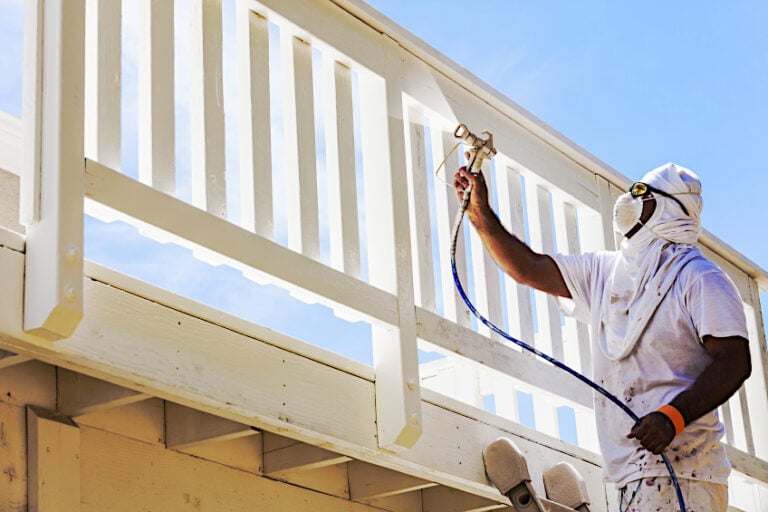
Usually a compressor produces the necessary air pressure, with which the liquid paint is carried along in the spray gun as it flows by. The air stream of the compressed air swirls and atomizes the paint particularly finely and can thus be applied very thinly and evenly by means of a nozzle to a suitable painting surface. The special feature of the airbrush technique is that the airbrush gun, unlike painting brushes or sponges, does not touch the painting surface at any time. Rather, the fine spray mist from the airbrush pistol serves as a particularly creative source of colour when painting. Because the paint application is so fine and even when airbrushing, neither streaks nor brush strokes are visible on the finished painted surface.
What makes airbrush art so attractive?
- Airbrush Art has very specific features that you will not find in other painting techniques. After all, Air Brush Art allows you to create particularly fine shades of color and also really smooth transitions between different color shades. With it you can create paintings that look extremely realistic and natural in their color perception.
- The thin and extremely even application of paint allows you to work quickly on large areas with relatively low paint consumption.
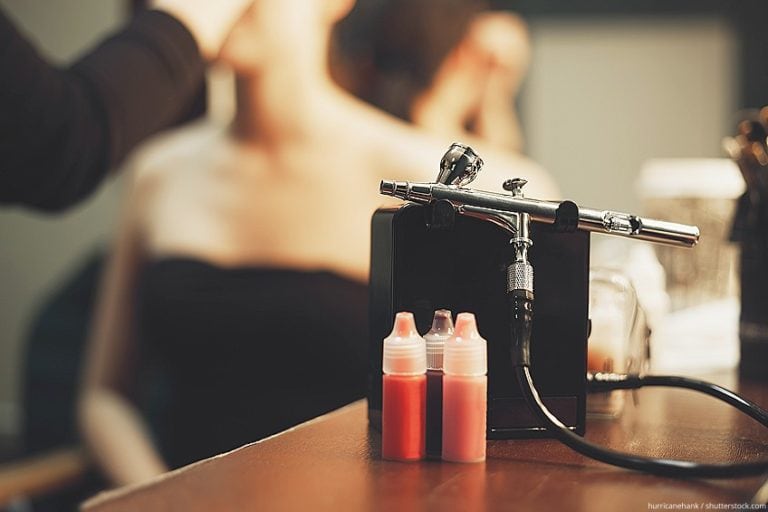
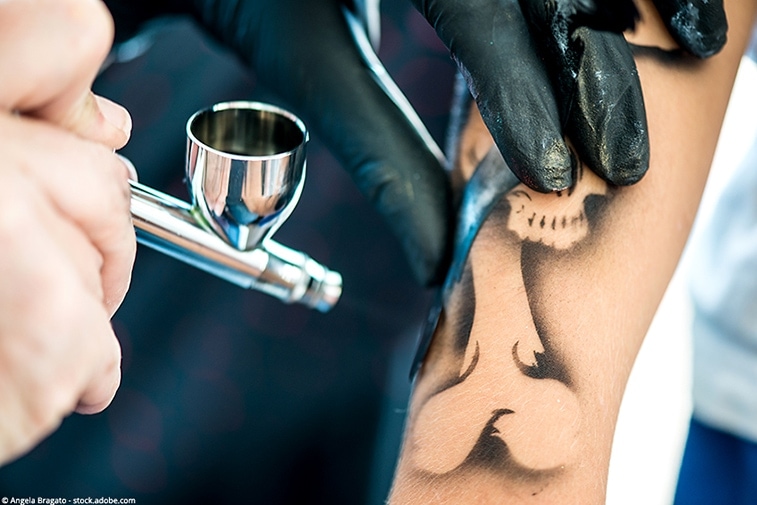
- Basically you can let off steam artistically with airbrushing on almost any kind of surface: Whether plastic, metal, paper, textiles or even human skin – with airbrush art the possibilities are almost unlimited.
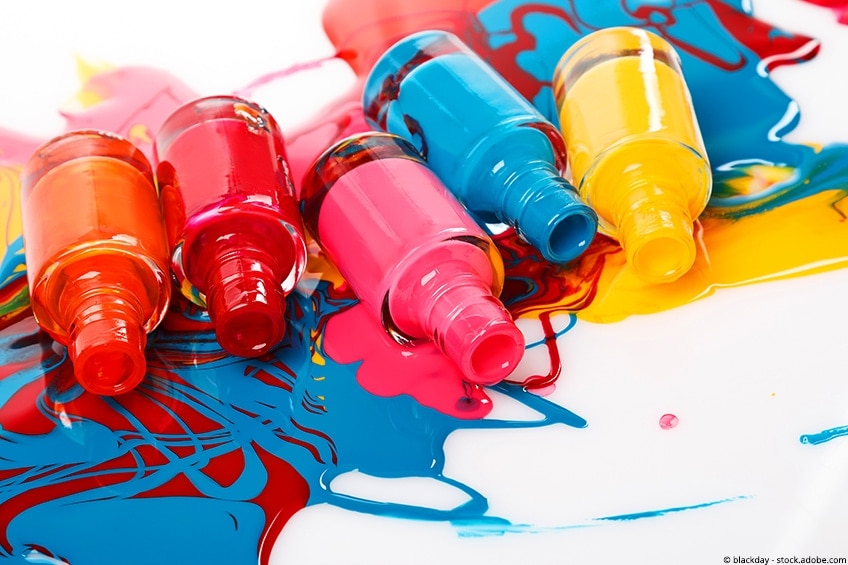
- When airbrushing, you can use lacquers as well as water- and solvent-based paints. Of course there is a wide range of paints available from the relevant manufacturers, which are specially developed and produced for airbrushing. In addition, there are also airbrush colors suitable for special purposes, for example in the form of edible food colors, special textile colors and airbrush make-up.
Possible applications for the airbrush technique
- Painting
- Model making projects
- Textile production
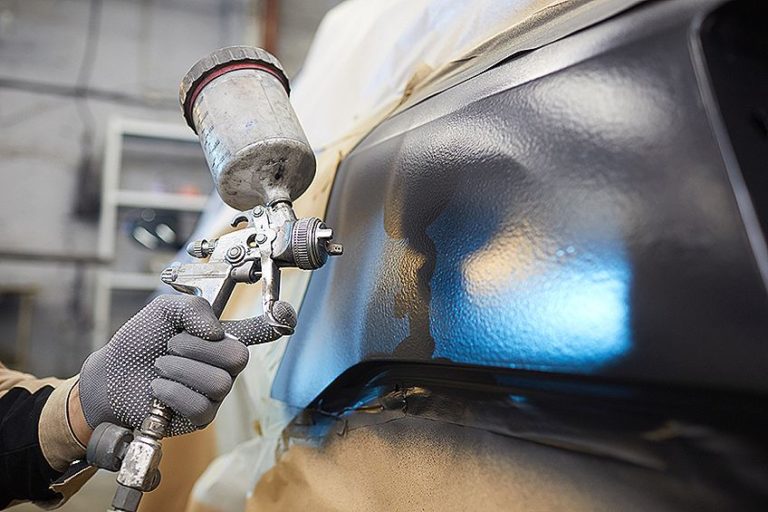
- Automotive Industry
- Make-up
- Masks for film and theatre
- Spray tanning
- Tattoos and body painting
- decoration of desserts, pastries and cakes with food colouring
What basic equipment is needed for the airbrush technique?
With these tools and materials you can start airbrushing:
- Airbrush compressor
- airbrush gun
- suitable airbrush colors
- 2K acrylic clear lacquer
- Cleaning utensils
Of course, this list is only a basic equipment with which you can take your first steps with the airbrush for beginners. If you are interested in this exciting creative hobby for the long term after your first attempts, you will usually find more accessories in your equipment pool. You will soon notice that there are not only many different colors for airbrush art, but also different nozzle sizes and airbrush guns that can be handled differently.
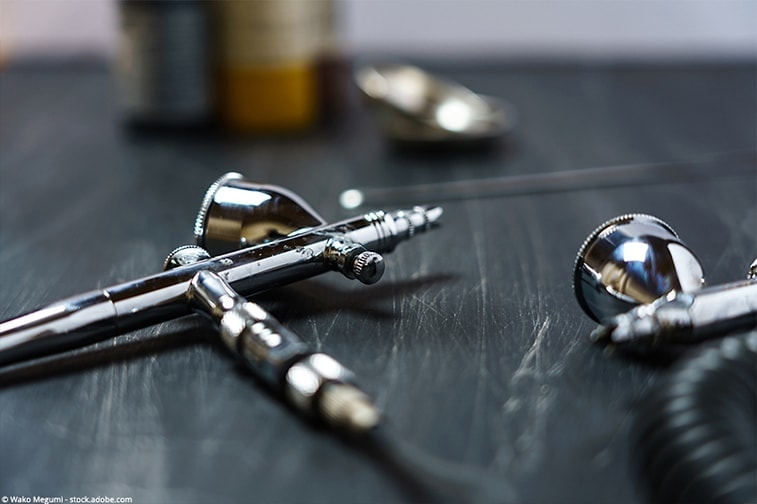
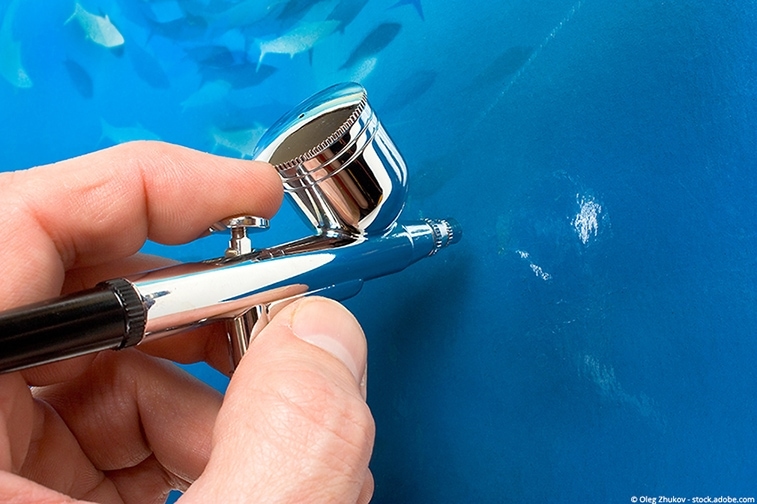
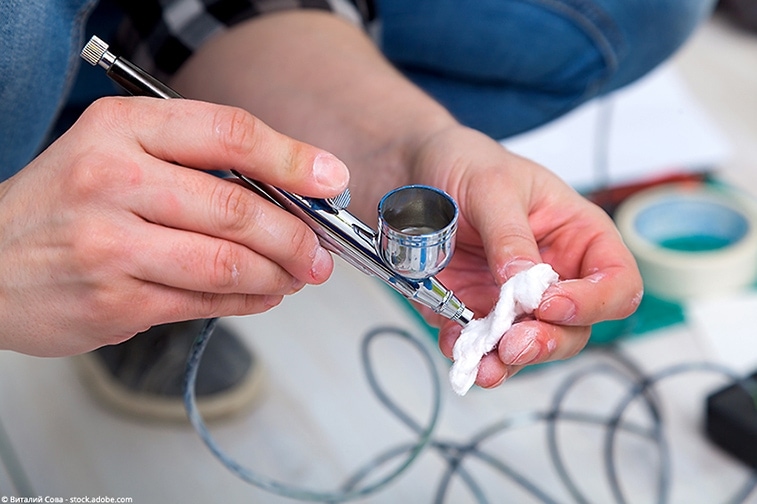
The heart of the airbrush: The airbrush gun
First of all, we would like to explain some basic airbrushing terms to you, so that when you buy your first airbrush gun, you will not be confronted with terms that you cannot do anything with. Basically, there are two different types of airbrush guns. Of course, the basic principle of how they work is the same. With both types, the paint used is atomized by the air stream of the compressed air used. The two types of airbrush guns differ more in terms of their handling:
- The Single-Action type usually has a wheel that can be used to adjust and fix the amount of ink. With a knob or lever you can then still regulate the air volume during the spraying process. This type of construction is suitable for simple painting and art projects.
- However, most experienced airbrush artists use an airbrush gun of the Double-Action type. Although this too is only equipped with a lever, it also serves to regulate the air flow and the amount of paint used. This double lever function requires some practice, but you can also use it to tackle more complex artistic challenges.
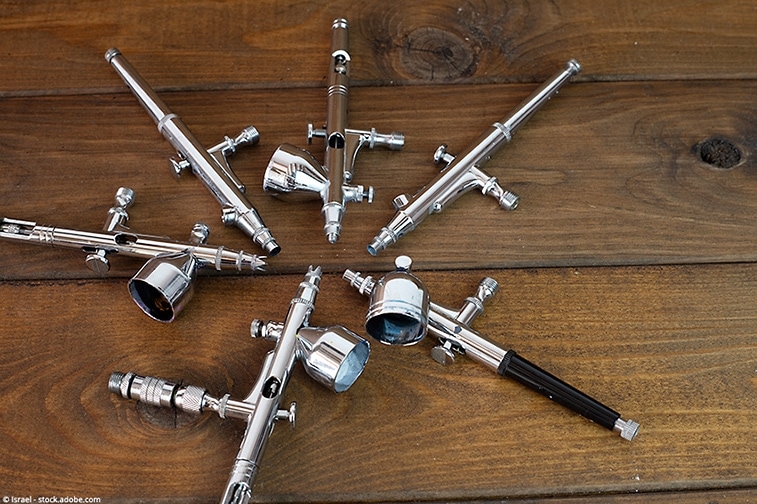
In addition, the airbrush guns available in specialist shops also differ in their equipment with the flow cup system or the suction cup system:
- You can recognize the so-called flow cup system at first sight by the fact that the paint cup is placed on the airbrush gun from above. With this system, gravity ensures that the paint practically flows into the nozzle all by itself. Therefore, only a small amount of pressure is required for atomization.
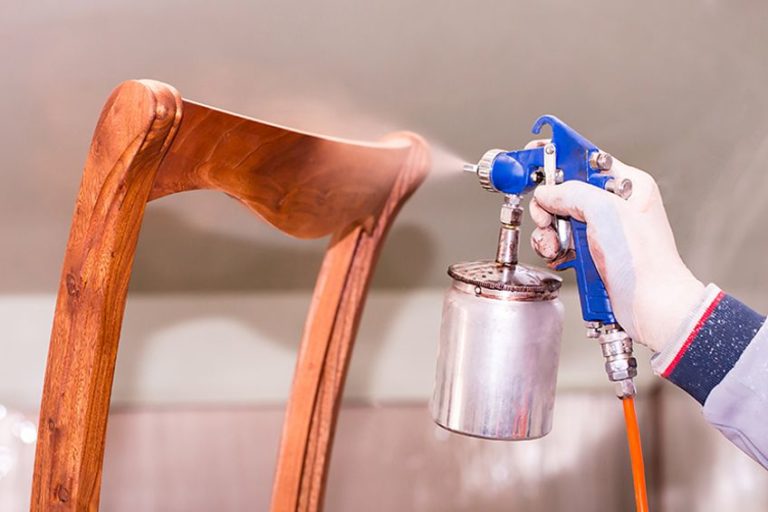
- With the suction cup system, a higher air pressure is necessary. This is because the paint cup is mounted underneath the actual gun and the air flows past above the paint cup. The air pressure must therefore be strong enough to suck the paint out of the container through the sufficiently strong suction. However, larger paint cups can be attached to these airbrush guns and correspondingly larger areas can be treated in one pass.
If you use a double action airbrush gun with flow cup system, you probably have the most versatile system at hand for various applications.
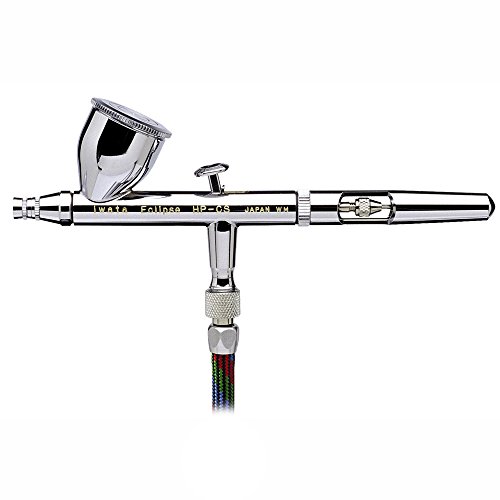
- Great for extremely detailed work
- Easy clean up and efficient paint flow
- Solvent-resistant and suitable for highly pigmented airbrush paints
Attention: Already when buying your airbrush gun you should make sure that for the model you have chosen you can get suitable spare parts and accessories like different nozzles.
Airbrush compressor
For use in combination with an airbrush gun, basically any air compressor that can be set to a pressure range between 1.5 and 2.5 bar is suitable. So for your first attempts with airbrush art you can simply use an existing or relatively cheap compressor from a DIY store.
However, if you are interested in the Hobby Air Brush, it will be worth investing in a special airbrush compressor at some point. Compared to the models from the DIY store, such a compressor offers advantages in terms of dimensions and noise level. Furthermore, a special airbrush compressor usually has additional features that most DIY store compressors do not have. An air tank, pressure regulator and water separator can not only be helpful during airbrushing, but also enable trouble-free operation.

- 8 hp1-35 PSI maximum operating pressure
- Mounted fully adjustable air-pressure gauge, mMoisture filter prevents pulsation
- Bleed valve airflow adjustment to lower air pressure
- Compressor shuts itself off automatically when not in use
Water separator
When air is compressed, a large part of the humidity previously contained in the air is removed. In a normal compressor this water separation does not bother much, as the water can simply be continuously expelled with the air. With an airbrush gun, on the other hand, this is a problem, as these water separations can cause unaesthetic and above all uncontrollable stains in the paint application of a work of art. Now the water separator integrated in a special airbrush compressor gets to the root of this problem by collecting the water produced during compression. The compressed air flowing out through the airbrush gun is thus largely free of water.
Pressure gauge and pressure regulator
For truly professional work, it is essential that the air pressure of the compressor for airbrushing can be set to a relatively narrow range between 1.5 and 3 bar. This is no problem with airbrush compressors, as they usually have a pressure gauge and a pressure regulator. The manometer is a measuring instrument on which you can always read off exactly the current pressure of the air. Only with this exact adjustability of the used air pressure it is possible to achieve a really successful spray pattern of airbrush paints.
Air tank on compressor
It makes a huge difference whether a compressor has an air tank or not. In a compressor with an air tank, the air is compressed for a certain time immediately after switching on until a certain pressure is reached in the air tank. As a result, there is not only a constant working pressure of the compressed air extracted, but also the sometimes quite annoying noise of a compressor in continuous operation is eliminated. This also benefits a relaxed and concentrated working method. As soon as the pressure in the air tank has fallen below a certain level, the compressor motor starts up again. Ultimately, this technical design has the advantage that there is less noise pollution overall and a very constant air pressure can be used for work over longer intervals.
These are our recommendations for the purchase of a compressor:
- a water separator is very helpful
- the compressor should not be louder than 45 dB during operation
- the system should supply a pressure as constant as possible
- Compressors without oil in the system should be preferred, as the thin openings of nozzles and needles on the airbrush gun cannot be blocked with oil
- the regular maintenance of oil, air filter and lint filter should only be necessary at longer intervals and should be as simple as possible
- for use in your own home, a compressor with low vibration generation should be selected in order to avoid possible annoyance of the flatmates
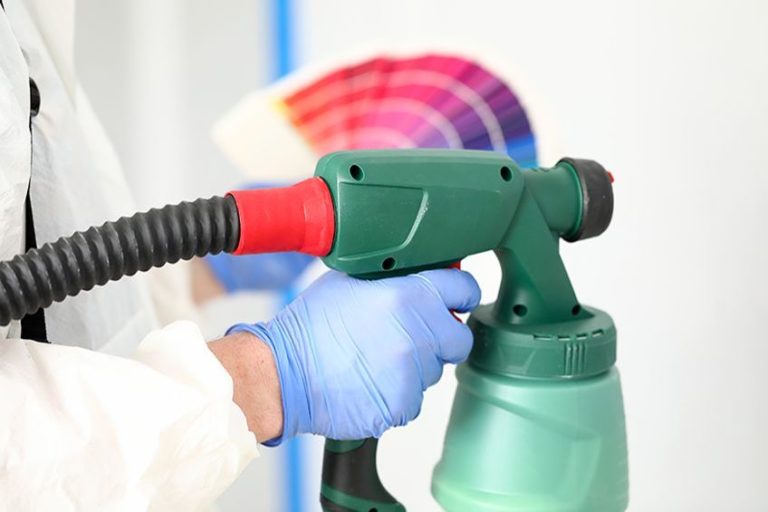
Choosing the right airbrush color
What is airbrush paint and what is it made of? This question is not so easy to answer, because there are many different kinds of colors for the airbrush art. It is possible to use a wide range of colors for the airbrush technique: From special make-up paints, textile paints and varnishes to acrylic paints, many colours can basically be used as airbrush colours. Water-based acrylic paints are very often used for the airbrush for beginners, as they are very easy to use. You can get acrylic paints in specialist shops either ready-mixed or in a concentration that has yet to be diluted.

- Outstanding airbrush flow characteristics
- High-quality, non-toxic, and lightfast pigments
- Set of 24 different opaque colors
If it concerns colours which should be thinned, then you can usually find the suitable thinner in the offer of the manufacturers. Water-based acrylic paint can also be easily diluted with ordinary distilled water. However, we warn against using normal tap water instead of distilled water because of the bacteria it might contain. Bacteria in the water can make your paint unusable for future projects, especially if it is stored for a long time. However, if you have a condensation dryer in your home, you do not need to buy the distilled water you need. Just use the distilled water that is produced in such a condenser dryer in any case in considerable quantities.
By the way, the perfect consistency of the colour for airbrushing is achieved when it is comparable to that of milk. To test this, you can use a brush or finger to pull the paint up along a clear glass edge. The paint should then run downwards, leaving a light veil of colour on the glass.
However, not every color can be sprayed with every nozzle size without further ado: So make sure when you buy a spray gun that the color you choose can really be used with the nozzle size you use.
Ultimately, however, it depends mainly on the intended result how both the nozzle size and the paint viscosity should be determined in the individual case. With the smaller nozzle sizes you can draw very fine dots and strokes, but for this you also need very fine color pigments. If, on the other hand, you want to prime larger areas, you can use coarser pigments and, of course, larger nozzles.
Protective coating with 2K acrylic clear coat
- Although acrylic paint dries waterproof when airbrushed, the surfaces coated with it are not necessarily scratch-resistant. So to protect the works of art you create from scratching, you should cover them with a protective layer of paint if possible.
- The 2K acrylic clear lacquer is a very resistant 2-component lacquer with which the artistically designed surfaces can be sealed particularly durably.
- The commercially available 2K acrylic clear lacquer can be applied with almost all airbrush guns without any problems.
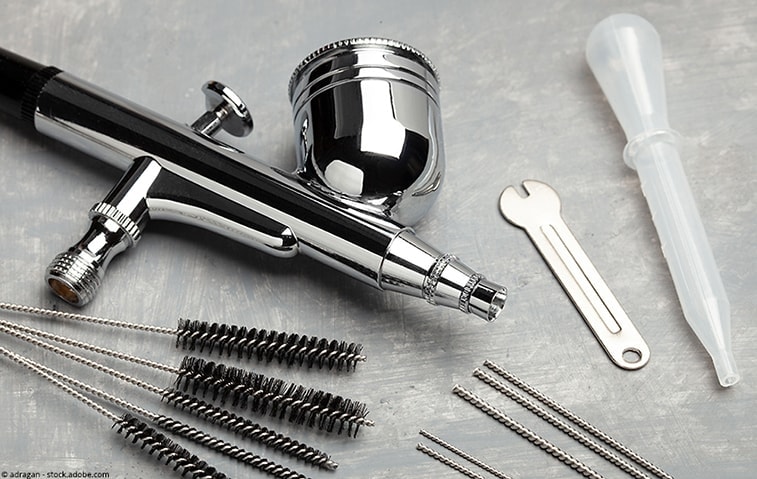
Cleaning kit
Your basic equipment for airbrush art should definitely include a cleaning set. Such a set usually consists of an airbrush cleaner, different brushes and a cleaning pot. In addition, you should always have enough cotton swabs and some kitchen roll for cleaning the airbrush equipment. Why should one always buy a cleaning set for airbrushes? Because the airbrush gun has to be cleaned briefly at the first color change. This is the only way to avoid that different colors mix unintentionally.

- Easy-to-use, insert one of the included filter pads in the filter tube
- Heavy glass jar; prevents the weight of an airbrush and hose from tipping over the pot
- Add solvent to your airbrush's color cup and spray through the rubber port in the cover, flushing the pigment from the brush and into the pot
- This clean pot also can be used as an airbrush holder
Even if you have finished working for a day, you must always clean your airbrush gun extremely thoroughly so that blockages don’t stand a chance. We recommend the following procedure: First of all, spray clear water through the airbrush gun before you remove the coarser paint residues with cotton swabs. Then, instead of paint, the Airbrush Cleaner is added to the paint tank and the tank sprays the water through the nozzle of the gun as before. After this blowing through, you should disassemble the gun into its individual parts and only reassemble it when all paint residues have been removed from the parts.
When is it worth buying an airbrush set?
If someone is not yet familiar with the technical details of airbrush art, the question of how to combine different tools can be a challenge. Of course, it also takes some time to put together the right components for an airbrush system yourself. Perfectly assembled airbrush sets are available in all price ranges. The basic equipment of such a set usually includes a compressor, a matching airbrush gun and a certain amount of basic airbrush paint. In addition, the obligatory cleaning set is often included in the scope of delivery. Sometimes you can even save time with the purchase of such a set, but also some money compared to the individual purchase.

- High quality airbrush system ready to go for Airbrushing
- The Master Airbrush Model TC-320 compressor is a powerful single piston compressor with two cooling fans that allow it to run much cooler for longer continuous operation time without overheating
- Also included: Airbrush paint / Airbrush Stand and Quick Start Guide
However, when you buy a set, you should take a close look to make sure that it contains all the materials you need. This includes, for example, the hose that connects the compressor and airbrush gun. If the selected set does not contain any premixed paint, you will also need a suitable thinner to make the paint sprayable in the first place.
A really central part of a complete package should be the cleaning set. Ideally, it should also include other accessories, practical aids and small glass containers. In these glass containers (with closure possibility) already mixed and sprayable diluted paint is stored before use. So they can still be used for certain periods of time. Of course, empty paint cups can also be cleaned and reused for this purpose. However, it can contribute to the joy of work if you have a perfect overview of the stock at any time with professional containers for the colours and also a tidy appearance at the workplace.
Other important materials for airbrushing
Masking film
From so-called masking foil you can make your own stencils with a little skill. With this you can also create motifs with sharp edges when airbrushing. You can also use the masking film to cover areas that should not be affected by the paint when spraying.
Cutter knife
With a cutter knife you can cut the masking film to the desired shape. Alternatively, you can also use a so-called cutting plotter.
Airbrush Paper
Particularly thick cardboard material is used for the production of airbrush paper. This material offers the advantage that the masking film can be removed from it more easily than from normal drawing paper. The latter can be damaged all too easily when the foil is removed. Airbrush paper has the disadvantage that it is comparatively expensive. For first attempts you should therefore use ordinary drawing paper first. But as soon as you have gained some experience, it is worth using airbrush paper. Usually you will only be able to create really high-quality works of art with airbrush paper.
Pencils
With pencils you can first make sketches on your painting surface, in order to be able to better realize your work of art when applying the paint with the airbrush technique.
Pencils and brushes
Sometimes small details cannot be realized in a satisfying way even with airbrush templates. In such a case you can help with pencils or brushes in the respective places.
Eraser
With a plasticine eraser you can correct imperfect details or create certain light reflections in your subject.
Extraction unit
In the case of an exhaust system, the housing is usually only open to the front. In the middle there is usually a turntable on which the objects to be processed can be easily turned. Behind it, there is an extraction unit with a special air filter, which ensures a constant air extraction. So you can work undisturbed with airbrush technique, while the fine spray mist is sucked away from your face to the back. With such a system you not only protect your face and thus your health, but also prevent the accidental deposition of paint spray mist on your objects. Since such systems can be a great help especially for very detailed designs, they are very often used by model makers.
Respirator mask
Basically, a mask should always be worn with the air brush, if possible, which effectively prevents inhalation of the paint. However, under certain circumstances this can be dispensed with if work is carried out in well-ventilated rooms and only water-based paints are used. If, on the other hand, you spray with solvent-based paints, you should always wear a suitable breathing mask!
Airbrush holder
An airbrush holder is required for the safe storage of an airbrush gun during short breaks in work. This special shelf prevents the airbrush gun from falling off the work table and thus possible damage to the equipment.
The successful start with the airbrush art
Putting the airbrush equipment into operation for the first time
For the start into the exciting adventure of airbrush art it doesn’t matter whether you have put together the necessary technique yourself or bought a complete set. As soon as you have the necessary basic equipment at your disposal, you can actually start airbrushing pretty quickly. To do this, simply follow the steps below:
- First of all, lay out an old newspaper or other surface at your workplace to protect the respective surface from dirt caused by paint splashes.
- Place a few sheets of ordinary copy paper near your workplace.
- Prepare a paint for airbrushing. If it is not ready mixed, dilute it either with a suitable thinner or with distilled water. Sometimes a mixture with a certain amount of thinner and a certain amount of distilled water may be the right way to achieve a milky consistency of the ink. The finished mixed ink should run down from the edge of the glass, but leave a thin film of ink behind.
- Now the airbrush gun must be connected to the compressor with the hose provided for this purpose. Only then the compressor is connected to the power supply. Afterwards you should first make sure that the pressure setting on the compressor is correct. How high this pressure should be depends on various factors such as the airbrush gun you are using, the paint you are using, the viscosity of the paint, the size of the nozzle used and the desired fineness of the paint mist when spraying. Roughly speaking, the necessary air pressure for working with most airbrush guns is somewhere in the range between 1.5 and 3 bar. In the beginning, it will probably take you some time to get to the optimal pressure setting through continuous trial and error.
- The prepared paint can now be filled into the paint cup of the airbrush gun. However, we recommend that you only fill this paint cup to about halfway. In this way you prevent the paint from leaking.
- Now it gets really exciting, because you can finally start with the actual airbrushing!
- Make sure to always start your airbrush gun in the following order:
- First the air is turned on, then the paint is added.
- When using a so-called double-action pistol, this means: First you press the lever to turn on the air. Only then do you pull the lever to activate the paint. While in the zero position a needle inside the system effectively blocks the nozzle, this needle is retracted a little bit by pulling the lever. As soon as the nozzle is released by pulling back, the atomized paint can emerge as an impressive cloud of paint.
- In order to stop the respective spraying process, the whole thing must then be done in exactly the opposite order:
- First you put the paint out, then the air. So to turn off the paint, you first have to move the lever to the zero position. Then you release it to also turn off the air flow.
- You can only avoid annoying splashes of paint if you follow the sequence described above exactly. If this is not the case, the uneven air pressure can quickly lead to splashes.
For a start, you should first experiment with airbrushing different shapes such as lines, dots and circles. During these exercises you can get a feeling for how the following parameters influence the spray pattern:
- the distance between airbrush gun and painting surface
- slower or faster hand movements with the airbrush gun
- Variations in air pressure and ink volume
If the shapes you spray during airbrushing do not have clearly defined edges, this is quite normal with this type of paint application. In order to create clearer outlines, you can use special airbrush templates or buy masking film from an airbrush retailer.
The most important spraying techniques with the Air Brush
The spraying of even lines
You will only be able to achieve really fine lines if you have a hand that is as steady as possible and if you create even movements over the painting surface with the airbrush gun. However, you must also make sure that you use exactly the right amount of paint. If you apply too much paint while airbrushing, it will run on the surface. Therefore, when using a double action pistol, you should not pull the lever too hard. Even with a single action airbrush gun, it takes a little practice and experience to be quickly successful in adjusting the amount of paint.
Some airbrush gun models offer the possibility to remove the needle protection cap. This allows particularly thin lines to be sprayed. However, we would like to warn you to be careful: After all, the sensitive needle is unprotected when the protective cap is removed and can be all too easily damaged by mechanical force, for example when the airbrush gun is dropped. Since replacement can be quite costly, you should be particularly careful and cautious when airbrushing with an exposed needle.
The spraying of even surfaces
One might think that the monochrome airbrushing of a surface is not a particular challenge. However, if the airbrush gun is guided incorrectly, it can very quickly lead to stains on the painting surface that are difficult or impossible to remove. We therefore recommend that you fill in areas in such a way that you fill them out from top left to bottom right in a serpentine pattern. Do this until the whole area is filled with colour in the desired intensity.
Create optical effects like light and shadow
Shadows are created in images by black and other dark colors. However, if you only want to create a slight shade, you can dilute water-based colors with a little water. This way you can create shadow effects that are not too dark and strong.
But at least as interesting as shadows are the optical effects of light reflections or at least their appearance in the respective motif. You can achieve these effects by using white paint. On the other hand, it is also possible to spray the white painting background with the different colours, but not completely covering it. So the already existing white of the background can shine through the colours in some places and be perceived by the human eye as a light effect. Similar light reflections can also be created by removing paint at certain points with a suitable eraser.
Insert airbrush stencils and masking film correctly
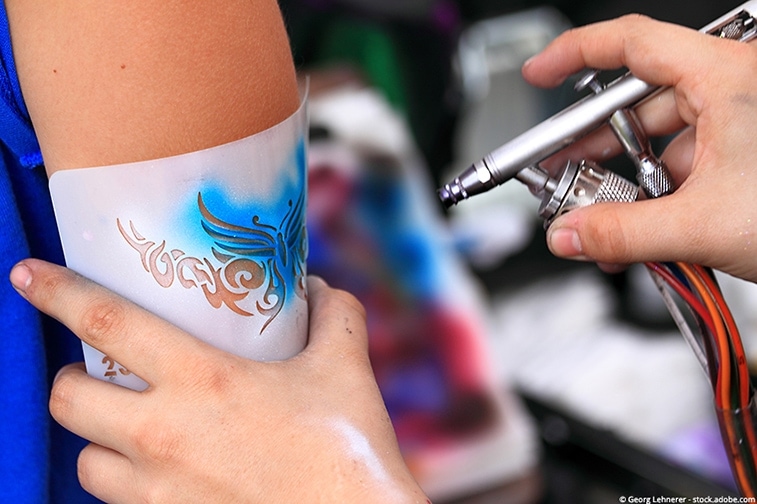
To be able to create really sharp edges in airbrush art, you have to buy tools such as airbrush templates or the masking film designed for this purpose in specialist airbrush shops. Prefabricated stencils are usually available in a relatively wide range of different motifs and sizes. The advantage of such airbrush stencils is that you can realize the desired motifs on your painting surface without long preparatory work. This ensures a quick and motivating feeling of success, especially for beginners, as many motifs can be reproduced as often as you like without a great need for creativity. In airbrush art areas such as body art with tattoos, face painting and body painting, airbrush stencils are used very often. A little more flexibility for the own creativity offers contour stencils and pattern stencils in contrast to the motive stencils.
We recommend not to be limited by the offered assortment of stencils in the trade. With a cutting mat, a pencil, a cutter-knife and some masking film you can easily make your own airbrush stencils. Simply draw the desired motif or a special shape outline with a pencil on the masking film provided. If you are inspired by motifs from the Internet, you can also simply print them out and stick them on the masking film. Then place a cutting mat underneath and carefully cut it out along the lines with the cutter knife. Your own airbrush stencil is now ready.
The use of purchased or homemade airbrush stencils is equally simple: simply place the stencil on the painting surface. The same applies to the masking foil, which is simply placed on the desired spot to cover the painting surface. In this way you can determine exactly which areas are hit by the paint during airbrushing and which are not.
Our recommendation: For really successful results, stencils and pieces of masking film should be glued on as well as possible. Only if the foil or the stencil is really close to the surface, the sprayed paint cannot get underneath when it runs. With a precise working method you can achieve clean and clear demarcations between different colours and motif areas.
Instructions for your first airbrush art picture
For your first exercises you can use ordinary printer paper as described above. But to be able to create really successful works of art with Airbrush Art, you should use the best possible paper at a certain point. The airbrush paper produced especially for this purpose does not only offer perfect characteristics in combination with most airbrush colors. It also makes it easier to remove stuck stencils and masking foils, so that damage to the paper surface is almost impossible.
- Especially for your first picture realized with airbrush art we recommend you to choose a rather simple motif. It really makes sense if you first make a sketch of it and draw the motif on the painting surface with a fine pencil that is not too strongly pressed on. With this help it will be much easier for you at the beginning to focus all your concentration on the airbrush technique.
- With self-made airbrush stencils made of masking film you can create very clearly defined lines in the areas you want to paint. In order to prevent paint from running under the stencils and thus destroying the limiting effect, you should always fix stencils as well and flush as possible on your painting surface. For this reason, masking film is usually already provided with an adhesive backing.
- The following two basic rules apply for airbrushing: On the one hand you always work from light to dark colors, on the other hand you spray first rather large areas and then small details. So you always start with the large and rather light areas of an airbrushed art picture. Only after these are sprayed, one dedicates effects and details as for example light reflections and shadows.
- When single areas of the image are finished so that they should not get any more color, they have to be covered in the best case in order to protect them from the unwanted color application. For this purpose you can either use the masking foil or just ordinary paper.
Your first attempts with the airbrush technique will probably not result in a painting that will later hang in an important art gallery. But you will notice that you can achieve acceptable results with airbrush art after only a few attempts. No master has fallen from the sky yet, but practice makes perfect!
Your health always has absolute priority
For airbrush art, you should at least always wear a professional respirator when spraying with solvent-based paints. Such a mask can prevent you from inhaling the fine spray of paint unintentionally. If you want to protect your health as effectively as possible, you can also use a suction system when airbrushing. Such a system is especially useful if you regularly work with solvent-based paints on airbrush art projects.
You should also wear the respirator when spraying if you only use water-based paints and other paints without chemical solvents. It is always an advantage if the room you use for airbrush work is well ventilated and your airways are protected from the fine paint mist in several ways.
Our most important tips and tricks for the start
- Before you fog different areas of your artwork with the different colors, you should always test them on a normal piece of paper first. This way you can check whether different parameters such as consistency, color shade and spraying behavior are in the best possible range.
- In addition, the adhesion of the paint used should first be tested on the material selected for the airbrush art. Before you spray your model with the paint, for example, you can spray other waste pieces of the same material with the paint as a test object (if available).
- When working with a Double-Action Airbrush Gun, if the flow of paint is not properly interrupted, unwanted spillage of paint may occur during pauses in spraying. It is therefore essential that you always make sure that the corresponding lever is pushed all the way forward during spraying breaks.
- If you always pull the sensitive needle forward out of the airbrush gun when cleaning the airbrush gun, you effectively prevent annoying paint smears inside the airbrush gun.
- If the needle of your airbrush gun is bent, it usually does not spray clean lines anymore.
- If nozzles are clogged or the nozzle seal is broken, air can escape through the paint cup.
Why we recommend that you wear fabric gloves when airbrushing:
- With this you can prevent unsightly fingerprints on your art object.
- You also avoid contaminating the surface to be worked on with fat secretions of the human skin. The gloves therefore contribute to an optimal adhesion of the used colors on the painting surface.
Airbrush for beginners: The most common mistakes
The used paint runs on the painting surface and unattractive color noses are formed
If paint is applied too wet during airbrushing and runs off, this can be caused by too little distance between the airbrush gun and the painting surface.
This leads to uncontrolled paint splashes
Paint splashes are very common when irregular air pressure conditions occur inside an airbrush gun. With this in mind, it is especially important that you follow the recommended sequence when airbrushing: Air on, paint on, paint off, air off.
The hiding power of the ink used is too low
If the paint does not cover well enough, this may simply be because the distance between the airbrush gun and the painting surface is too great. Another reason may be that the painting surface is highly absorbent, such as a special type of paper or textile material. It is also possible that the paint has been diluted too much during mixing. As a countermeasure, we recommend that you dilute the paint less strongly, reduce the distance when spraying a little or simply spray several times over the respective surface until the desired degree of coverage is achieved.
The ink application appears visually rather coarse-grained
If a too coarse-grained ink application is detected, the reason for this can usually be sought in two different places: Either the pressure on the compressor is set too low, or the paint has too thick a consistency. This error can usually be remedied relatively quickly by experimenting a little with the parameters air pressure and consistency of the inks used.
Occurrence of dark spots and color clouds
Dark spots in the airbrush art picture mostly occur when the airbrush gun is moved back and forth uniformly at individual spots. In order to avoid exactly this, you should always move the airbrush gun in a relatively even movement and sufficiently quickly and at the right distance over your painting surface. Make sure that when changing the spraying direction, your turning point must be outside the object you are working on. Otherwise an unwanted concentration of paint can occur exactly in the area of the turning point.
The sprayed lines are irregular or have interruptions
Irregularities of this kind usually occur when a needle is defective or a nozzle is very dirty. For troubleshooting you should therefore first try to disassemble your airbrush gun and clean it thoroughly. If there are still major irregularities when airbrushing with this airbrush gun, troubleshooting the needle and nozzle under the magnifying lenses of a microscope or magnifying glass can make sense. If it turns out that the needle or nozzle is damaged, you will have to replace the respective part.
The paint does not stick to the painting surface or tends to run
If the paint does not hold well on the respective painting surface, it is usually either too greasy or too smooth. A possible solution is therefore to thoroughly clean the painting surface first. In order to avoid further contamination by natural skin oils during this step, you should wear fabric gloves if possible. If the paint still doesn’t hold well, the painting surface may simply be too smooth. Then it can be helpful to slightly roughen the surface of the material.
The airbrush technique as a hobby: Our conclusion
In a nutshell, airbrushing is a very complex and creative art form that meets different demands. On almost every imaginable surface, airbrush art can be used to create realistic looking pictures and entire paintings. However, in order to realize really impressive projects, some practice is required when using the airbrush gun. If you stay on the ball after your first attempts with airbrush stencils and do not give up too quickly, you will soon be able to create fascinating shapes with airbrush freehand.
With this in mind, we wish you every success in your first attempts at airbrush art and also hope you enjoy this exciting creative activity. If you motivate yourself to practice at the beginning, you will soon be amazed about your increasing success!

Larissa Meyer is a 32-year-old mother from Michigan and creative spirit since childhood. Her passion for painting and drawing has led her to an education as an illustrator and a career as a freelance graphic designer. She has a Bachelor of Fine Arts in Illustration and a degree in Graphic Design. Larissa is a talented artist who is able to master a wide range of styles and techniques to bring her artistic vision to life. Her greatest passion is currently fluid painting and epoxy resin art. Larissa’s love for art and her knowledge and experience in illustration make her the perfect Creative Director for our fluid-painting.com team. She is the creative head of our team and shares her passion and knowledge with our community through articles and tutorials.
As a mother of a 2-year-old daughter, Larissa also understands the importance of fostering creativity in early childhood. She uses her experience and knowledge to help other parents inspire their children and develop their artistic skills as well.
Learn more about Larissa Meyer and about us.