Epoxy River Table Tutorial: Make Your Own Epoxy Resin Table
This post may contain affiliate links. We may earn a commission from purchases made through them, at no additional cost to you.
Are you convinced that you can only get an aesthetic epoxy resin table from an artistically and technically skilled furniture manufacturer? Think again! With our step-by-step instructions, we show you exactly how you can create a particularly decorative table using epoxy resin yourself, even without much experience. You can also see from our detailed list what materials and tools you need for this creative project. With the right materials and our many tips inspired by practical experience, such an undertaking is easier to carry out than you might imagine.
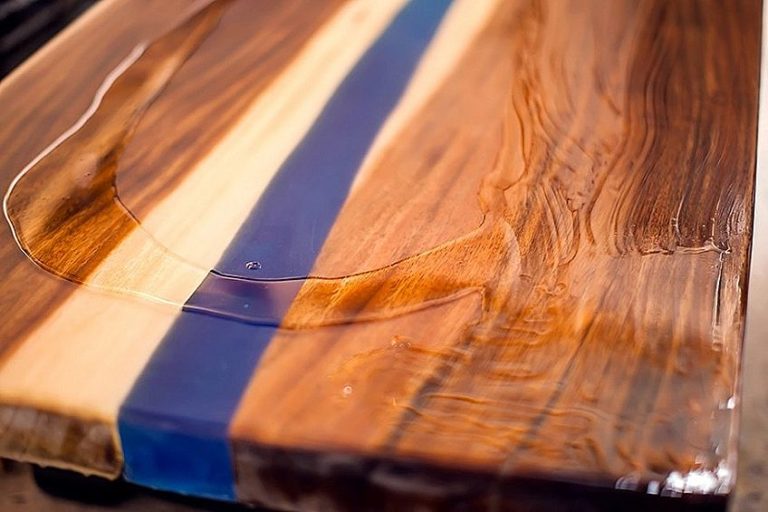
What is an Epoxy River Table?
The artistically designed Epoxy River Tables have been established as an absolute furnishing trend around the globe for some time now. These household, creative works of art were initially able to spread as a trend across the USA before they finally gained more and more attention worldwide. The reasons for this are quite understandable: An epoxy resin table combines functionality with creativity, stylish appeal, and luxury. As a result, each piece becomes a modern work of art with surprisingly timeless aesthetics. An epoxy table can usually be integrated into a rustic environment with a high natural wood content just as well as into a clean loft in the city.
The extravagant aesthetics of an epoxy resin river table cannot be assigned to any traditional category of existing furnishing styles. This furnishing trend is probably popular because you can let your imagination run wild when designing an epoxy resin tabletop. The possibilities range from the classic table model to eccentric-looking pieces with a striking combination of intense colors.
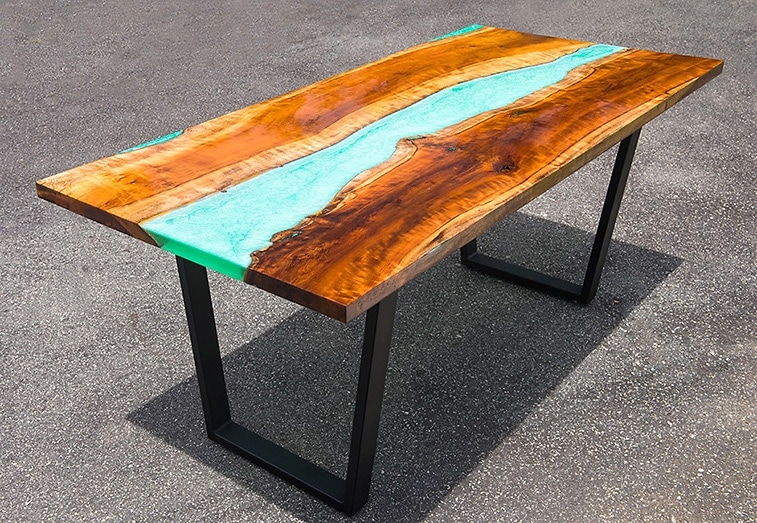
Image: © Wood n’ Water Artwork and Design
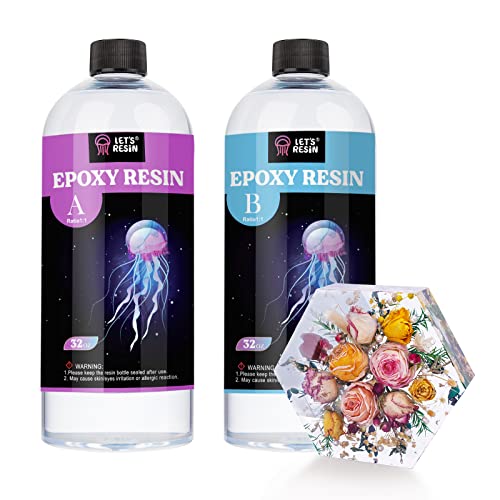
Choosing the Right Epoxy Resin for Building an Epoxy Resin River Table
This high-quality casting resin is perfect for casting the Epoxy River Table:

- Thick pours, low viscosity, and long working time
- Clear results and compatible with pigments and dyes
- 2:1 mixing ratio by volume
We recommend this laminating resin for sealing the wood and the tabletop:
- Crystal clear finish for tabletops and all other craftings
- Bubble Free Clear Resin, non-toxic, low odor, and yellowing resistance
- Easy mixing ratio 1:1 by volume, no experience needed
Choose the Right Wood for Your Wood and Resin Table
One of the most important decisions when building a successful Epoxy River Table is to choose the right wood. At this point, do not pay too much attention to the price, but rather invest in really high-quality material. After all, it takes a lot of time and effort to build a wood and resin table yourself. The result should not only last as long as possible but also be a pleasure to look at.
For the construction of a live edge river epoxy table, you should use natural wood. For example, a board sawn from a tree trunk with a thickness of at least 4 cm is suitable. Additional attractive accents can be achieved if the piece of wood still has a so-called “natural edge” with the original bark. Such wooden boards can usually be found in well-run joiner’s workshops, at specialist timber dealers, or at many a contact point on the Internet.
With a little less effort and cost, there is usually the alternative possibility of obtaining two wooden boards from a DIY store. Of course, these usually did not have the same charm as natural wooden boards. Wood from the DIY store is then sawn into shape on one side with a jigsaw so that they fit together with some distance between them. Wherever the wood comes from, it should be completely dry in any case. Ideally, the moisture content of the wood used should not exceed 12%.
Prepare the Wooden Boards for the Next Steps
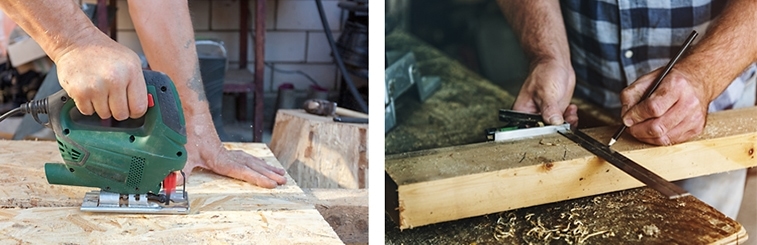
First of all, there are two possible variations on your way to a stylish table with epoxy resin: On the on hand, you can prepare your selected wooden boards for further processing yourself by cutting them to the desired size and shape with a hand-held circular saw. For a River Table the wooden board is cut in the middle. Then you can smooth the material with a planer.


On the other hand, you can of course also go to a carpentry workshop of your choice, where you can have your wood prepared by experienced professionals in no time at all. There you will usually find boards in many thicknesses and lengths, which you can easily saw to the desired size on-site and also have them planed smooth.
If you have little or no experience in woodworking or have little time available, you can still achieve your dream of your own River Table.
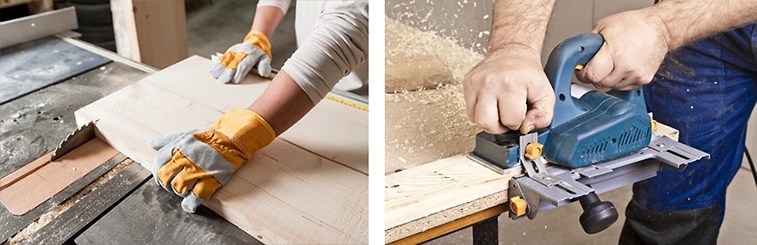 Image: Vlad Teodor / Rawpixel.com / shutterstock.com
If you don’t already have the machines necessary for woodworking available, this variant can even be cheaper overall than the purchase of a whole basic set of equipment. In most cases, it may be a good idea to go to a carpenter if the planned table is to be built from a very large piece of wood.
Before you continue any further, you should measure the two pieces of wood exactly once again. Are both wooden boards exactly the same length? In addition, the side edges should be exactly at right angles to the straight outer sides so that a perfectly rectangular tabletop is created later. For a perfect result, both pieces of wood must also be of almost identical thickness, as well as flat.
This means an even, smooth planed surface. If achieving these factors causes problems, you can always hire a joiner to save your work-piece by planing it down further, even after failures in the processing.
Creating Perfect Working Conditions for Your Resin Table DIY Project
Epoxy resin is essentially a very versatile material, but the material is also somewhat sensitive to several factors. In order to prevent problems from the outset, it is important to ensure that the conditions at your work location are as perfect as possible. The workability and quality of epoxy resin can be impaired, for example, by extreme cold, excessively high temperatures or moisture. Unsuitable conditions at the workplace can also have a negative effect on the normal drying time of the chosen synthetic resin.
The perfect temperature for processing most epoxy resins is usually considered to be a constant temperature of about 20 degrees Celsius. In case of doubt, the temperature in the room should rather be above 20 degrees Celsius, but never significantly below.
Differences in temperature should also not be underestimated with regard to the specific place of storage in the room: If the thermometer at eye level shows the ideal processing temperature of 20 degrees Celsius, the temperature near the floor can be considerably lower. At room temperatures of around 20 degrees Celsius, it is even possible that the reference temperature on the floor is only just over 15 degrees Celsius.
Storage of the epoxy resin on the floor under these temperature conditions could be the reason why annoying bubbles form in large numbers in the synthetic resin. Even with a hot air dryer, it can be difficult to get all of them out of the material.
So in any case, you will be better off if you generally place and store your materials on a shelf or workbench. This usually also makes it easier to keep them dry, dust-free, and optimally ventilated, as the dirt from the floor will also not be brought to the workplace on the containers.
Step-by-Step How To: Epoxy River Table
Step 1: Remove Bark from the Wood and Sand it Down
- First of all, the bark, which may still be adhering to the wood, must be carefully removed. Although it would usually be quite decorative in itself, it does not form an optimal adhesive effect with the epoxy resin used. The edges of the wood should also be cleaned from the bark and finished by hand with sandpaper. This will give you clean, smooth surfaces that can later bond well with the hardening resin.
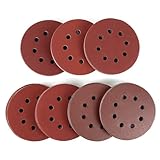
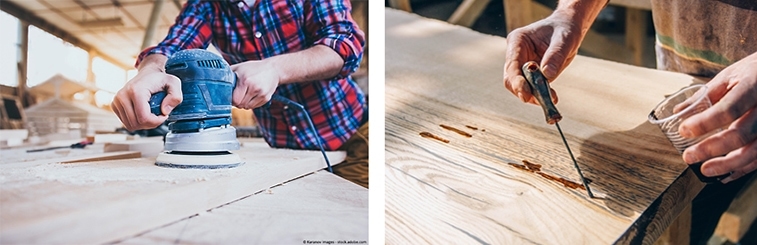
- Next, you sand the large, straight surfaces of your wooden elements until smooth. This is usually done quite well with an eccentric sander. You can achieve satisfactory results with as little effort as possible if you first use an 80 grit and then slowly work your way up to the finer 220 grit. Whenever you change the grit size, the wood should be briefly freed from dust. However, the narrow sides are usually easier to work on by hand with sandpaper than with a sander.


- The end of this processing phase is the thorough removal of all dust residues from the wood. You can do this very quickly by simply using an ordinary household vacuum cleaner. The last, fine dust residues are caught in a final cleaning pass with a dry microfiber cloth.
 Images: left: Vlad Teodor / shutterstock.com, right: Velimir Isaevich / shutterstock.com
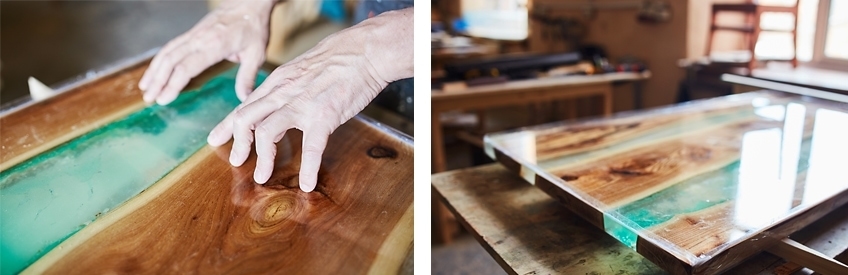
Step 2: Fill Cracks / Holes and Seal the Wood Surface
- In this step, all kinds of dents and unevenness such as cracks and porous areas in the wood must first be filled in. To do this you simply use transparent laminating resin. Since some of these uneven areas can be located in relatively unfavorable places on the edge of a work-piece, we recommend that you prepare the edges with a dimensionally stable adhesive tape. This will prevent the resin from running over the edge in an uncontrolled manner.
- After the filled areas have dried sufficiently, the next step is to seal the entire piece of wood. Here too, you use the same laminating resin as for filling the cracks and holes. Spread it relatively generously over the entire surface of the wood to prevent the natural material from outgassing later. The investment in a non-hairy brush of good quality is absolutely worthwhile for this step. If loose brush hairs get into the distributed synthetic resin, they can only be removed again with great difficulty. This transparent sealant must then first be allowed to dry well. For this phase alone, you should plan a waiting time of at least 5 hours. The synthetic resin dries particularly evenly at temperatures between 18 and 24 degrees Celsius. When the surface sealant is finally completely dry, you should finish off the inner edges manually with sandpaper. If you roughen the areas where resin and wood meet later with the sandpaper, the materials can bond particularly well at the edges in the next step.
Step 3: Making the Formwork or Mold
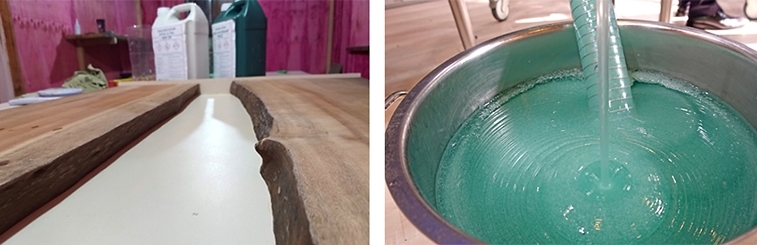
- Now it is time to build a suitable mold for the desired epoxy table top size. This is particularly easy and inexpensive with so-called MDF boards. At first, this may seem like a challenge, but in principle, this point is not that difficult to achieve. We recommend MDF boards with a board thickness of 16 mm for the construction of the formwork. This applies to the bottom panel as well as to the side panels. You should construct the side panels to be at least 15mm higher than the surface of the tabletop. The side parts can either be screwed to the underside or glued together with hot glue.
 Images: left: brizmaker / shutterstock.com, right: Rawpixel.com / shutterstock.com
- After screwing or gluing the different parts together, the edges must be additionally sealed. For this, you can use simple, clear bathroom silicone. Only if you are very careful with the sealing, you will get your form really 100% tight. As a consequence of a defective seal, the liquid epoxy resin could leak out at the edges later on, which would then mean more work and expense.


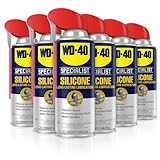
- The finished sealed mold must finally be treated with a release agent. If this is not done, the epoxy resin could adhere too strongly to the MDF boards after drying. Then it would be very difficult to release your epoxy resin tabletop from the mold without major damage. There are different ways to prevent this. For example, the mold could be lined all inside surfaces with adhesive tape. But liquid release wax can also be used. Spraying the mold several times (in up to three layers for a smooth surface) with silicone spray or Teflon spray can also counteract excessive adhesion between the boards and the epoxy resin tabletop.


Step 4: Insert the Wood into the Finished Mold of Your Epoxy Tabletop
- It is especially important that your form is absolutely flat and in position at the chosen workstation. You should not just eyeball it, but use a spirit level and, if necessary, use wooden wedges to bring your workspace into the correct alignment. After all, this way you can make sure that no liquid epoxy resin runs out over the edge of one side of the mold during casting. Once you have sufficiently controlled this basic requirement, you can place the wood in the mold. Push your piece of wood exactly into the position where you want it to be fixed with epoxy resin in the finished table. Simply use several parallel clamps to fix the wood in the desired position.


- If this epoxy resin table guide is intended for building a rather small table, the smaller piece of wood can also be weighted down with a stone or similarly heavy object. However, do not use objects of financial or idealistic value as weights. After all, these could possibly come into contact with the resin when working with it and be damaged.
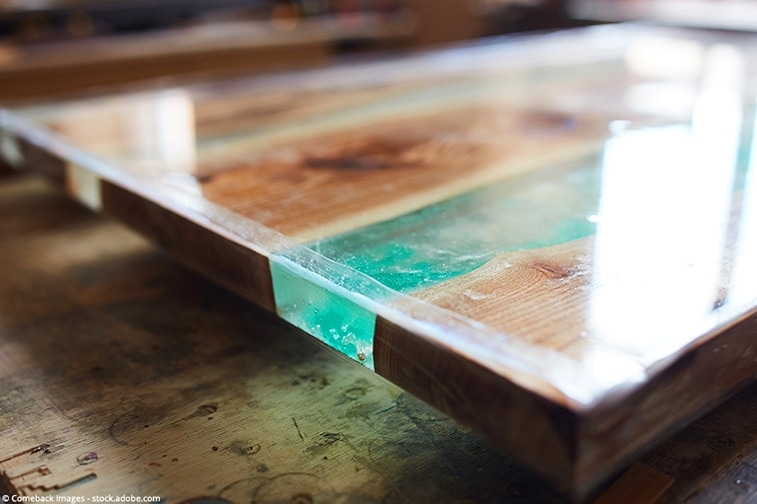
Bilder: left: Wood’n Water Artwork and Design, right: Comeback Images / shutterstock.com
- When making a River Table, the resin should generally only land in the gutter provided and not on the entire table surface. To ensure this, you can use sanitary silicone to create a small barrier at a distance of about 1 to 2 cm from the inner edges of the wooden elements.
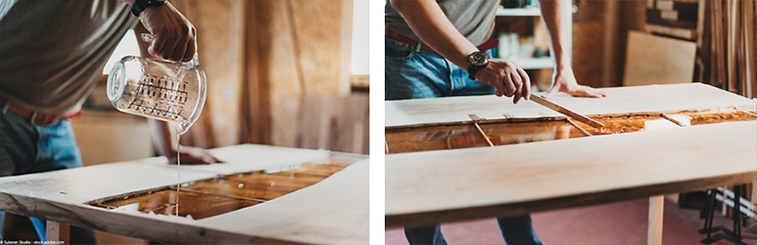
Step 5: Mix Your Epoxy Resin
Now you first have to calculate how much epoxy resin you need for your table. Experience shows that this calculation can be a bit complicated for some epoxy resin artists, so we have created our own special epoxy resin calculator. It will guide you step by step to calculate the right amount of epoxy resin.

- Next, the epoxy resin is mixed. For health reasons, you should always wear suitable respiratory protection, proper nitrile gloves, and protective goggles that cover the eye area.
- You can mix the epoxy resin in a bucket of an appropriate size. Ideally, this should be large enough to hold the required amount of resin in a single mixing operation. The bucket should also be large enough to keep a safe distance from the upper rim so that no liquid epoxy resin spills over the rim when mixing. In order to prevent the heat released during the chemical reaction from accumulating too much in the mix, the bucket should not be narrow and high, but rather have the largest possible diameter.
- In this step, you will notice once again that epoxy resin is one of the more sensitive materials. As soon as a certain filling level in a vessel or a certain total quantity is exceeded, the stirred mixture can become very hot due to the exothermic character of the chemical reaction.
- In some cases, the material may even start to boil and, as a side effect, become cloudy or not usable at all for further processing. In case of doubt, it is better to pour this material by applying several layers on top of each other or use a specialized casting resin. Whether you have to proceed in this way depends on the material you are using. It also depends on the exact conditions of your project if you want to build an epoxy table yourself: Depending on the planned thickness of the tabletop and the maximum possible layer thickness of your product, you will have to decide if you are going to make your epoxy table out of several layers, or if you want to mix the whole amount needed at once.
 Images: left: Wood’n Water Artwork and Design, right: futuristman / shutterstock.com
- You will find the information you need for accurate planning in the manufacturer’s information for the epoxy resins you use. Either choose an epoxy resin to be cast in one go or otherwise stick to the specified maximum layer thickness quite closely.
- It is essential to follow the manufacturer’s instructions for the optimum mixing ratio. Once you have measured the required quantities of liquid resin and hardener correctly, you can mix them easily and thoroughly with each other using a drill with an appropriate stirring attachment.
- If air bubbles form in the resin during mixing, you can remove them with the heat of a heat gun. However, take care to use only as much heat as absolutely necessary for the air bubbles to rise in the material. Overheating the resin could otherwise have a very negative effect on the quality.


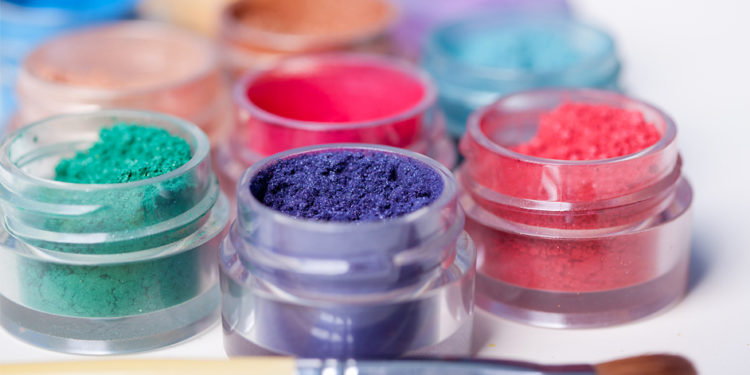
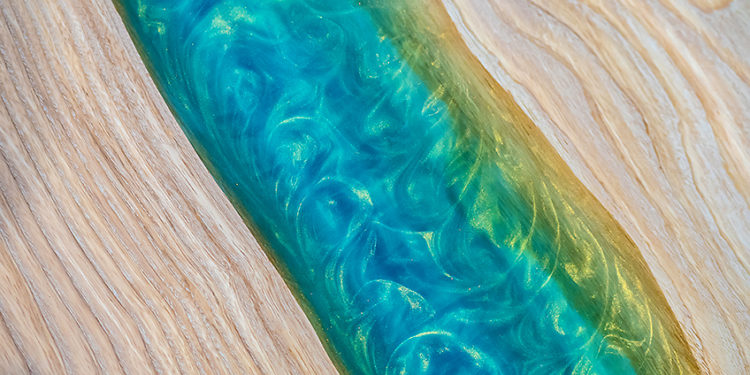
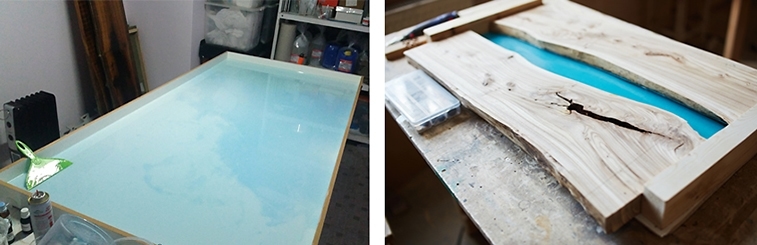
Step 6: Coloring the Resin for a Water Effect
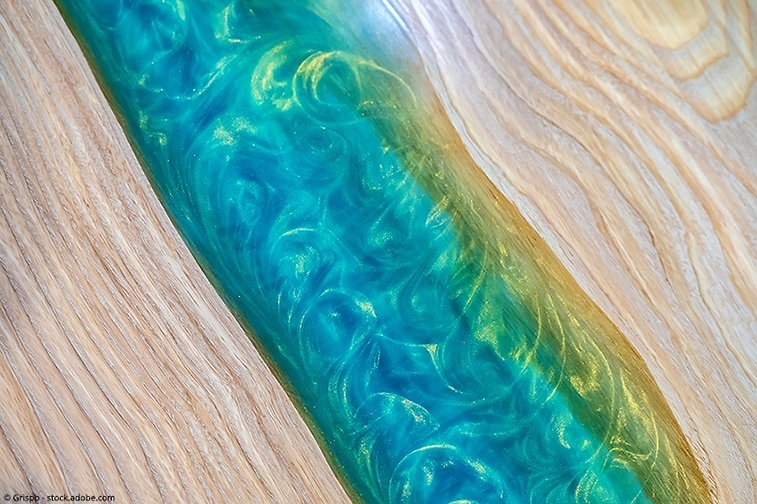
- If an impressive water effect is to be achieved during casting, it is always worthwhile investing in an epoxy resin that can be cast in one go.
- To achieve a convincing water look, mix suitable color pigments into the two components. To do this, you first have to divide the resin into two separate containers, for example in a ratio of 1:1.5, then add a metallic pigment in turquoise to the larger quantity and a matt-blue pigment to the smaller quantity. However, these specific color suggestions are only our recommendation for a project with a water look. Of course, you can let your imagination run wild and try out unusual color combinations.
 Images: left: © Suteren Studio – stock.adobe.com, right: Suteren / shutterstock.com
- Now you have again two choices how you want to fill the epoxy resin into the mold for the epoxy table: You can either fill the resin from the two mixing vessels alternately in smaller portions or pour the resin into the mold from each side at the same time. If you pour the metallic epoxy resin into the mold in a circular motion, you will get a very lively looking end result.
- After pouring the resin into the mold, you can also use a wooden stick or similar tool to finish the color pattern.
- Afterward, you should let the epoxy resin cure long enough in accordance to the manufacturer’s information.
Our recommendations for high-quality colorants for epoxy resin tables:


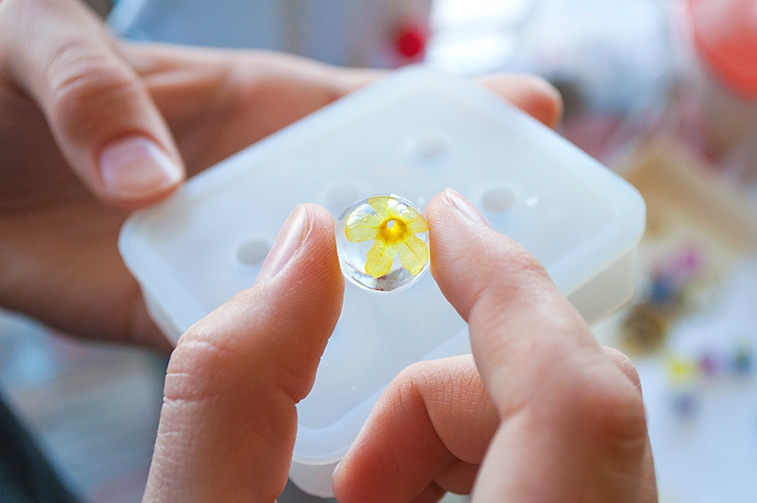
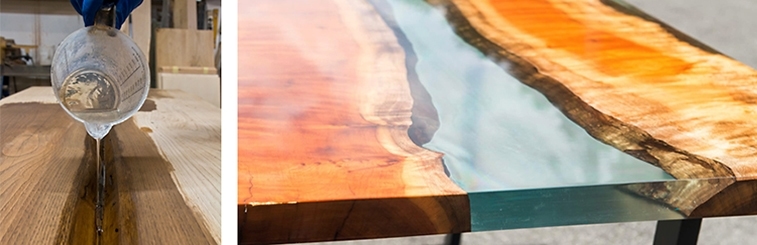
Step 7: Table of Crystal Clear Resin and Embedded Objects
- With our epoxy table guide, you can not only undertake projects with a cool water look. There is also an almost infinite number of designs that can turn your homemade River Table into an extraordinary work of art. Beautiful results are also possible when different objects are embedded in crystal clear resin. To do this, you first pour the first layer of crystal clear epoxy resin between your two wooden boards. You should work carefully, but also rather quickly. Then you warm up this first layer very briefly with a hot-air dryer. You should never aim at one spot for longer than 3 seconds to prevent the heat from burning in the material and causing it to turn yellow.
 Images: left: Marco Zamperini / shutterstock.com, right: Wood’n Water Artwork and Design
- In a next step, the second epoxy resin layer is followed by the so-called “B Stage”: This should be cast as long as the first layer is not yet completely dry, but still has a slightly sticky consistency on its surface. Take care not to miss the right time for applying the second layer. Only if the surface of the first layer is still sticky will it bond perfectly with the second layer of epoxy resin. However, if you are too late, it is better to wait until the first layer is completely dry and cured. Then you can carefully sand the surface of the first layer with a 220 grain before applying the next layer. Also, do not forget to thoroughly remove the dust created during sanding before pouring the second layer.
- When making an epoxy tabletop, very aesthetic effects are possible when decorative elements such as particularly pretty pebbles or crystals are embedded in the epoxy resin. You should do it in this step if possible. If these solids are cast into the second layer of resin, they can practically no longer sink to the bottom but are held in position by the layer that has already hardened.
- Finally, you fill the remaining resin into your mold and let it dry well. Again, follow the manufacturer’s instructions on how long the resin takes to cure completely.

Step 8: Remove the Tabletop from the Mold, and Sand
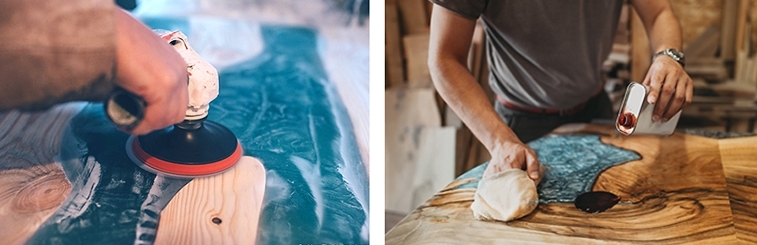
- In the next step, you remove your completely dried tabletop from its mold. We recommend that you first remove all parallel clamps and screws from the mold and then carefully remove the tabletop from the self-built formwork with a plastic hammer and a chisel. Once this has been done, the tabletop edges can also be sanded. This can usually be done by hand. However, it is even easier and faster with an eccentric sander. We recommend that you start with an 80 grit and then work your way step by step up to a 400 grit. At the very end, there should be no resin left on the wood.
Images: Comeback Images / shutterstock.com
- You can achieve particularly smooth edges if you first work them with a router before sanding. They can also be cut exactly straight with a circular saw and then planed off again. You do not necessarily have to carry out these steps.
Tip: The surface of your Epoxy River table will become brighter the higher you choose the grit size of your sanding paper.

Step 9: Finishing and Polishing
Finish by Polishing and Oiling the Tabletop
- At this point, you can now provide a finish that will perfectly protect the wood of your homemade epoxy tabletop. For example, you can give your tabletop a more natural and relatively matt appearance. To achieve this, it is necessary to finish the hardened and sanded tabletop (and especially the resin flow) with a polishing machine and a suitable polishing paste. This will remove all traces of sanding so that a very silky surface can be created.
 Images: left: Osadchaya Olga / shutterstock.com, right: © Suteren Studio – stock.adobe.com
- You can achieve the matt look by spreading a suitable oil with a soft cloth evenly over the entire surface of your tabletop. With this simple technique, you can seal the wood easily and effectively. You only have to do this step once.
- If you would like to learn more about this topic, you can read our detailed instructions on polishing epoxy resin.


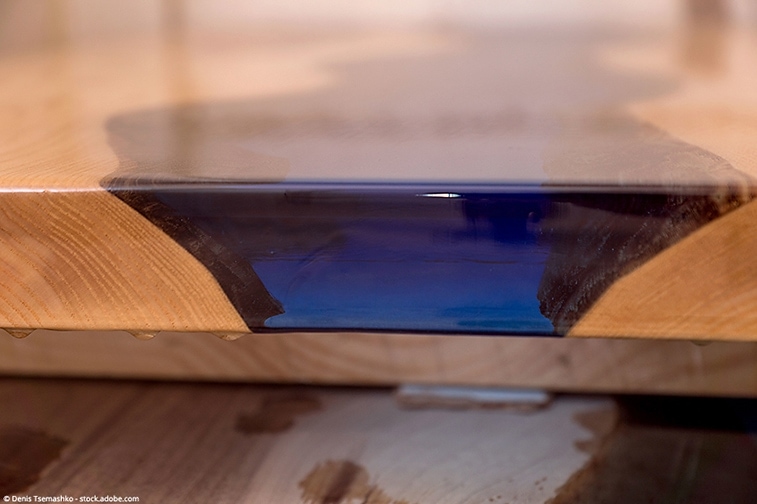
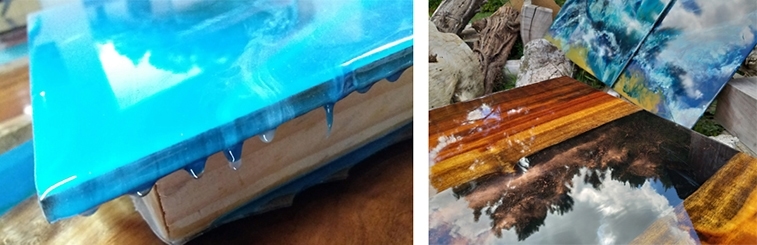
Sheathing Made of Crystal Clear Epoxy Resin for Your River Table
- If you find glossy surfaces more aesthetic than the matt version, it is a good idea to coat your tabletop with crystal clear epoxy resin. Ideally, this should start at the underside of the tabletop. To do this, first apply a dimensionally stable adhesive tape around the top. This should protrude about 1 to 2 cm over the surface of the top. This will ensure that no resin can run over the sides of the piece.
- Pour the mixed resin over the area prepared with adhesive tape and distribute it evenly over the entire surface. A plastic spatula can be a very good help here. You can also avoid unwanted bubbles in the material at this point by briefly blowing over the resin with a hot air dryer. Afterward, however, you must again observe the waiting time specified by the manufacturer, during which the epoxy resin hardens completely.
- The first layer only serves as a base for this technique, so you should repeat the process once again to pour the second layer of resin. However, the first layer should also be sanded a little bit to allow the two layers to bond together optimally.
 Images: Wood’n Water Artwork and Design
- After complete curing, you can remove the adhesive tape. Then, as the next step, you can cover the edge of the already sealed underside with tape at least 5 cm wide.
- Now carefully turn the tabletop upside down. You can use leftover pieces of the wood you have cut to size, for example, to put underneath. In addition, you should also put a soft fleece underneath the tabletop so that the sealed underside is not damaged.
- Now the tabletop has to be aligned absolutely in the scale again so that you can pour the still liquid resin evenly over the top of your river table. As soon as you have spread the resin with the spatula and it has dried sufficiently long, you can remove the remaining tape. Afterward, you take fine sandpaper to sand down all sharp edges.
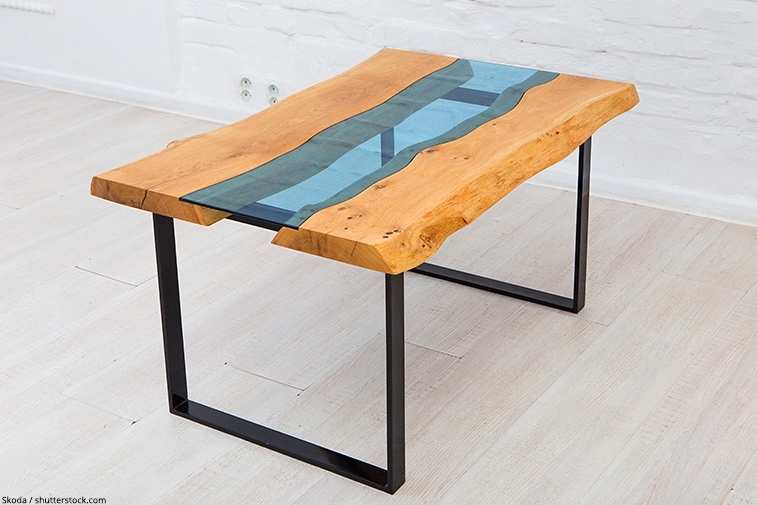
Finishing Your River Table: Attaching the Table Legs
- To finally complete your work of art, you screw on the table legs you have chosen. A rustic, but at the same time elegant look can be achieved by using classic wooden legs. Stylish metal table legs turn the table into a modern, trendy piece of furniture.


Larissa Meyer is a 32-year-old mother from Michigan and creative spirit since childhood. Her passion for painting and drawing has led her to an education as an illustrator and a career as a freelance graphic designer. She has a Bachelor of Fine Arts in Illustration and a degree in Graphic Design. Larissa is a talented artist who is able to master a wide range of styles and techniques to bring her artistic vision to life. Her greatest passion is currently fluid painting and epoxy resin art. As a mom of two kids, Larissa also understands the importance of fostering creativity in early childhood. She uses her experience and knowledge to help other parents inspire their children and develop their artistic skills as well.
Learn all about Larissa Meyer and Fluid Painting.