Wood Epoxy – Creative Projects with Epoxy Resin for Wood
This post may contain affiliate links. We may earn a small commission from purchases made through them, at no additional cost to you.
Epoxy resin offers possibilities for artistic and handicraft processing that can hardly be compared with any other raw material. The combination of epoxy resin and wood can be used in many ways: When sealing wooden surfaces with epoxy resin, casting forms in interaction with wooden elements, manufacturing entire tables or tabletops from resin, or the aesthetic repair of damaged wooden surfaces. We will introduce you to the best application possibilities and provide you with precise instructions for the completion of exciting projects with wood epoxy.
Table of Contents
- 1 The Most Important Facts about Epoxy Resin
- 2 Which Wood Epoxy is Suitable for Woodworking?
- 3 Best Wood Epoxy
- 4 Required Supplies for the Presented Projects
- 5 Project # 1: Sealing Wood with Wood Epoxy Resin
- 6 Project # 2: Repairing Wooden Surfaces with Wood Epoxy Resin and Filling Gaps
- 7 Project # 3: Epoxy Resin Casting with Wood
- 8 After Hardening: Sanding Resin
- 9 The Perfect Finish: Polish, Oil or Lacquer
- 10 Our Conclusion
The Most Important Facts about Epoxy Resin
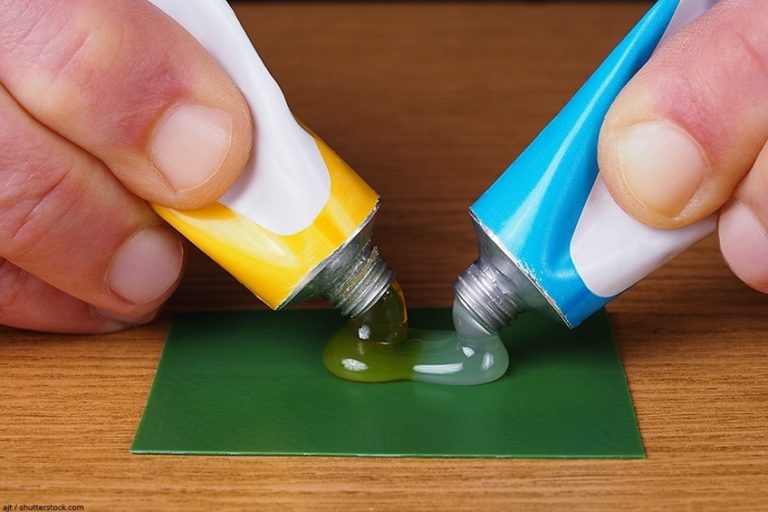
From a purely technical point of view, the epoxy resin often used as coating materials are so-called thermosetting polymers. These consist of a resin and a matching hardener. Only when these two parts are finally mixed together in a precisely defined ratio is a chemical reaction set in motion. At the end of this reaction, after a certain period of time, the material is completely cured if everything has been done correctly. Fully cured surfaces of an epoxy coating are generally very scratch- and water-resistant, as well as immune to solvents and many types of chemicals.
When working with epoxy resin, the way to a truly successful end result is through the best possible combination of the following factors:
- Well-prepared surfaces
- Thorough mixing of the two components (according to the manufacturer’s instructions)
- Appropriate working environment
Immediately after mixing the two components (epoxy resin and suitable hardener), a chemical reaction is set in motion in the mixture, which takes place exothermically. This means that heat is released from the mixture into the environment. Over a certain period of time, a transformation from a liquid state, via an intermediate gel state, to a completely solid and hardened form takes place. This process may well take some time. However, the exact duration depends on a whole range of factors:
- The ambient temperature
- The type of the respective hardener
- The amount of heat generated (depending on material thickness and quantity)
- The temperature of the substrate used
The heat factor is particularly important in this respect: although a hotter temperature of epoxy resin is usually accompanied by a faster transformation process, this faster curing can sometimes impair the quality of the final result. This is because too high a temperature rise in the material can cause surrounding materials to melt. Also, the curing and its appearance at the end of the transformation process can be inconsistent in such a case.
Which Wood Epoxy is Suitable for Woodworking?
If you want to upgrade wood and similar natural materials with epoxy resin, you should keep in mind the following: Wood reacts to different levels of humidity in its environment. It therefore changes its volume, which can cause problems when resin and wood are combined. First and foremost, it is therefore important that the epoxy resin chosen is suitable for wood. When selecting materials that are optimally matched to each other, the following classification should always be observed:
- Coatings of wooden surfaces are made with low viscosity (very fluid) resin
- With resin that is as viscous as possible, you can repair wood with epoxy resin and fill holes
- Viscous resin is also suitable for the production of self-made casting molds
- Some types of epoxy resins are more suitable for indoor use only, while others retain their color and structure even under the sun’s UV light outdoors
Yellowing Protection and UV-Resistance of Resin
Very often epoxy resin is used (not least for aesthetic reasons) that needs to be transparent and crystal clear. However, the material may tend to yellow under the influence of UV radiation (for example natural sunlight). It is therefore essential to buy a UV-resistant resin, with extensive protection against sunlight for outdoor use. In some cases, supplements can be added to certain epoxy resins together with the hardener to improve light resistance.
Note Extent of Shrinkage
Generally, epoxy resin shrinks much less with curing than polyester resin, but there are differences between different products. It can be very annoying if a wooden surface that was initially covered with resin is suddenly only partially covered when sealing with epoxy resin, or if an additional layer of the material used suddenly has to be applied. After all, such problems not only cost valuable time but can also be quite costly due to the additional material used.
Therefore, it can be worthwhile to focus on high-quality products with low shrinkage right from the start.
Pouring the Maximum Layer Thickness of Epoxy Resin
When repairing wood with epoxy resin or especially when producing molds from this versatile material, you should keep in mind that the different product variants of resin on the market each have specific properties. Additionally, these will have an effect on the quantity and layer thickness of a certain epoxy resin that can be cast in one operation.
The usual variants available on the market can normally only be used for a layer thickness of a maximum of 2 cm and up to a maximum quantity of 10 kg per application. If this resin is used in much larger quantities, the heat generated during the chemical reaction cannot escape quickly enough. The result is then usually unsightly spots, which are caused by the uneven hardening of the compound, which is faster in some areas.
Temperature Resistance and Surface Hardness
Once the processed epoxy resin has finally cured after the respective period of time, there may well be striking differences in surface hardness: While some products are soft enough that a fingernail can leave small scratches in their cured surface, other products are impermeable and almost scratch-resistant even at higher temperatures.
Before starting a project, however, you should briefly assess whether the investment in a higher quality resin is worthwhile: If the resin used is to be used to produce objects that are mechanically heavily stressed, such as epoxy tabletops or cutting boards, we recommend that you purchase high-quality materials with the appropriate durability for your work. We would also like to point out that for optimal curing it is also of central importance to ensure that the mixing ratio specified in each case is adhered to exactly.
Best Wood Epoxy
Best wood Epoxy for clear coatings:

- Specifically designed for art projects, developed with professional artists
- Heat resistant, scratch resistant, food safe, maximum UV resistant, water resistant
- Compatible with alcohol inks, acrylics, silicone oils, metallics, dyes, pigments
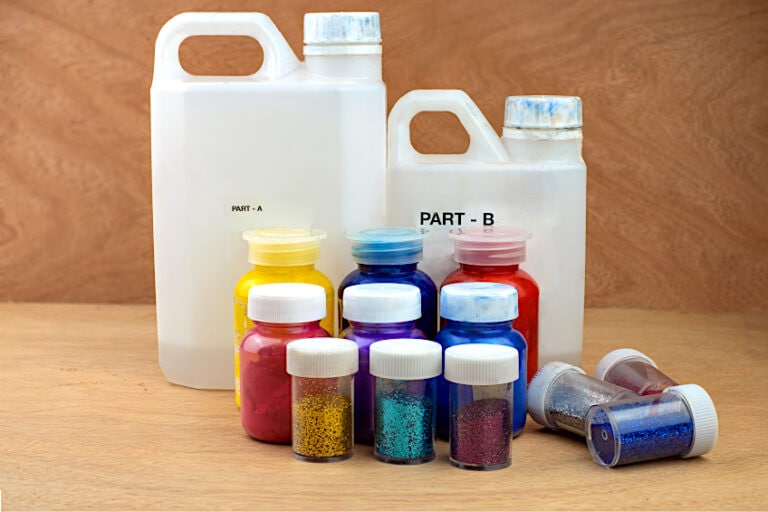
Required Supplies for the Presented Projects
Mix and Pour the Epoxy Resin
Making the DIY-Mold
Surface Sanding and Polishing
Industrial Safety
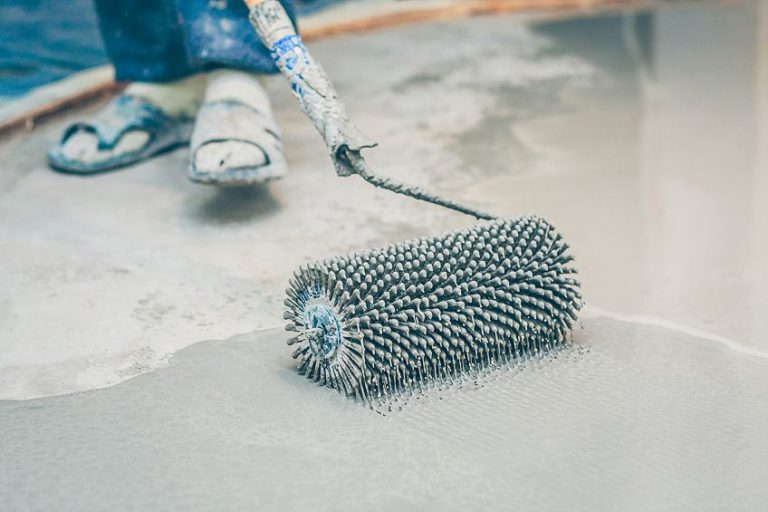
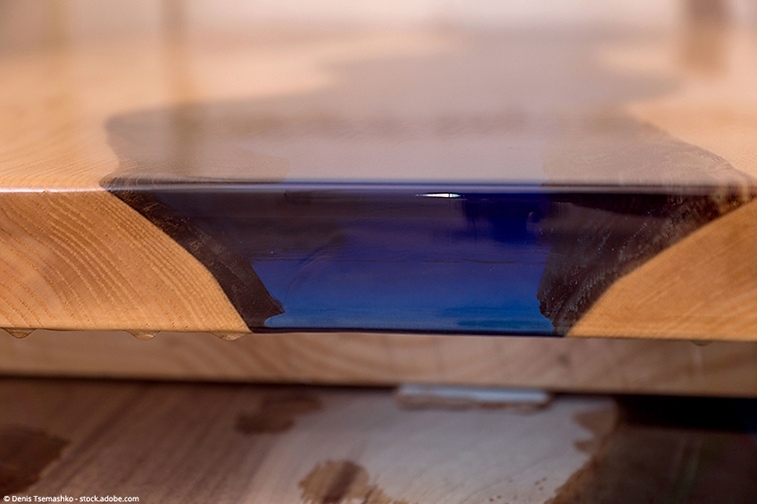
Project # 1: Sealing Wood with Wood Epoxy Resin
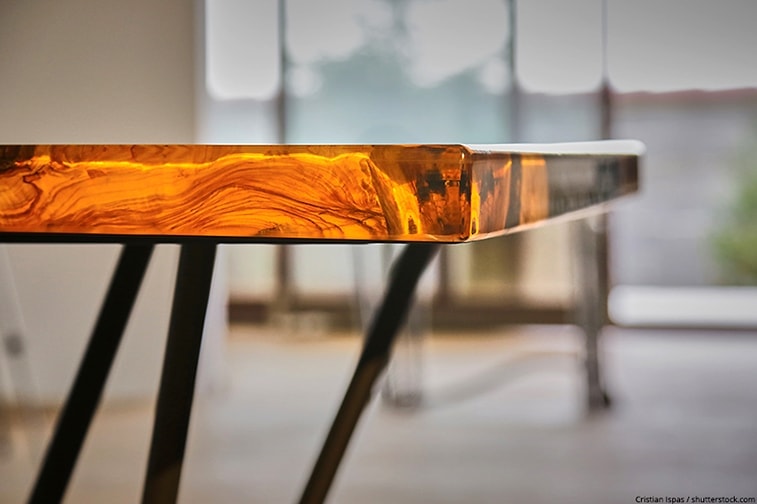
Under the right conditions, epoxy resin can show off the wood and its natural appearance in a modern way. Especially in the living area, suitable epoxy resin can be used for wood in different variations to optimize its aesthetic and functional benefits. If you work carefully, you can seal wooden surfaces with epoxy resin or simply fill gaps in the wood with the resin. This protects the wood against moisture from the outside and makes it more resistant to mechanical stress. Possible examples of epoxy resin applications of this kind are
- Furniture with elements or complete parts made of epoxy resin
- Covers for the kitchen area
- Coatings for wooden floors
- Tabletops for dining tables, desks or living room tables
- Cutting boards for use in the kitchen
For a high-quality end product, in addition to the materials used and a careful approach, the working environment plays a significant role: Ideally, you should find a place that not only offers you enough space, but is also dust-free and as dry as possible. In addition, the materials used should be stored for a while at the place where they will be used before starting work. This way the wood and the epoxy resin have the same temperature as your workplace and there are no undesirable reactions due to excessive temperature differences.
Tip: Medium to high viscosity laminating resins, which form a particularly hard surface after curing, are perfect for sealing wood with epoxy resin.
Step by Step Tutorial to Work with Wood Resin
- In order for the epoxy resin to bond optimally with the wood, you should consider a number of factors. First of all, the wood surface must be as clean and dry as possible. However, it should also not be sanded extremely smoothly. This is because a certain roughness promotes the adhesion between the resin and the wood surface used as the substrate. However, what you should definitely remove beforehand are residues and impurities like grease, oil, splashes of wax, or similar substances on the wooden surface.
- Also, the substrate should not only be clean but also completely dry. You can ensure this relatively easily if you have a heat gun or hairdryer available for drying the surface as carefully and slowly as possible. When the wood surface is finally sufficiently dry, it can be sanded with a suitable random orbital sander or even by hand with standard sandpaper. With oily woods such as teak or olive wood, you can improve the adhesion between resin and wood by degreasing the surface chemically with some acetone.
- Dust that is already present or that has been created by sanding can easily be removed with a vacuum cleaner or a hand brush. Then moisten a lint-free cotton cloth with a suitable solvent and gently wipe the surface with it. Make sure that you do not touch the surface with your bare hands afterward. Otherwise you could contaminate it again with tiny traces of body oils, which in turn could cause defects in the adhesion of the resin to the wood surface.
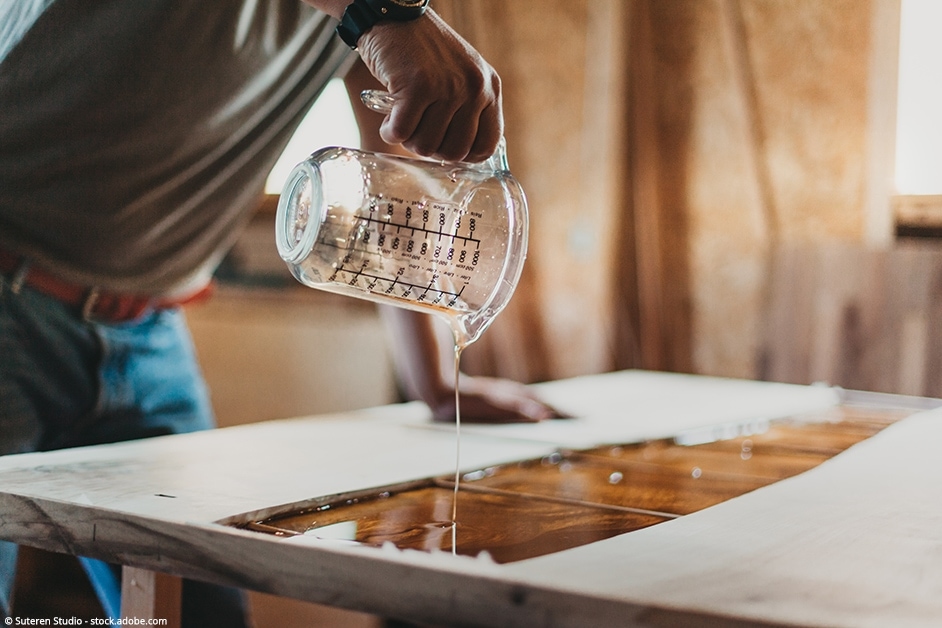
- Now, it is also necessary to limit the flow area for the casting process of the epoxy resin, so that no material can run over the edge of the surface to be processed. For this purpose, in most cases, you will need to apply a suitable barrier around the surface to be sealed. We recommend high-quality adhesive tape, which has proven to be relatively stable, for this use. Correctly applied, it usually withstands the relatively low pressure of the liquid resin and can be removed again relatively easily. However, before you can start the casting process, the prepared surface should be leveled by placing wooden blocks or other aids underneath. If you use a spirit level, it should be no problem to achieve an even layer thickness of the epoxy coating at all points.
- To avoid wasting excess resin, it is advisable to calculate the exact amount of epoxy resin needed before the actual casting process. So that you do not have to spend a lot of time calculating, you can simply use our special epoxy resin calculator. However, there is hardly anything more annoying than suddenly being left with too little material in the middle of work. That’s why you should always round up and mix a bit more rather than too little. After all, this is a time-critical job and you usually don’t need any extra stress during the curing process.
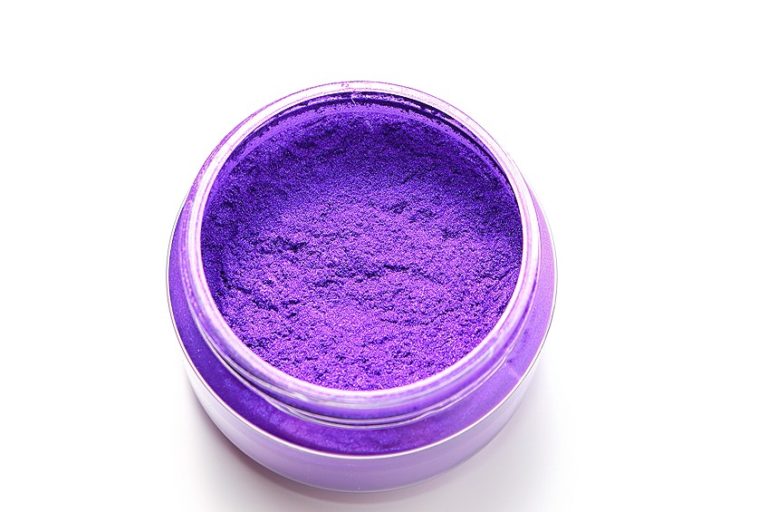
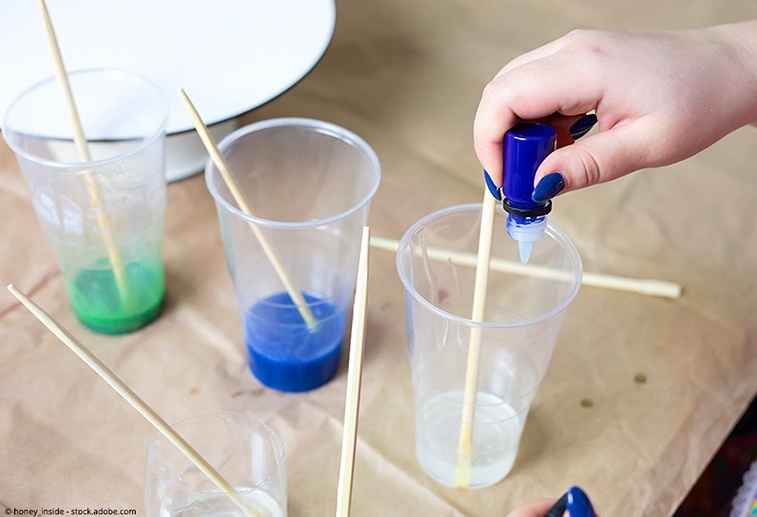
- The correct mixing of epoxy resin and hardener has a decisive influence on the final result. Although these two components should be mixed very thoroughly, at the same time not too many air bubbles should be mixed into the material. During the mixing process, you can also color the epoxy resin with special colors should you so wish. There is a wide range of possible materials available for this purpose. These ingredients each have their own individual advantages and disadvantages. Since possible limitations have to be taken into account, you will find the necessary information on this important topic in our separate article on epoxy resin color.
- In order for the epoxy resin to spread as evenly as possible on the wood surface to be sealed, you should first pour the mixture in a spiral or zigzag shape starting from the center of your work-piece. In order for the epoxy resin to really run together, the pouring process must be repeated from time to time. After the actual pouring, you should level the surface for a few more minutes to make it smooth and even.
Different types of epoxy resin remain relatively liquid for different lengths of time after mixing. With a little practice and the experience that comes with it, you will find out how long you can use this time window for the distribution of the liquid and for working on the surface. Basically, you should not waste time to achieve the desired material thickness. Once the chemical reaction of the resin enters the phase of the gel and rubber-like state, you should not work on its surface any further. - As a rule, after the epoxy resin has been applied to a surface, air bubbles will almost always rise in the mixture. These can be removed by targeted heating with a heat gun or a Bunsen burner. However, you must not aim at a specific area for too long, otherwise the mixture could become too hot. The heat causes the air bubbles to rise to the surface, where they burst.
- If this is desired or necessary after the first layer has set and before the first layer has completely hardened, a second layer can be applied directly to it without having to sand it down again. As a rule, this time window covers a period of up to 48 hours. If the second layer is applied directly within this time window, optimum adhesion is ensured by a chemical bond between the two layers.
- To ensure that the last remaining epoxy resin mixture has dried, it must be allowed to cure for at least 24 hours. Covering with a sufficiently large board has proven to be a good way of preventing the surface from being contaminated during this period. It doesn’t matter if you use a plastic or cardboard plate, as long as it covers the cast epoxy resin layer as perfectly as possible. Only if the plate is very close to the coating without direct contact can it effectively shield all kinds of dirt or lint. How long it finally takes for the cast resin to really cure completely depends on the material used and, to a large extent, also on the thickness of the cast layer. You can usually find information on this right on the packaging of the components used or from the manufacturer. However, most epoxy resins should ideally be completely cured after a maximum of 72 hours. Then you can place or hang up your finished artwork in the desired location without any further restrictions.
Tip: With a little extra heat, almost any epoxy resin can be processed more easily. You should therefore heat the working area if possible, or warm up the vessel with the mixture in a warm water bath before casting. In this way you achieve a better distribution of the resin on the wood surface than would be the case with colder processing temperatures.
Coating Stained Wood Surfaces with Wood Resin
In principle, stained wood can also be sealed with epoxy resins. It is also possible to repair the wood with epoxy resin on stained wood surfaces. However, you should first test the compatibility of the stained wood surface with the resin.
If the wood surface is freshly stained, the stain must be completely dry before further processing. As a rule, it should be possible to combine all stains with epoxy resins. However, you should make sure that you do not completely ruin a work-piece that may have been prepared with great effort. Make sure that after the coating with the resin no more repainting is needed. Therefore, it is better to use a UV-stable stain from the start. Once the wood surface has been coated, removing the hardened resin layer takes a lot of effort and time.
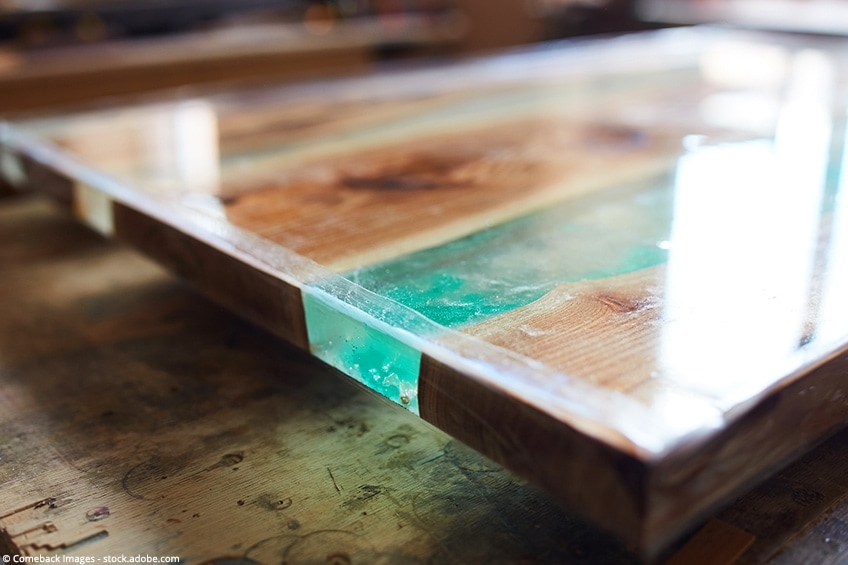
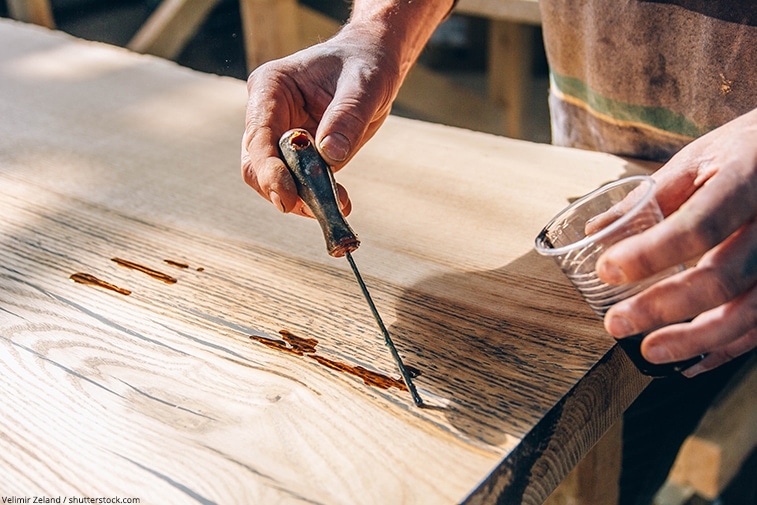
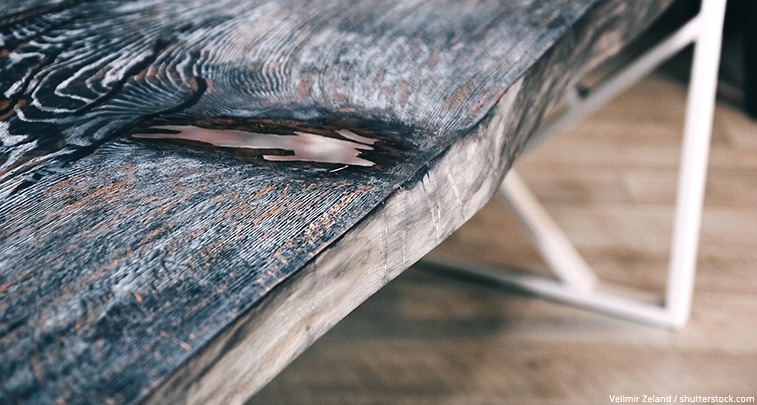
Project # 2: Repairing Wooden Surfaces with Wood Epoxy Resin and Filling Gaps
Particularly exciting when combining the timeless materials epoxy resin and wood, are those pieces of wood that have a strong grain or are particularly knotty. Knotholes or cracks in the material can give a work of art or piece of furniture a special character. Epoxy resin can be the ideal material especially when a surface, such as a table, needs to be especially even for functional reasons. However, to be able to authentically integrate the appearance of old wood or driftwood into the design, you can easily fill holes or cracks with epoxy resin. With our step-by-step instructions we want to show you how easy such projects are to implement with the appropriate preparation:
- Remove wood dust or already partially loosened bark pieces from your work
- For this type of project, too, success is largely due to solid work preparation. Holes and cracks should be covered all around with a sufficiently stable adhesive tape so that the liquid epoxy resin cannot flow in undesirable directions during the casting process. It is essential to carry out this step before mixing the components of the casting resin. Once you have mixed them, there is usually not enough time left for time-consuming preparation work. If workpieces such as a tree disc are processed, the entire back should be masked off as well. This will save you a lot of work if cracks run through the wood to the underside.
- Now is the time to mix the components of the epoxy resin you have chosen for the project. When filling holes, it can be particularly aesthetic to use a colored epoxy resin to fill them. Black pigments are usually very suitable for wooden table tops. However, make sure to mix not only the hardener but also the color pigments thoroughly with the epoxy resin. This will give you a uniform color tone in the material.
- After filling the respective cavities with the finished epoxy resin mixture level with the surface of the material, you should have another check a few minutes later: Often the level can still sink during the solidification, as the shrinkage described above usually plays a role. The more an epoxy resin shrinks, the greater the need for later reworking may be. To avoid having to mix extra resin again later, a small amount of resin left over from the first casting process should be kept for this case.
- The right timing plays an important part in this type of project as well. After all, with a curing time of about half an hour, you only have about 20 minutes for the actual processing of the material. After this time, the curing process begins for many product variants. However, when filling holes or cracks in wooden workpieces, you still have the advantage of being able to work with several small quantities in succession. So you don’t necessarily have to mix the total amount all at once as with other projects.
- If in doubt, it is better to let a little more resin flow into holes and cracks than too little. After all, you have prepared your work carefully with tape before. This way, the excess resin cannot simply run off to the side but is usually contained. If unwanted residues should actually be removed after the casting process, you can remove them relatively easily with an eccentric sander. If you follow all these steps exactly, it should be no problem to upgrade wood with epoxy resin and fill holes in the wood.
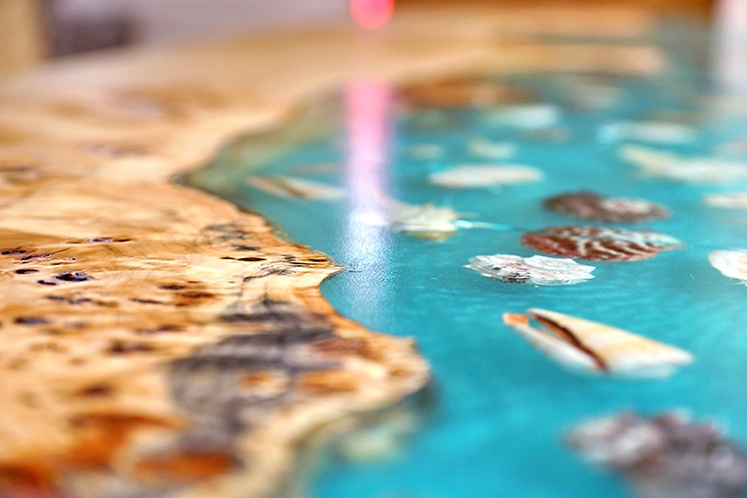
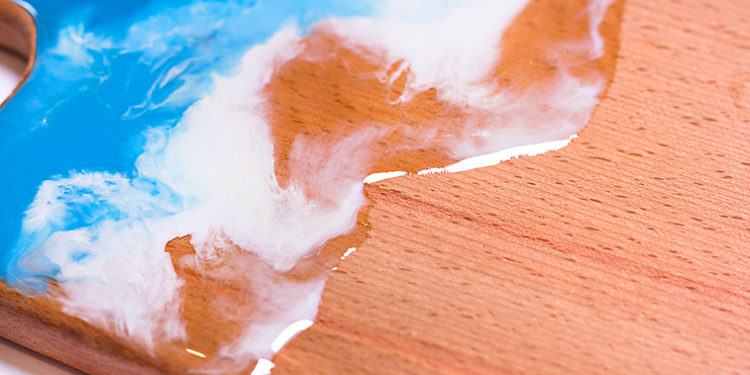
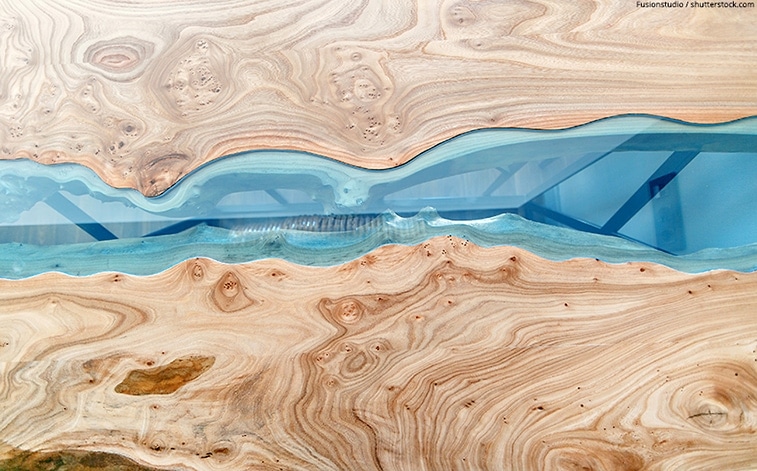
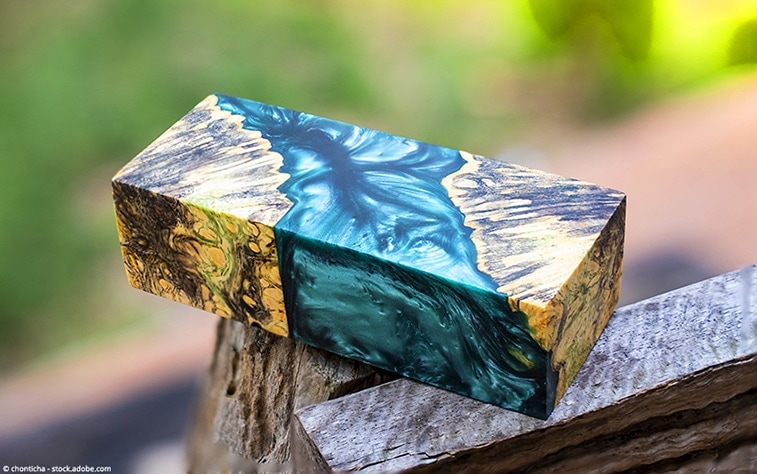
Project # 3: Epoxy Resin Casting with Wood
Exceptionally attractively grained pieces of wood can be cast in epoxy resin to create your own wooden squares for knife handles, for artistic turning or for other woodworking projects. There are almost no limits to your imagination, whether your goal is an aesthetic work of art or the creation of individual pieces of resin jewelry.
The following materials are required for mold casting of wood epoxy resin:
- Molds made of silicone, which are available in a wide range of sizes and shapes in the relevant trade. These molds are suitable for a quick start in creative projects, as the selected piece of wood is simply placed in position in the mold and the liquid wood resin is poured in.
- Silicone molds from our own production or corner-shaped casting molds made of special boards with synthetic resin coating. The latter is first rigidly connected with screws and then sealed at the joints with suitable silicone. As this requires a certain amount of experience and skill, you may have to accept slight setbacks during the first attempts.
Tip: For molding with resin, it is very important that you observe the manufacturer’s instructions regarding the maximum layer thickness for each individual casting process. If necessary, you can pour several layers on top of each other, whereby it is important that the previous layer has hardened in each case, but not yet fully cured.
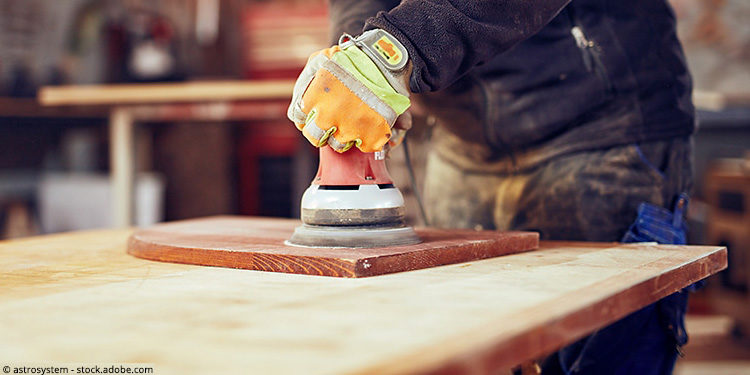
After Hardening: Sanding Resin
The sanding that is sometimes necessary after curing is not much fun for many creative artists. For a really perfect end result, this step may nevertheless be very important for all the project variants presented. At this point, however, it pays off if the work has been done very precisely beforehand: Then the amount of work involved in sanding is sometimes very little.
For most products, epoxy resin sanding should be carried out between 48 and 72 hours after the casting process. Once the resin has completely hardened, the sanding work can be quite tedious because of the very hard surface. However, it is still possible to sand the surfaces later. The following basic procedure should be followed when sanding epoxy resin:
- When sanding, work your way from a relatively coarse grain (80 grit) to a fine grain (2000 grit). In this way, you can use the finer grit to remove the sanding marks of the coarser grit for a more polished look.
- Smaller workpieces with epoxy resin can be sanded by hand. However, all larger surfaces are better finished with a suitable eccentric sander.
- You will achieve particularly good results with wet sanding. After all, not only can a finer sanding pattern be achieved, but the dust produced during sanding is also bound by the water used.
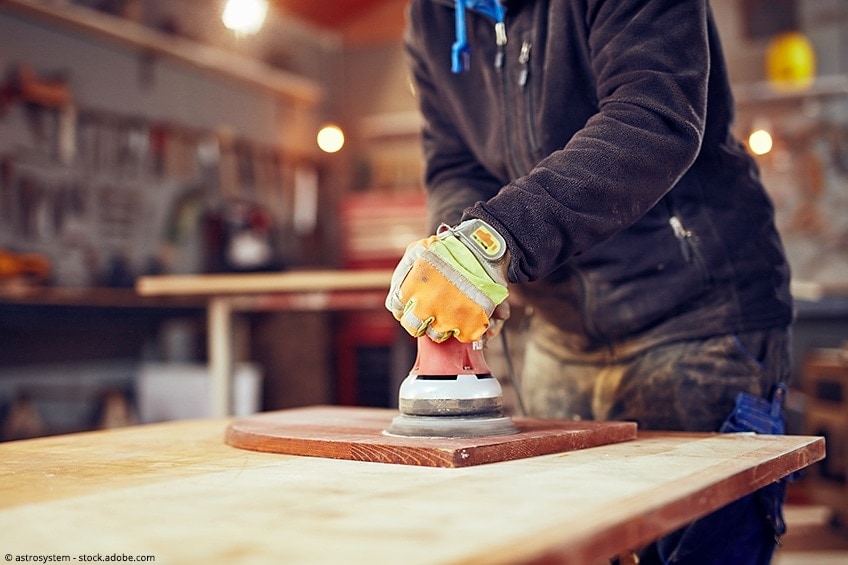
Tip: Any sanding dust (from wood or epoxy resin alike) should not be inhaled for health reasons. Therefore, for the sake of your lungs, you should always wear a well-fitting breathing mask when sanding.
The Perfect Finish: Polish, Oil or Lacquer
After curing, epoxy resin surfaces are very robust by themselves and do not necessarily require a further treatment step. However, they can be made much shinier if they are expertly sanded and then polished. Remember that the wooden parts of your artwork are also still untreated (unless completely covered with a layer of epoxy resin) and should be protected from moisture.
- Smaller workpieces can be polished by hand with a suitable cloth and some polishing paste. Simply polish the surfaces with circular movements until they have the desired shine.
- On larger surfaces such as a sealed wooden floor or a covered tabletop, it is worth using a professional polishing machine. With this machine, the work is not only done faster, but sometimes an even higher gloss factor can be achieved than when polishing by hand.
- Wood surfaces can usually also be polished without damaging their surfaces. There are of course exceptions, for example natural wood surfaces with original bark.
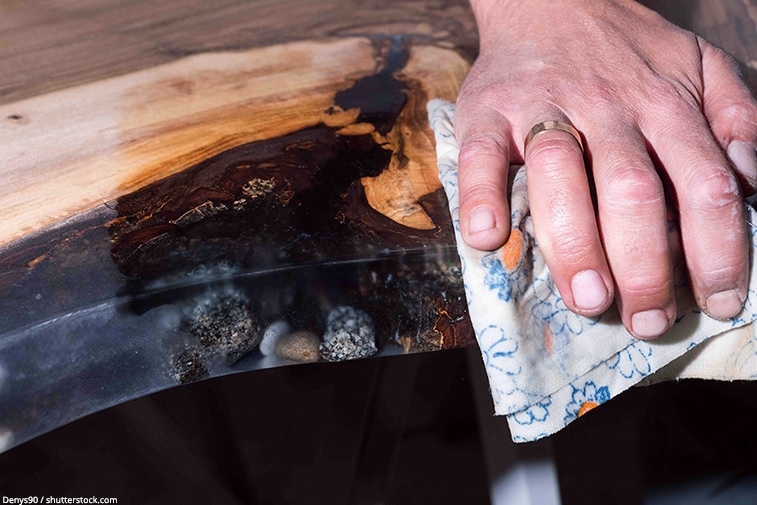
For a perfect finish, we recommend using a high-quality polyurethane lacquer from a well-known brand or manufacturer. Alternatively, you can also use so-called hard wax oil, with which you can finish both the wooden surfaces and the epoxy resin. This oil usually takes about two to three days to completely soak into the wood and dry. Then you can either apply another coat or polish the surfaces again for more shine.
Finally, you can optionally apply carnauba wax to the surfaces to protect both the wood and the epoxy resin from environmental influences and damage. This wax is one of the hardest natural wax types. You can apply it with a polishing machine or a lambskin pad on a drill and spread it evenly. You can find more information in our tutorial on how to polish resin.
Our Conclusion
With these tutorials for different projects using epoxy resin for wood, we hopefully could give you an exciting insight into a very interesting hobby . With this information, you should be well prepared to start immediately with the planning and execution of your own creative projects.
We wish you great ideas and much success!
Title image: Julia Lototskaya / shutterstock.com

Larissa Meyer is a 32-year-old mother from Michigan and creative spirit since childhood. Her passion for painting and drawing has led her to an education as an illustrator and a career as a freelance graphic designer. She has a Bachelor of Fine Arts in Illustration and a degree in Graphic Design. Larissa is a talented artist who is able to master a wide range of styles and techniques to bring her artistic vision to life. Her greatest passion is currently fluid painting and epoxy resin art. Larissa’s love for art and her knowledge and experience in illustration make her the perfect Creative Director for our fluid-painting.com team. She is the creative head of our team and shares her passion and knowledge with our community through articles and tutorials.
As a mother of a 2-year-old daughter, Larissa also understands the importance of fostering creativity in early childhood. She uses her experience and knowledge to help other parents inspire their children and develop their artistic skills as well.
Learn more about Larissa Meyer and about us.