How to Clean an Oil Painting – Keep Your Paintings Vibrant
This post may contain affiliate links. We may earn a commission from purchases made through them, at no additional cost to you.
Paintings are undeniably beautiful, no matter what era they are from. Many artists have found ways of preserving their work to outlast their lifetimes. Regardless of such efforts, paintings are prone to dulling from collecting all the dust and grime that crosses their path. This tutorial will teach you how to clean an oil painting. We will talk about the various brands that have created amazing products to clean all sorts of things from your oil painting on canvas, and other surface materials. We will even talk about what products are best suited for cleaning varnish from the surface of your oil artworks. Not only that, but we will also include instructions so that you can learn how to clean an old oil painting without causing too much damage. By the end of this tutorial, cleaning oil paintings will seem less impossible and far more approachable.
Reasons for Cleaning an Oil Painting
Oil painting might be long-lasting in terms of the sturdy medium they are painted with, but that does not mean they are impervious to dirt and grime collecting on the surface. You will need to learn how to clean an oil painting if you want it to look as vibrant as it was when it was first painted. Simply cleaning it with water and soap will not be enough for most of the dirt, especially if it has collected there over a long while and has been left unattended.
The painting you want to clean may be an heirloom that was handed down through your family. Your family members may not have noticed the dirt, but you have, and that might trigger a cleaning frenzy in you whenever you look at it. Or, maybe you went thrift shopping, and you found a masterpiece that was hidden amongst a hoarder’s belongings, and the dirt from sitting in a dusty room for too long has made the colors seem all dull and lifeless. Cleaning oil paintings is amazing because it can bring life back into the swirls of blended colors.
Prevention is Better Than a Cure
When you are finished with your painting, the appropriate storing method should be taken into account. If you were to leave it in a place where the dust and grime can easily get to it, then, sure enough, it will become dirty within no time at all. It is always a good idea to practice some preventative methods so that you don’t have to clean your artwork too often. Cleaning can be damaging to oil paint, so you do not want to clean any painting too frequently. For your benefit, we have compiled a list of methods for preventing dust from collecting on the surface of your painting.
Frequent Dusting
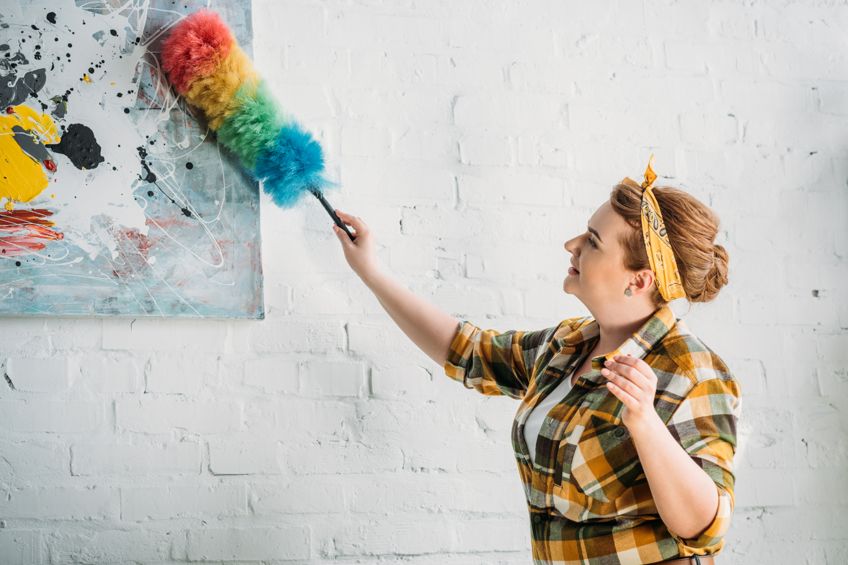
Dust is truly the bane of each of our existence. It is the root of all grime because, without dust, there would be no dirt for any oil residues that may spill or humidity that hovers in the air to collect and make sticky. We always recommend keeping the place where your oil artworks are kept free of dust, and the best way to do this is by dusting the place regularly. You might prefer to just dust down the painting itself so that the dust does not settle on the surface of the paint. Make sure that you are using a clean feather duster, and that it will not damage the particular finish of the painting.
Protective Glazing
If your painting has a glazed finish, the chances are the artist applied this purposefully to prevent any dirt from ruining the actual artwork. We recommend this layer to be added onto any oil painting on canvas or other surface materials for that matter. Make sure to leave a small gap of about 0.5 cm at the top of your painting without glazing.
A layer of glaze is ideal for adding that professional feel to your artwork, but they also have other benefits like anti-static properties. This will prevent dust from settling on the surface of the painting if it were to be left in a room unattended for a while. Not only that, but nicotine stains from cigarettes, liquid spills, or just the humidity in the air will pose less of a threat to your oil painting.
Store Appropriately
Where you choose to store your painting is also crucial to the survival of the artwork, as well as the prevention of dirt from collecting on the surface that will make the colors of the paint less vibrant. If you keep your artwork too close to the sunlight, the sun will zap the colors, regardless of the dirt and grime. Make sure that you do not hang a painting in your kitchen, or the bathroom, because the humidity from cooking and showering will cause the dust that settled on the painting’s surface to make a grimy mess – maybe that is how you came to this page and in that case, you should move the painting to a more suitable spot, away from excessive sunlight and humidity and dust.
Proper Handling
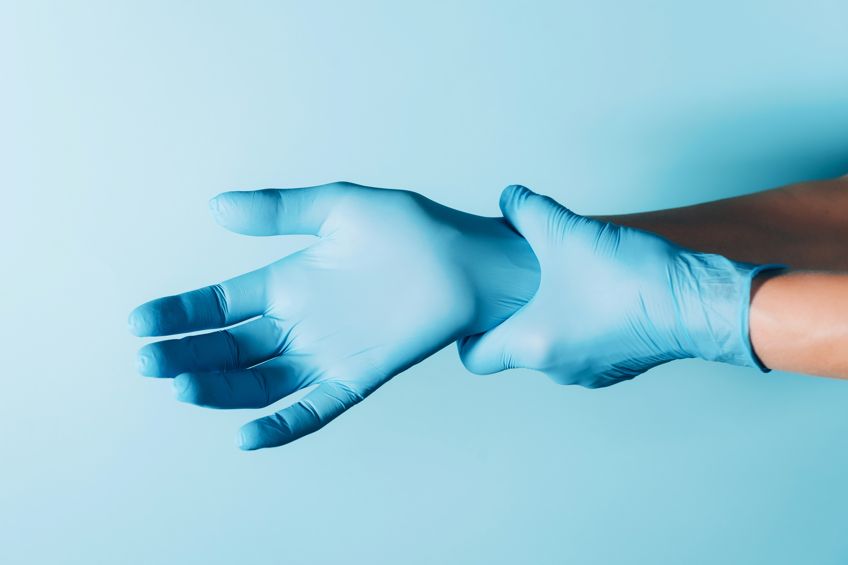
Some paintings do not have the luxury of protective glazing to keep them safe. Many things can happen when you are transporting the painting from place to place because our hands are covered in grease and dirt. Make sure that you are wearing surgical gloves when you handle a painting so that it does not get greased up from your fingers. Dust will follow the grease, and by then you will have a big job of cleaning. This applies even if you are simply moving it from one room to another.
Managing Accidental Damage
It is never possible to predict an accident, the very word is that it was not done on purpose, and that lack of deliberate behavior cannot be predicted. Accidents happen, and this does count for the random liquid spill that found its way to your oil painting. If something spills onto your artwork, then you should be ready to clean or wipe it off immediately before any real damage is caused.
Should it be Professionally Cleaned?
The question of whether or not the painting should be taken to professionals to be cleaned is definitely up to you. Do you have the time and effort to give to cleaning the painting? Or, do you want to hand that over to someone else instead? This might be considered too high of a risk for some people because if your painting was damaged at all, in any way, the damage might come back worse. Some people prefer to learn how to clean oil paintings for themselves to prevent any careless damage.
Professionals are not limited to cleaning your painting. They are also amazingly helpful in repairing any broken frames. They can easily fix most aspects of your oil painting, and they will clean the actual artwork for you when the repair is complete. If you are lucky, you might even find a company that will clean off any varnish topcoats that may have been applied to the surface of your painting, and they might even refinish the surface with a fresh coat when they are done. You can always ask your local art supply store if they have any recommended repair companies that specialize in repairing oil paintings, or you can search online for the best reviews.
If you choose to go the professional route, you will need to be understanding and accepting that the painting may undergo some trauma in the process. The grime might need more intense cleaners to remove it, and the person cleaning it may or may not have as much love as you have for your painting, so they are more careless with it. Ultimately, no one will ever be as careful with your things as you will be. The decision is yours.
What Are Some Possible Challenges When Cleaning Oil Paintings?
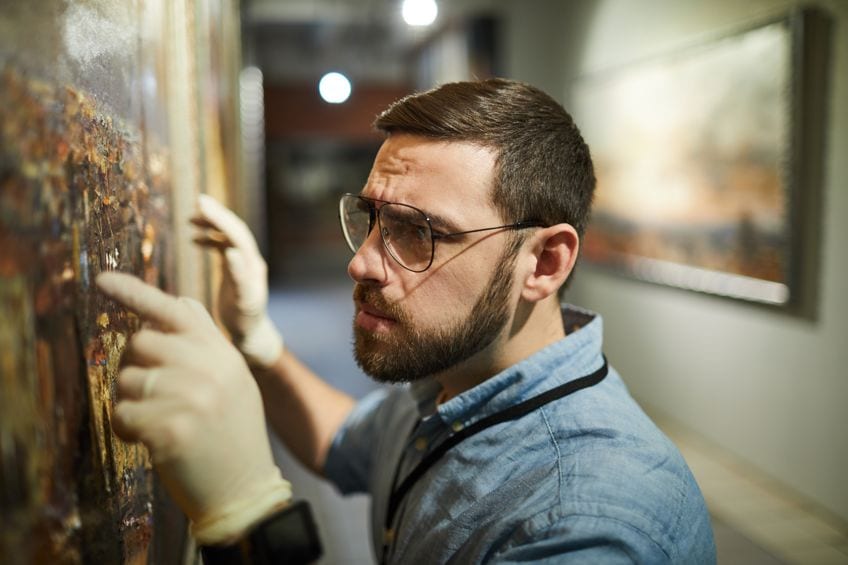
Improper cleaning techniques can irreversibly damage paintings. Even if paintings have not necessarily been damaged to the point of peeling or cracking, it is still very likely that most DIY methods will have unintended consequences on the painting. Often this means paint removal or color fading due to too much abrasion or heavy use of cleaning agents. It can also mean warping or stretching on the canvas due to lack of support and excessive pressure during the cleaning process.
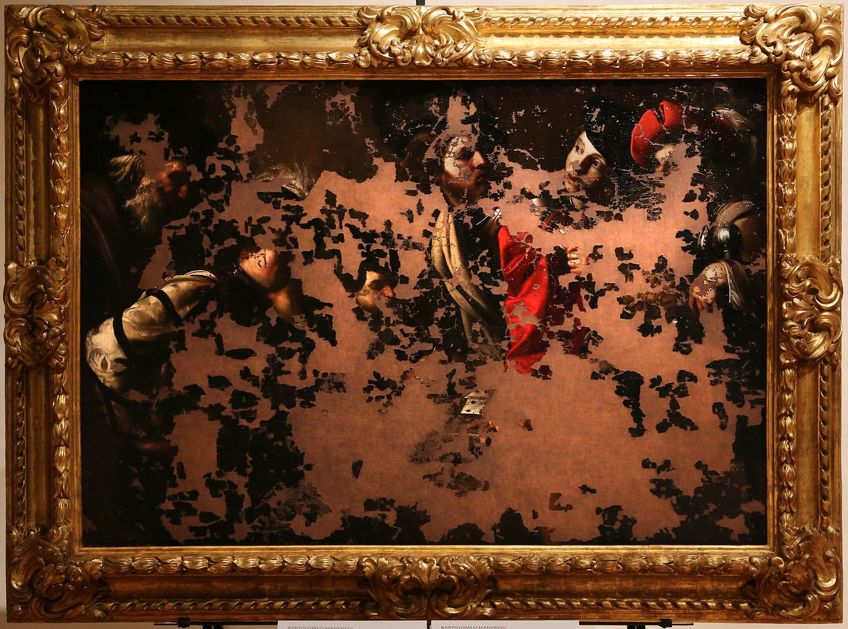
Once some of the dirt has been cleaned away, you will often encounter a layer of varnish on the oil painting. Varnishes yellow over time and lead to a washed out and dull look on your paintings. If you want to fully restore your painting the old varnish will need to be removed and a fresh coat reapplied. Removal of old, yellowed varnish is meticulous and delicate work. It is very difficult to separate varnish from the paint. You often will need specialized products to do this effectively.
If the surface of the paint is no longer properly preserved it can make the cleaning process more complicated. A badly preserved surface could mean that cracks, fissures, and gaps may appear once you begin the cleaning process. It is always a good idea to perform a spot test somewhere along the edge of the painting before continuing elsewhere on the surface of the painting. This allows you to see how the painting is going to react to your chosen cleaning method.
How Not to Clean an Oil Painting
The internet is filled with blogs and reviews that people have made when they attempted to clean their paintings. All you need to do is type in some specific wording into your search engine, and you will have a world of other people’s experiences to help guide you through the process. If you are thinking of cleaning the painting yourself, there are a few things to keep in mind that might not help you at all, but rather ruin the artwork altogether. There are so many home-based remedies that will help to clean the dust and grime from your artworks, but can cause significant damage. Here are a few examples:
Paper Towels or Cloths
One of the worst things you could do for your oil painting is to use a piece of paper towel to clean it. We know that you have the best intentions, but sometimes that is not enough, and you need to learn how to clean an old oil painting using the appropriate methods, ideally with suitable oil painting cleaners. A paper towel might leave behind tiny bits of itself as you wipe it across the painting’s surface. This will cause the painting to look all grainy. Even if you manage to clean the dirt off with a paper towel, you will have another cleaning expedition on your hands to rid the painting of the minuscule bits of the paper towel.

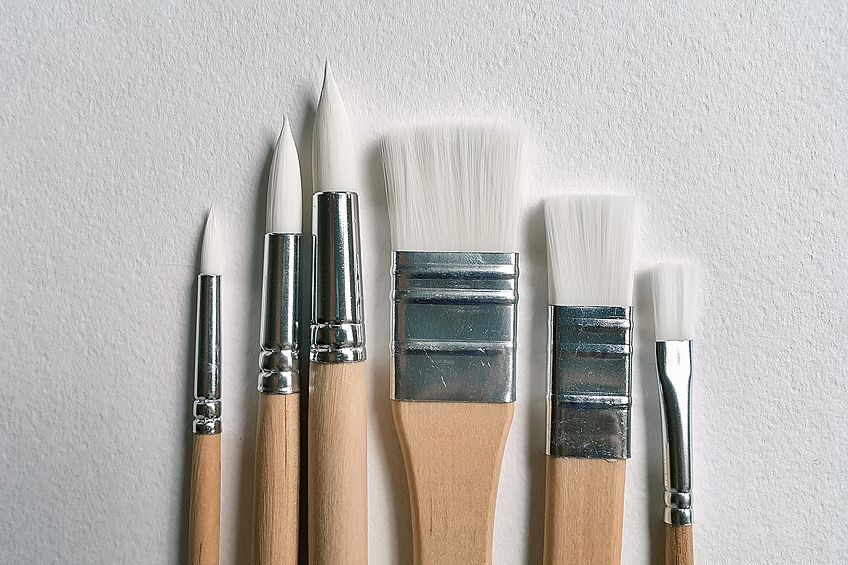
Feather Dusters or Stiff Brushes
If you want to dust your painting down, we do not recommend using any old feather duster lying around. You need to make sure it is specially made for things that can get scratched easily. These feather dusters will not have the rigid shafts that form the spine of each feather. These can scratch surfaces very easily. Rather opt for a duster that has no feathers, or one that is made out of some sort of fluff. An old, but still soft-bristled paintbrush is the ideal option for dusting your oil paintings.

Water
Water-based products should be avoided at all costs. No oil painting needs to be cleaned with water, or products based in water because the water will seep through the canvas and it might loosen its grip from the wooden frame. Not only that, but the water will also break apart the pigment from the paint, and this might eventually make the painting’s color fade and seem lifeless. As the pigment separates from the binding agent, you might even notice how the paint start to peel off or become flakey in certain areas. An affliction that will spread throughout the painting until the whole thing is ruined.
If you need to clean your painting of any type of dirt, grime, or whatever else, we recommend using specially created products – the type that is not water-based.
Household Detergents, Vinegar, Lemon Juice, or Rubbing Alcohol
You might have thought about using one of your home cleaning remedies, the type that your grandmother taught to you, and swore would never fail. In most cleaning cases, that may be true, but not when it comes to your oil painting. There are a few things that you can find easily in most homes, but should not be used.
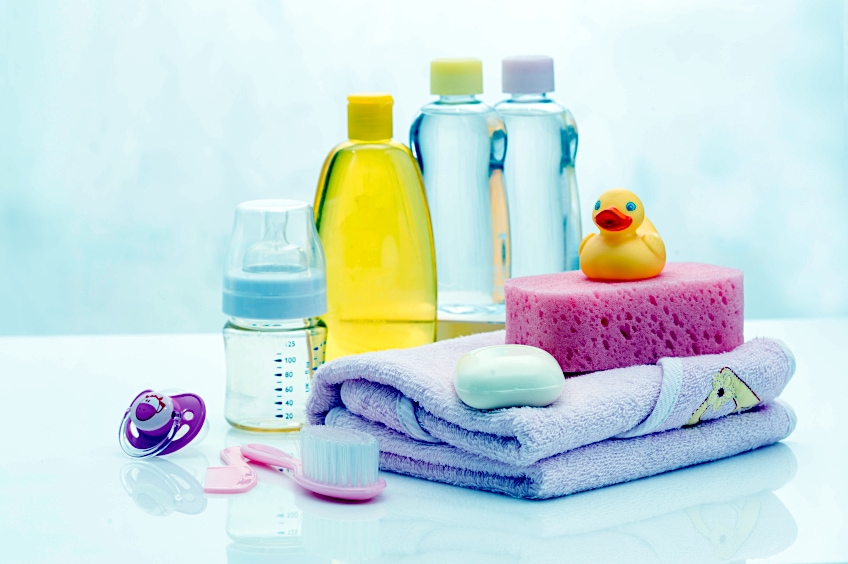
Baby Oil
This might seem surprising, but for some, it might seem like the best option to use for cleaning an oil painting. This is not true, and we need to assert the fact that baby oil is damaging to your artwork, regardless of it being an oil-based product, like the oil paints used for the painting. What happens is that when you are done cleaning (because it will get the job done) there will be a residue left behind on the surface of your artwork that causes more dirt and grime to collect than what was there before.
Bread or Potatoes
This myth that you can clean your oil painting using these two starches is an odd one. If your granny did not tell you about this one, then count yourself lucky, because many people have been using these two foods for cleaning their artworks without realizing the damage they are causing. Bread leaves behind crumbs that might be easily brushed away when they are big enough to be noticed, but might be left behind if they are too small to be seen. Potatoes leave behind a residue from the starchy liquid inside the potatoes, and this causes the dust to settle more easily.
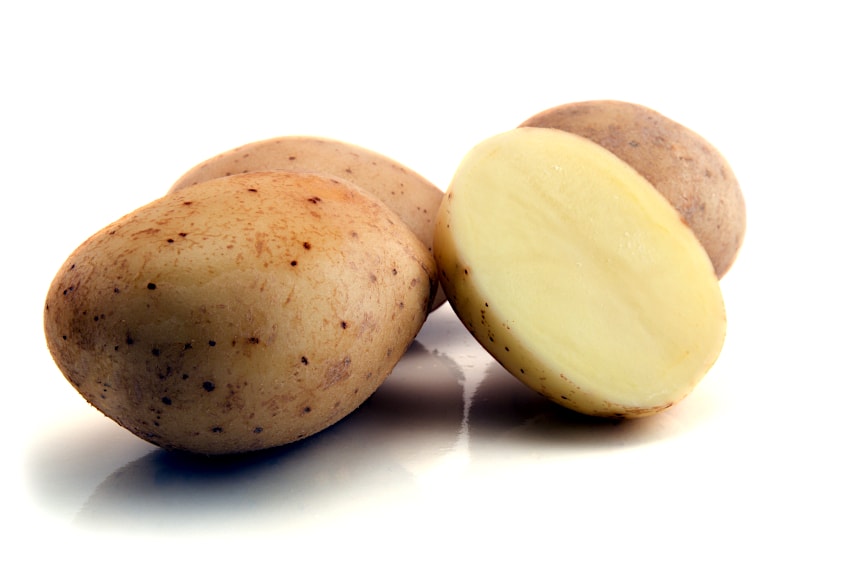
The worst part about the bread and potatoes myth is that smearing these over an oil painting creates an ideal environment for mold to grow on the surface of your painting. This is not just bad for the painting, it can be harmful to your health as well.
What are the Different Methods of Cleaning Oil Paintings?
Now that we have covered what not use as oil painting cleaners, we can now have a look at the best methods for cleaning your painting. Here are three different methods that are surely never going to fail you and your oil painting that needs cleaning.
Cleaning Oil Paintings with Soft-Bristled Brushes
As we have mentioned before, we recommend using an old paintbrush to clean the painting. Make sure that the bristles are still soft and malleable so that they do not cause any damage to the surface of the painting. The soft bristles of the brush will be able to get into the groves of the painting, which is helpful for those paintings that are more textured.
How to Clean an Oil Painting with a Soft Paintbrush
Before you start cleaning the painting with your soft-bristled brush, you will need to gather all the tools and materials needed for the job. These include the following:
- A work area that is well lit and ventilated
- Old newspaper, or a plastic tarp to protect your work area
- Paintbrush with very soft bristles
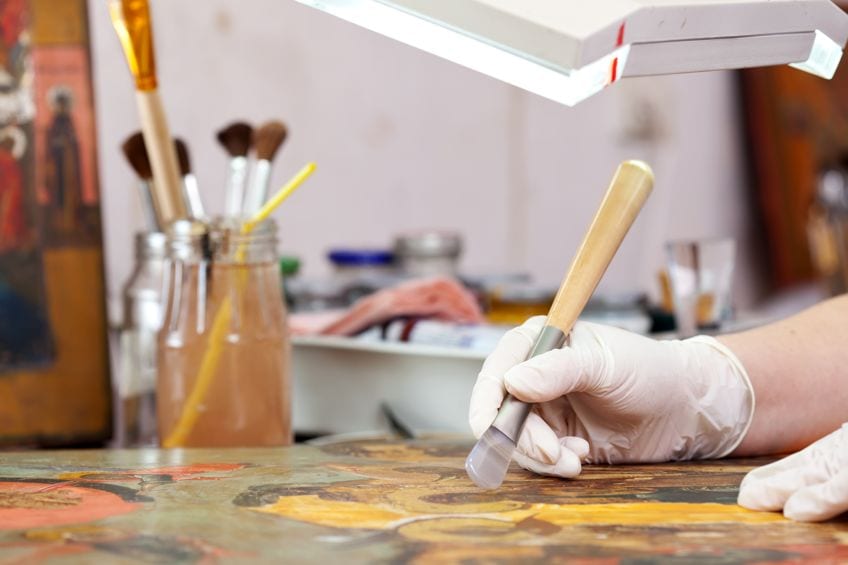
Take the painting off the wall, or get it out of storage, and lay it down in the well-ventilated working space that you have set up. Give your painting a good examination to make sure there are no flaking bits of paint or varnish, and if you notice some loose dust or residue, then you can dust them off using the type of duster that we spoke of earlier in this tutorial.
The best way to dust a painting is to angle the actual painting in a downward slope. You must work from the top half of the painting, and dust going down the slope of the angle you have created. The dust will simply fall off the surface of the painting and onto the plastic tarp. If you notice any bits of the actual paint falling onto the tarp, then you should rather get a professional to clean the painting
Saliva
Saliva is not something that most people would consider using as a cleaning detergent for your oil painting, and we can bet that most of you are a little grossed out right about now. Surprisingly, your saliva is one of the handiest things about ourselves. There are enzymes in our saliva that help to break down the food we are eating, so surely those enzymes could break down the grime that collects on your oil paintings?
How to Clean an Oil Painting with Saliva
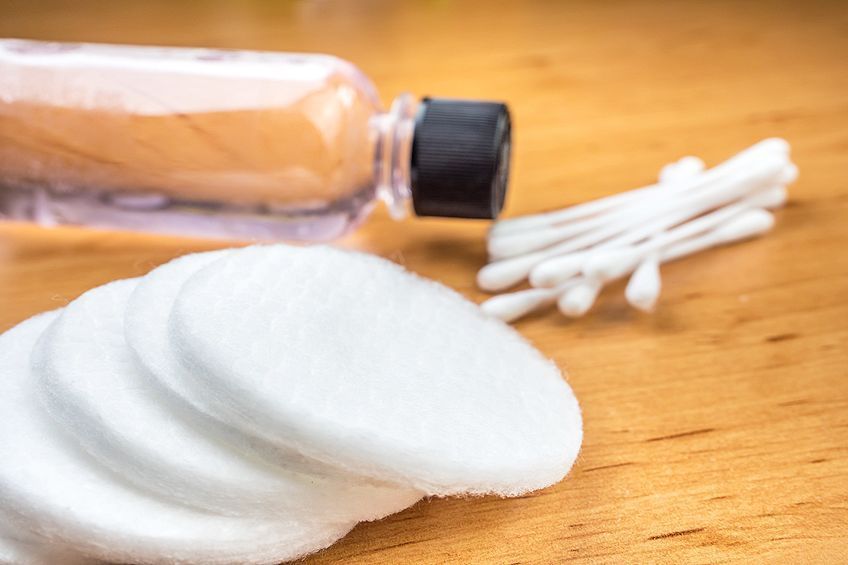
If you are adventurous enough to give your saliva a chance to clean your beloved painting, then here are the bits of equipment you need for the process to be possible:
- A well lit work area
- A folded towel or a T-shirt
- Cotton swabs or cotton pads
The first thing you need to do is fold the towel up, or maybe your T-shirt if you prefer to use that, and place the painting facing upwards onto either one (whatever you chose to work with). This helps to keep the surface of your painting flush, and prevents it from warping underneath the pressure you apply from cleaning it. If you like to see the difference that your cleaning has made, you should take a photo before you start cleaning so that you have the comparison later.
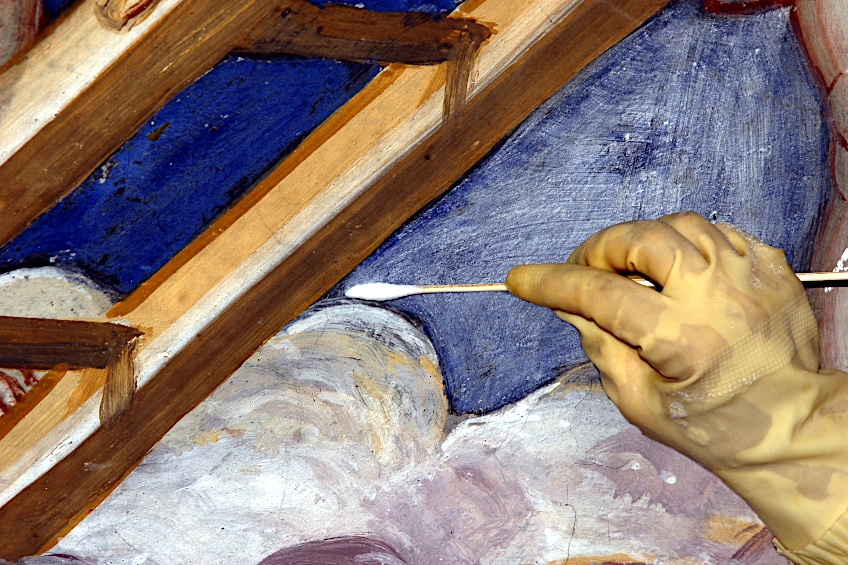
Get a cotton swab out, and put in your mouth, the source of your saliva. Swirl it around a little and make sure it gets damp the whole way through. Do a spot-test before you go on ahead with your whole painting, and make sure your saliva is not too acidic (we are all unique, so you can never be sure).
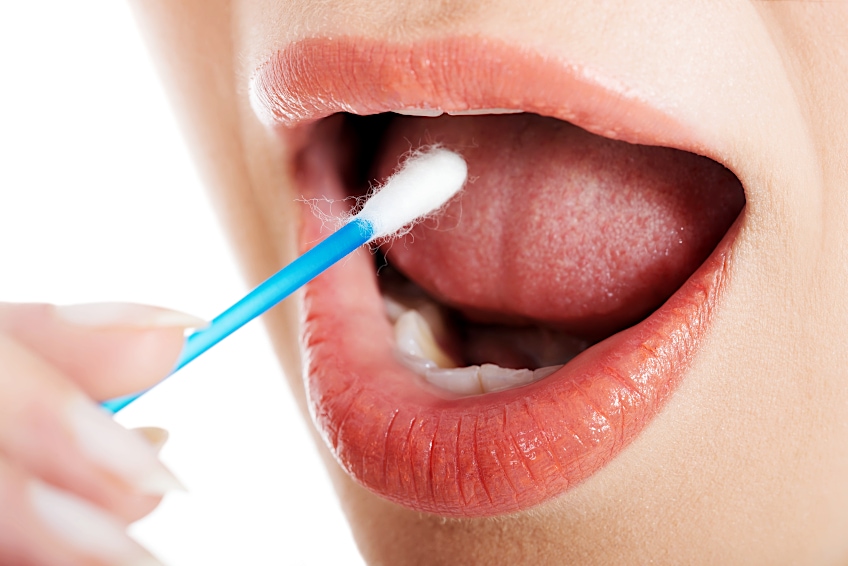
Roll the swab over the painting, and keep swirling in rounded motions so that the swab collects the dust without leaving a steak of grime behind as it would if you used a swiping motion. Make sure the cotton swap does not peel off any of the actual paint and make sure you stop the moment you see this happening – the professionals can deal with it from then onwards.
Picture Cleaners
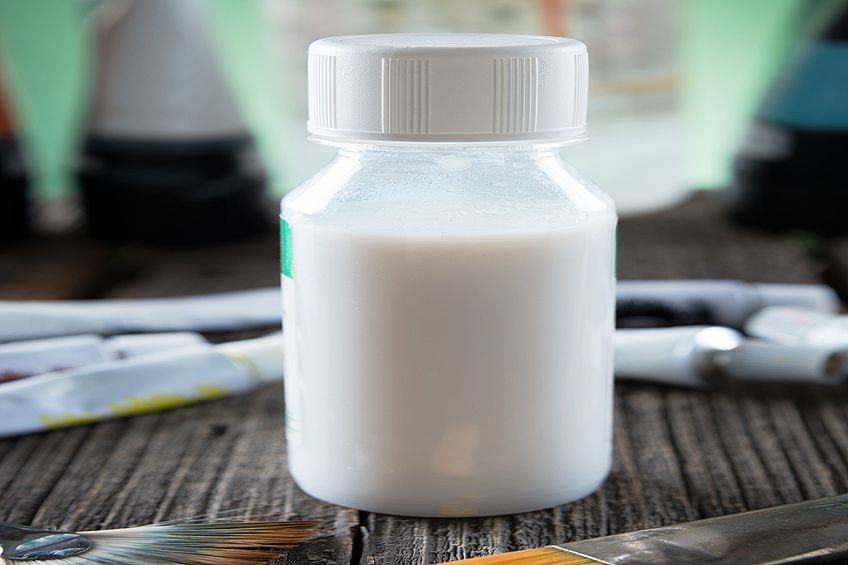
Let us say that you went on ahead and tried not one of the methods that we have spoken about in the above passages, but you tried both of them, but neither worked. You can always use an oil painting cleaner that is specially designed to clean oil paintings without damaging the surface of the artwork. If the painting in question has old varnish that unfortunately turned a yellowish tinge, then you might be pleasantly surprised with the brand Winsor and Amp, Grumbacher Oil Painting Restorer, and possibly the Newton Artists’ products for cleaning oil paintings because they will help with lightening the yellow tinge from the varnish.
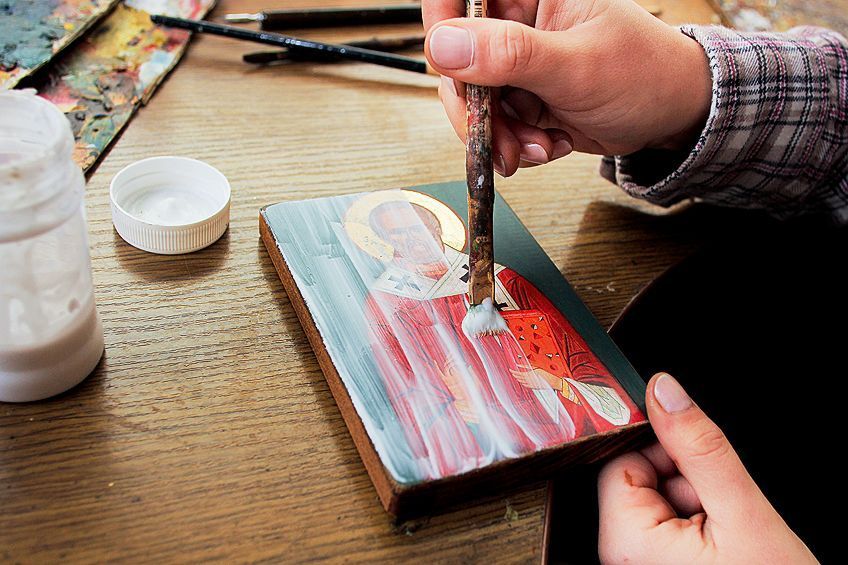
Cleaning an Oil Painting with Picture Cleaners
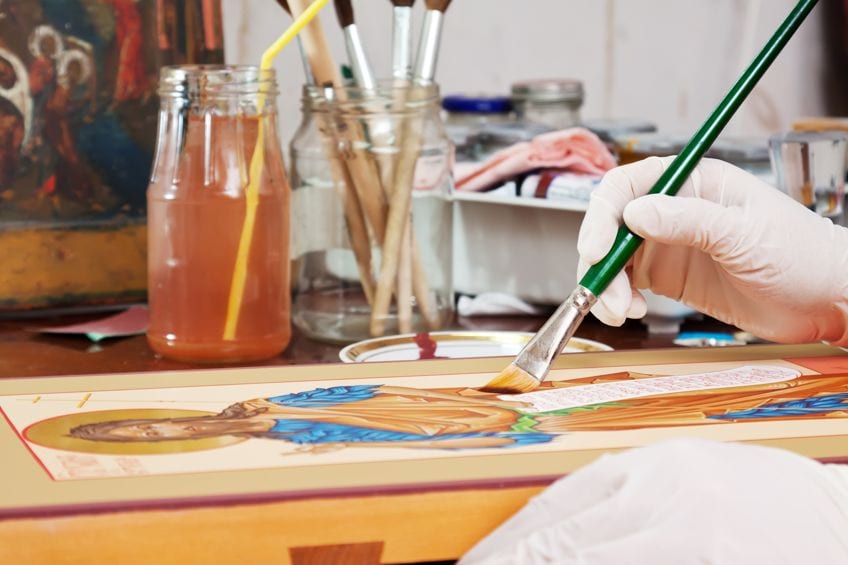
The first step in learning how to clean an old oil painting is to lay it down with a towel or an old T-shirt that is folded up underneath it. This will prevent the surface of the canvas from warping under the pressure you apply to it when cleaning. Not only that but if any stray drips from the oil painting cleaners might fall down the side of the painting and onto the countertop you are working on. Depending on how important the surface top is, this is a necessary step.
Make sure that you have adorned yourself with the right amount of protective clothing. Sensitive skin will react in uncomfortable ways to the detergents that you are using. Some surgical gloves will work perfectly fine. The workspace you have chosen ought to be well-ventilated. Make sure that all the doors and windows are open so that the airflow is not compromised.
Before you start lathering on oil painting cleaners, you will need to make sure it is compatible with the paint, and the surface it is painted on. Dip a cloth into the detergent, and then rub it softly over a certain area that is not as obvious, and see what happens. If the painting itself starts to wash away, then that is not the right cleaner. If it gets brighter from the dust and grime lifting off, then this is the right detergent for you.
Manufacturers will always include a detailed description of the product on the label of the packaging. There you will find the instructions on how to use it, how long to wait for the detergent to do its thing, and how to care for the painting after you have finished cleaning it.
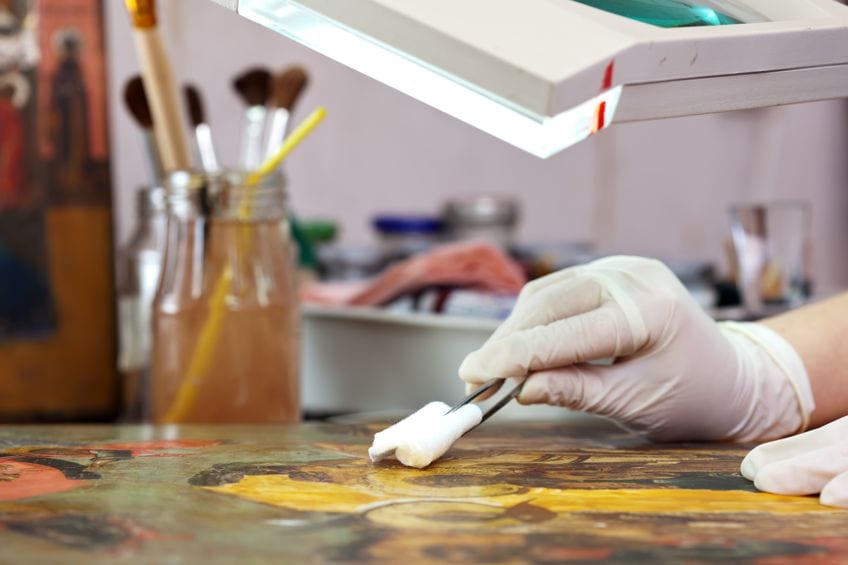
If you need to wait a few moments for the detergent to kick in and lift the grime and dust, then make sure you have allocated the right amount of time. You can dip a cotton pad into the cleaning solution of your choice and then wipe the painting down. A cotton swab might be better for the areas of the painting that are textured, like if the artist used a palette knife to paint with. Replace the cotton pads and the cotton swabs when they are too dirty.
Do not press down too hard because the oil painting cleaners will still pose a risk of smudging the paint. We recommend taking your time, because if you are working too fast, you might not realize how hard you are pressing, and you might end up smudging the artwork anyway.
What to Do About Yellowed Varnish on an Oil Painting?
Learning how to clean an oil painting is not all about cleaning off dirt and grime. There is also the matter of those oil artworks that have a layer of varnish painted as the topcoat. Often, the artist may have used whatever was available at the time, or maybe they opted for the clearer option. Either way, there is a yellowing tinge that appears on some varnishes that are not ideal, and it is not exactly the most aesthetically pleasing look.
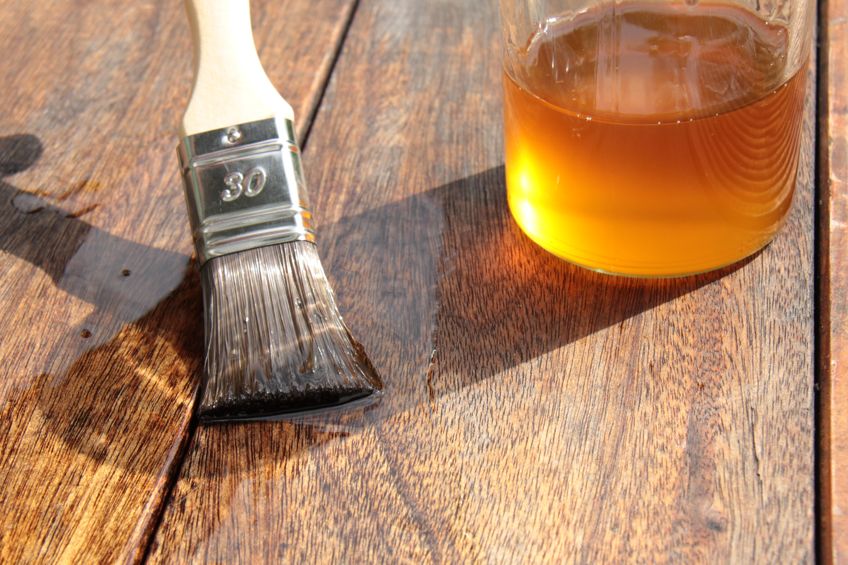
Using solvents might seem like the most obvious answer, and it is the most popular method for removing varnish from your painting, but it does come with its risks. These risks are not small either, so make sure that the solvent you choose is not the harshest of solvents. Make sure that you are wearing protective gear, and that no flame sources are nearby – solvents are super flammable.
Take a look online, because that is the best place to find reviews from people who have tried and tested the different solvents, and they have posted their experiences online for people like you! Make sure that you are using a solvent that is not too strong so that you can remove the varnish and not destroy the oil painting underneath. Let the experiences of others help you, they have done the trial and error, so you might as well not risk the beauty of your painting, and follow their suggested products.
What is also just as helpful, is knowing what type of varnish you are dealing with. This might be as possible as it is for some of you, because some paintings have been inherited from some distant family member long passed, and the chances of them having made a note about the type of varnish that was coated on the surface of the painting are not very high. You can even take the painting for something called an appraisal, where professionals will be able to determine what the type of varnish is, and they will even remove it for you.
Those of you who cannot afford the appraisal and want to remove the varnish yourself, you can test out the type of cleaning detergents that work for the various types of varnishes on the less conspicuous areas of the painting, and see if it causes any damage, or if it lifts the varnish off the surface without ruining the painting underneath. Windsor & Amp have created a solvent that you might find to work perfectly. The last thing you will need is a neutralizer so that the turpentine or solvent product of choice does not continue to break down the painting once the varnish is lifted and gone.
If you have worked out the type of varnish and found the appropriate solvent, then you can begin the cleaning process. For this you will need the following equipment:
- A well lit and ventilated work area
- Solvent
- Neutralizing agent
- Folded towel or old shirt
- Cotton swabs and cotton pads
- Protective surgical gloves
- Glass or ceramic bowl
Removing Varnish from an Oil Painting
Old varnish on paintings can get to the point where they start to look tatty. Either it has yellowed over time, or maybe it has started to look cracked and it is peeling away. An oil painting on canvas often has some varnish painted over as the topcoat, and final seal. It protects the paint from any possible damage it might face from the climate, excess sunlight, and more problematic elements. Some artists even like to paint some clear varnish over certain areas of their painting, to give them a shiny hint, or extra highlight from sunlight shining on the area you are varnishing, like how the ocean glistens.
Let’s say you want to remove this varnish topcoat, for whatever reason. This topcoat can be removed in various ways, but we have some guidelines that you can follow, for a method that we know works.
First, you must lay the painting down on a towel, or an old T-shirt that you have folded up. This will protect your painting whilst you work. This will prevent the canvas from becoming distorted from the pressure you apply while you clean the varnish off, as well as catching any of the drips that might fall down the side of the painting. Put on some protective gloves, or surgical gloves, if you will. Dip the cotton pad you are going to work with into the solvent, and squeeze out any excess. If you use too much solvent, the painting could be ruined.
Before you go all out with your varnish, you need to work out how thick the varnish was laid on, and how strong the painting is. Wipe the solvent-dipped cotton swab on a less conspicuous area of the painting, and see what happens. If the varnish lets up, but the painting holds its ground, you can continue.
If the artists used a palette knife to paint with, there will be a lot more texture to work around than if it were painted with a paintbrush. You can deal with these areas by dipping a cotton swab into the solvent, and then working it into the grooves of the textured painting as you would have with the cotton pad. You can replace both the cotton pad and the swab when they are too saturated with the varnish and the solvent. When you are happy that all the varnish has been removed, then we recommend adding another clear coat of varnish, or you might prefer to add a thin layer of a clean oil-based medium.
At some point, just like the other decor, art and furniture in your home, your oil paintings will need to be cleaned. We trust that our article today has equipped you with all the knowledge you will need to get the job done without damaging your precious art.
Frequently Asked Questions
Can You Clean the Back of an Oil Painting?
Some artists like to clean behind the painting, on the back of the canvas as a way of preserving the color of the painting. You can do this by sweeping away the dust and grime with an old, but soft paintbrush. Make sure that the brush is dry before you use it on the canvas because moisture will seep through to the front of the canvas.
How Do I Clean a Faded Area Along the Edges of the Canvas?
In most cases, the edges of an oil painting tend to fade, mainly because most canvases are stretched on wood, and at the point of greatest tension, the pores of the canvas material becomes visible. Grime gets into these pores, as does sunlight, both of which cause fading of the pigments in paint.
Can I Use Soap on an Oil Painting on Canvas?
There are many wondrous inventions these days that have made everything we do that much more convenient. One of them is the different types of soaps that are designed for specific purposes. If you want to use soap to clean oil paintings, then we recommend using a soap with an olive oil base. There are no promises with the soaps, but many artists would still recommend one of the methods discussed in the tutorial above.
How Can I Clean Oil Paint Off of a Surface?
If you are lucky enough to catch the spilled paint before it manages to dry, then all you need to do is clean it up with a bit of water, and maybe some soap. You can do this by dipping an old cloth into some water and then wiping it away. If you are not so lucky, and the paint that you want to clean up has dried, turpentine will be your best bet in most cases. The surface that the paint is on also plays a part in this, you must make sure that whatever cleaning detergent that you use is compatible with the material the surface is made of. Turpentine is great for surfaces like plastic glass, or tiles, but not so great for porous materials like fabrics and wood.

Larissa Meyer is a 32-year-old mother from Michigan and creative spirit since childhood. Her passion for painting and drawing has led her to an education as an illustrator and a career as a freelance graphic designer. She has a Bachelor of Fine Arts in Illustration and a degree in Graphic Design. Larissa is a talented artist who is able to master a wide range of styles and techniques to bring her artistic vision to life. Her greatest passion is currently fluid painting and epoxy resin art. As a mom of two kids, Larissa also understands the importance of fostering creativity in early childhood. She uses her experience and knowledge to help other parents inspire their children and develop their artistic skills as well.
Learn all about Larissa Meyer and Fluid Painting.