How to Draw Wings – Create an Angelic Drawing of Wings
This post may contain affiliate links. We may earn a small commission from purchases made through them, at no additional cost to you.
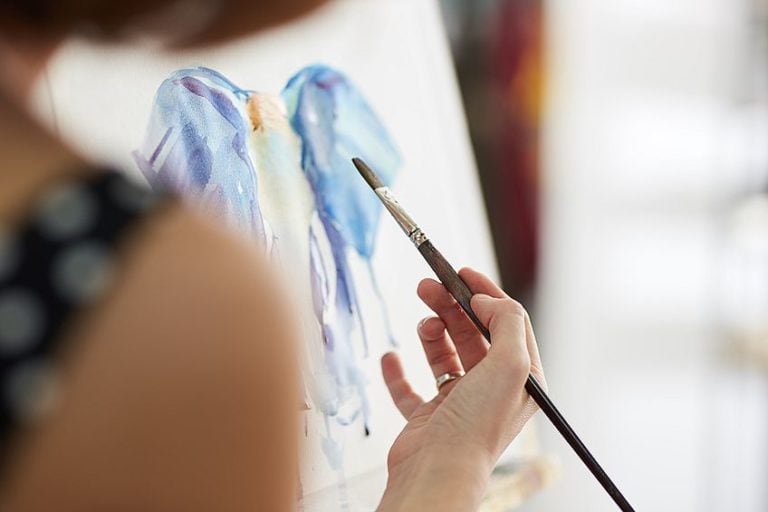
Angel wings are a symbol of heavenly beauty, purity, and grace that have captured the imagination of people throughout the ages. These majestic wings are often depicted in art, literature, and mythology as the wings of divine beings, who are messengers of love, hope, and protection. Angel wings are said to have the power to lift us, help us transcend the limits of our earthly existence, and to bring us closer to the divine. Whether we see them in a dream, a vision, or in the form of a tattoo, angel wings have a way of inspiring us to reach for the skies and to believe in the power of the unseen. With that in mind, get ready for an exciting tutorial on drawing wings! With your drawing kit in hand, we’ll guide you step-by-step in creating these stunning symbols of beauty.
Table of Contents
- 1 How to Draw Wings Step-by-Step
- 1.1 Step 1: Draw the Main Shape
- 1.2 Step 2: Shape the Wings
- 1.3 Step 3: Add the Arch to Your Wings Drawing
- 1.4 Step 4: Draw the Flight Feathers
- 1.5 Step 5: Add the First Feather Layer
- 1.6 Step 6: Draw the Second Feather Layer
- 1.7 Step 7: Continue to the Third Feather Layer
- 1.8 Step 8: Draw the Final Feather Layer
- 1.9 Step 9: Apply the First Color Coat
- 1.10 Step 10: Continue to Color Your Wings Drawing
- 1.11 Step 11: Shade the Outer Feathers
- 1.12 Step 12: Shade the Inner Feathers
- 1.13 Step 13: Finalize Your Drawing of Wings
- 2 Frequently Asked Questions
How to Draw Wings Step-by-Step
Congratulations on deciding to learn how to draw wings easily! Get ready to embark on a creative journey that will bring you closer to these ethereal and graceful symbols of divinity. Drawing angel wings can seem daunting at first, but with some guidance and practice, you will soon be able to capture their heavenly beauty on paper. Start by studying the intricate details of angel wings, such as the curvature of the feathers and the play of light and shadow. Experiment with different techniques to create a sense of depth and texture, and don’t be afraid to let your imagination soar. Remember, each set of angel wings is unique, so allow yourself the freedom to explore different styles and interpretations. Above all, have fun and enjoy the process of bringing these magnificent creations to life on your canvas.
Follow the below collage which depicts each step you will take to finalize your drawing of wings.
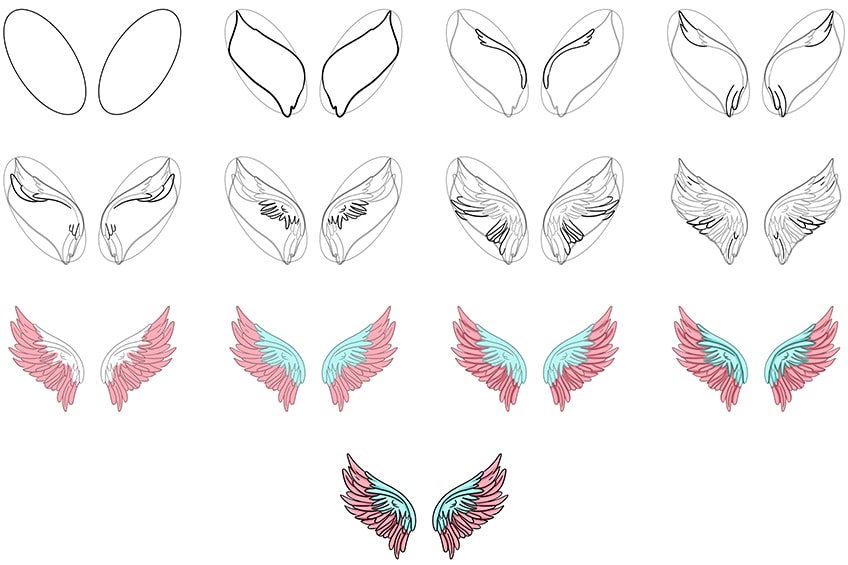
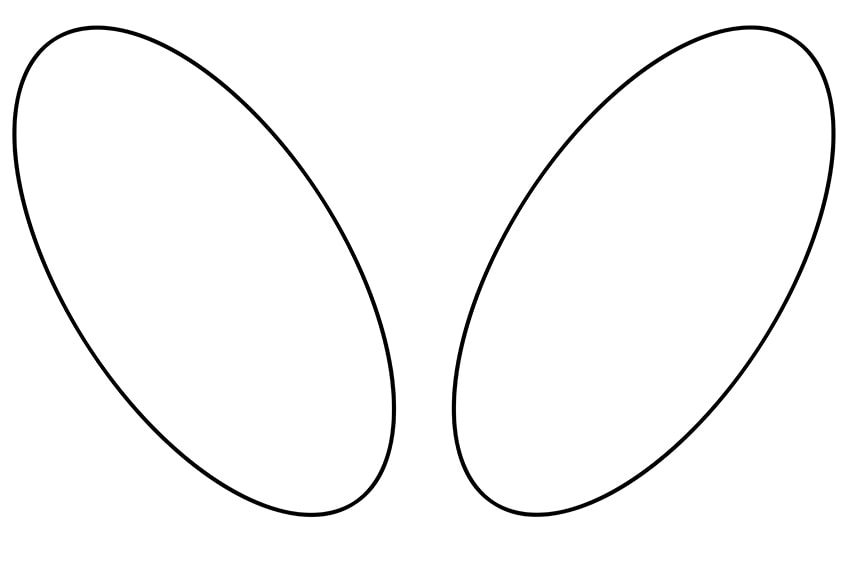
Step 1: Draw the Main Shape
To begin your wings drawing, start by drawing two identical, inverted oval shapes.
Step 2: Shape the Wings
Use the ovals previously drawn to aid you in drawing the wing outline shape.
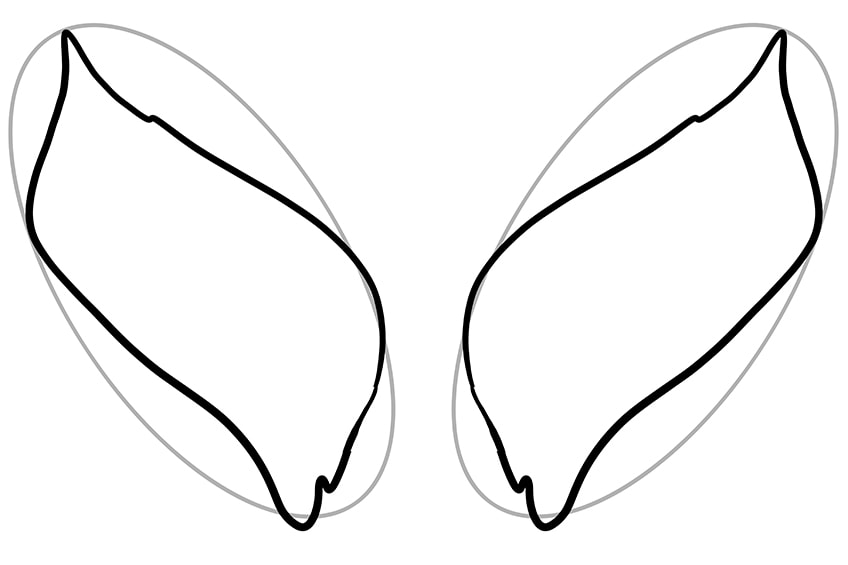
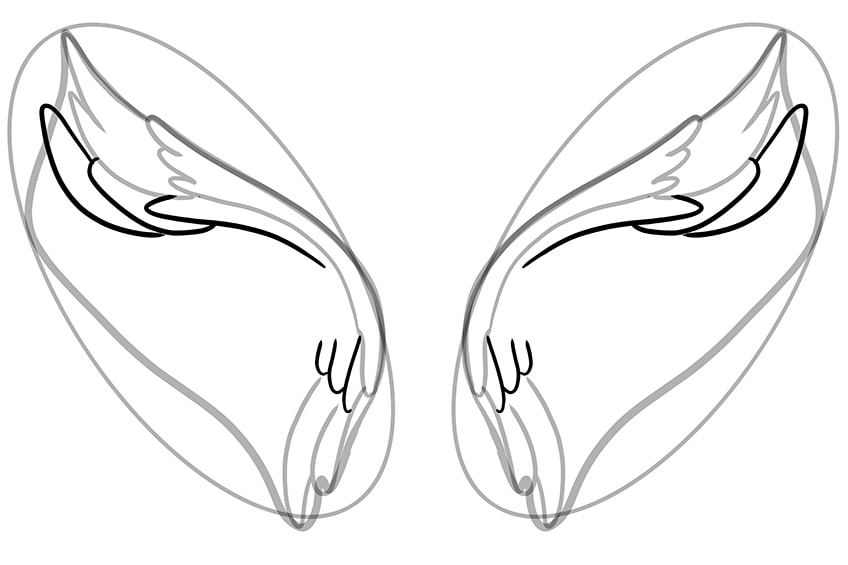
Step 3: Add the Arch to Your Wings Drawing
Attached to the wing shape, draw the wing arch which will be the mainframe that spreads the feathers out.
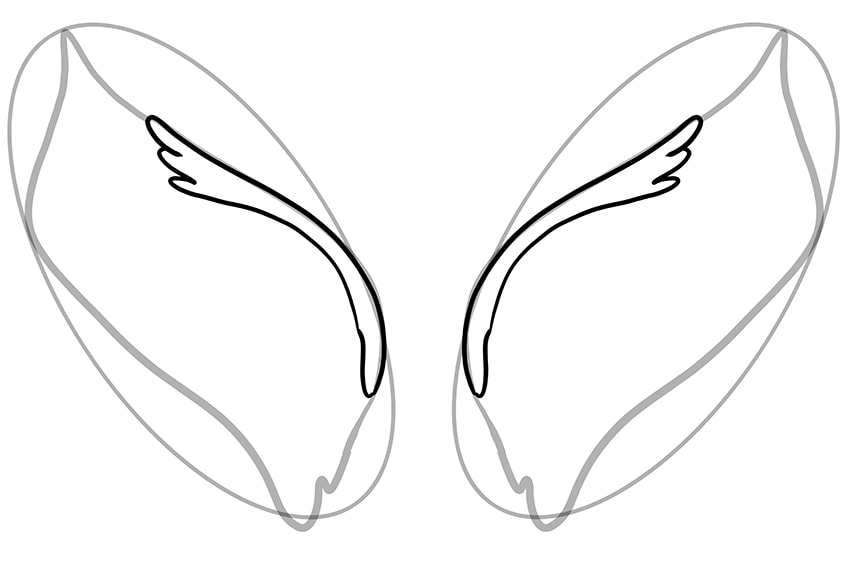
Step 4: Draw the Flight Feathers
The flight feathers are the main, largest feathers of the wing set. To draw these, start at the top of each wing and follow the curvature of the wings. Finish off by drawing the bottom flight feathers, also leading with the curvature of the wings.
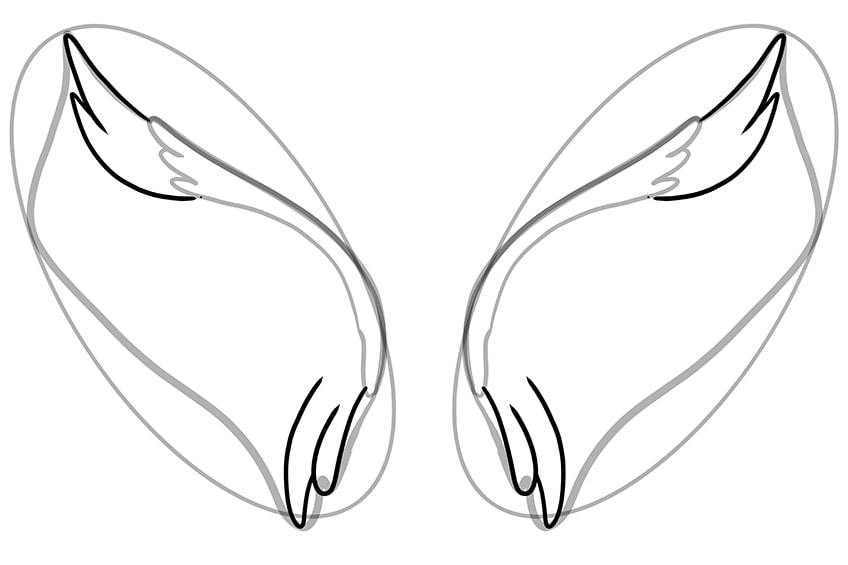
Step 5: Add the First Feather Layer
Beneath the previously drawn feathers, begin drawing the first layer of feathers in a stacked order. Do this along the bottom feathers as well.
Note! Both wings should be identical.
Step 6: Draw the Second Feather Layer
Continue by drawing the secondary feather layer beneath the first. The feathers here should look like one piece instead of a stacked layer, but these should still have sharp edges to each feather. Remember, the feathers should always be flowing outward in your wings sketch.
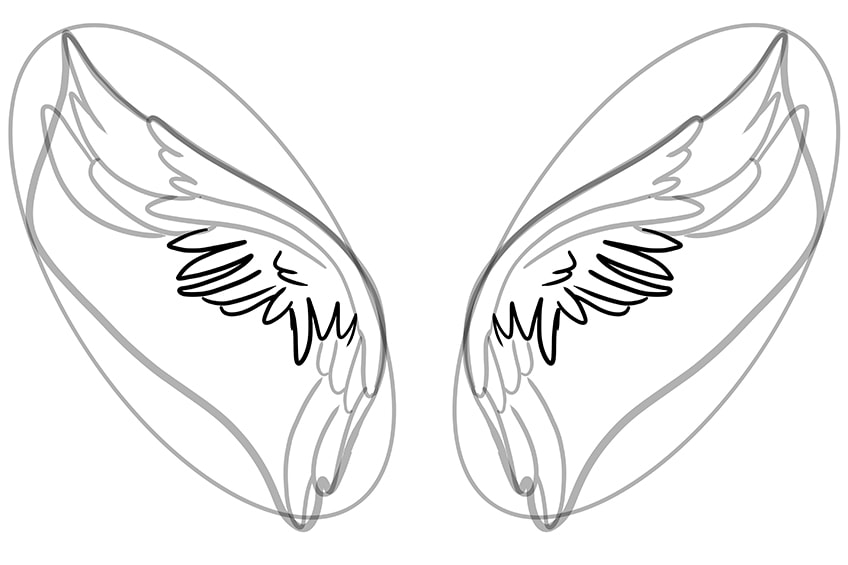
Step 7: Continue to the Third Feather Layer
For the third layer of feathers, draw individual, lengthy feathers leading outwards with the curvature of the wing outline. These feathers should also be stacked.
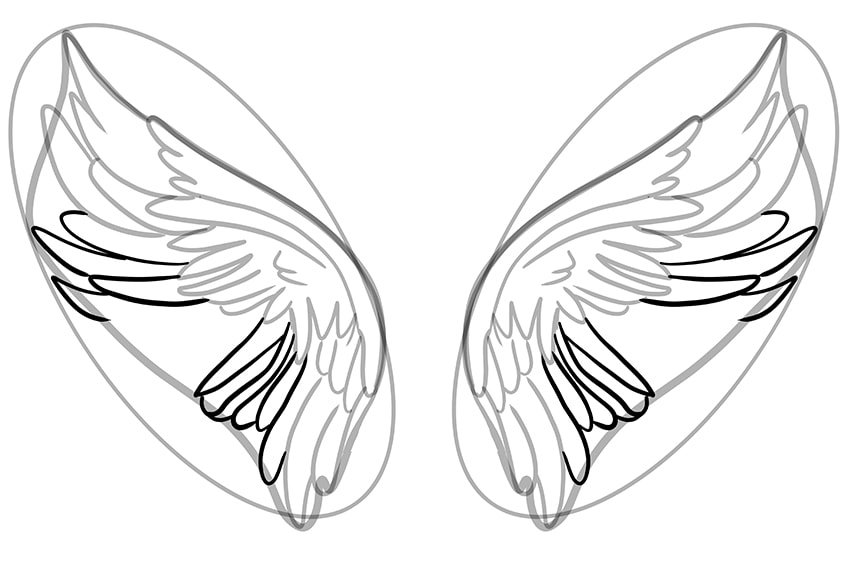
Step 8: Draw the Final Feather Layer
Begin this step by drawing individually, stacked feathers in the open areas in your wings sketch. Continue by drawing fine lines within several of the feathers to add more structure. Finalize this step by erasing any outlines or overlapping lines that are still visible.
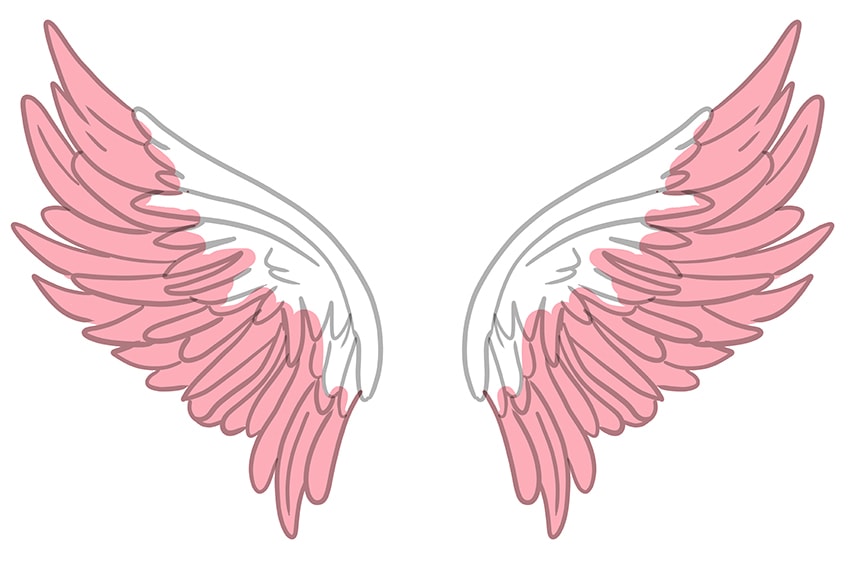
Step 9: Apply the First Color Coat
Select a fine, sharp brush and pink paint, and evenly coat the outer feathers in your wings drawing.
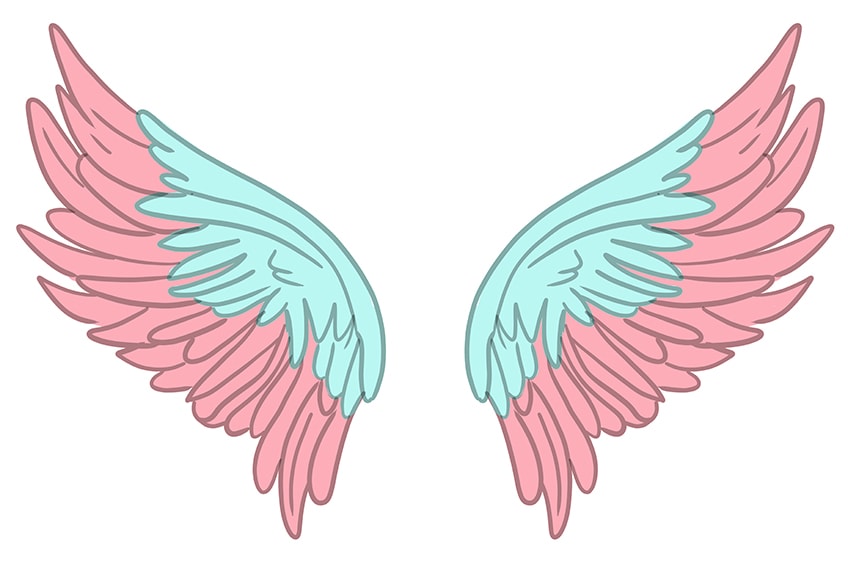
Step 10: Continue to Color Your Wings Drawing
Continue using the same brush as previously but switch to teal paint, and evenly coat the inner feathers and wing arch on your wings sketch.
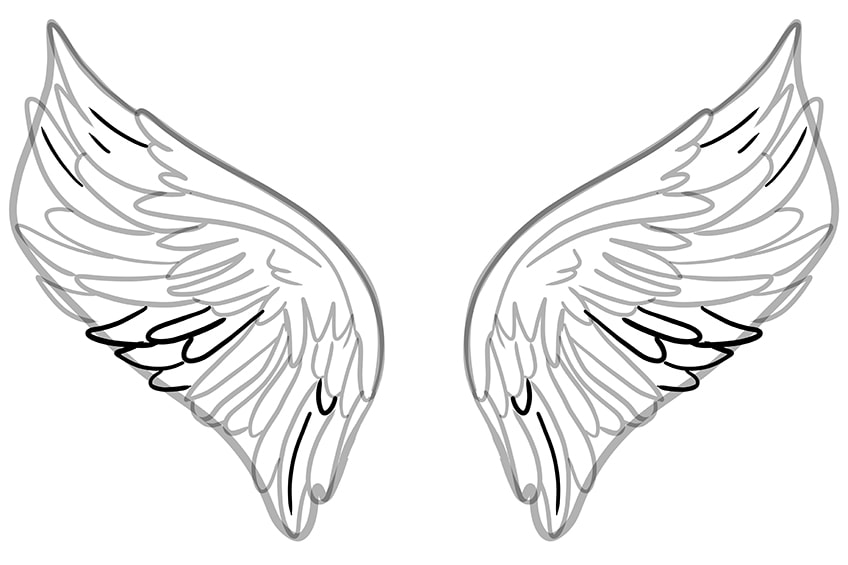
Step 11: Shade the Outer Feathers
With a small, soft brush and black paint, apply light to medium shading between the edges of each feather, including beneath the inner feathers.
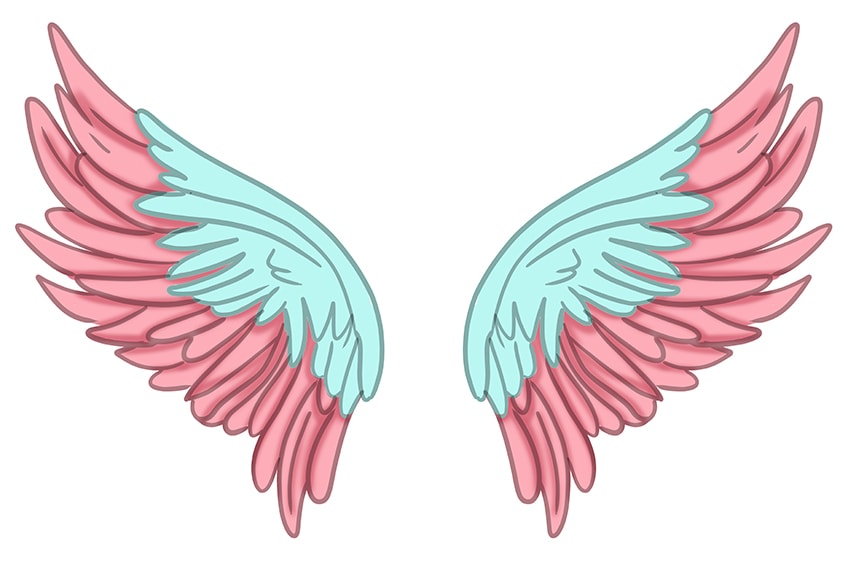
Step 12: Shade the Inner Feathers
Continue to add light to medium sharing within the inner feathers and wing arch, using a soft brush and black paint.

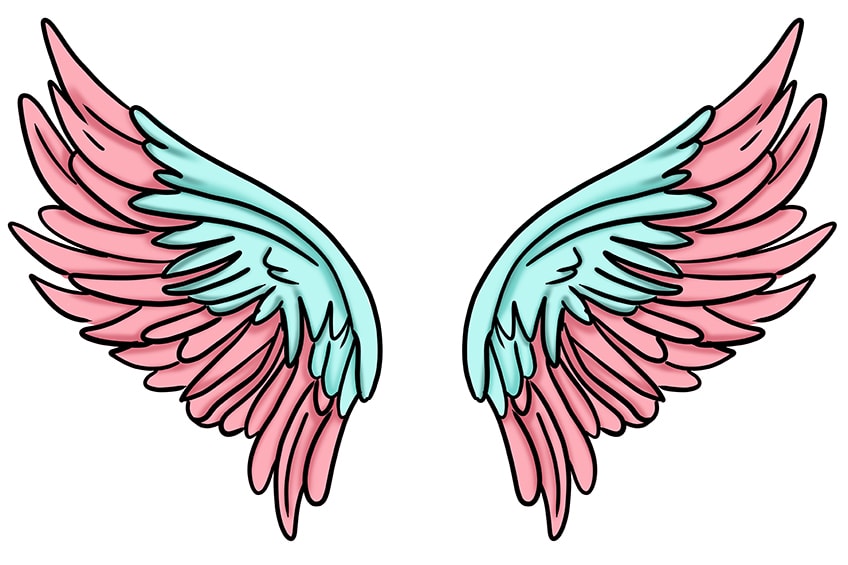
Step 13: Finalize Your Drawing of Wings
You have reached the last step of our tutorial on how to draw wings easily! To finalize your wings drawing, select a fine, sharp brush and black paint, and trace the outline and inner texture lines.
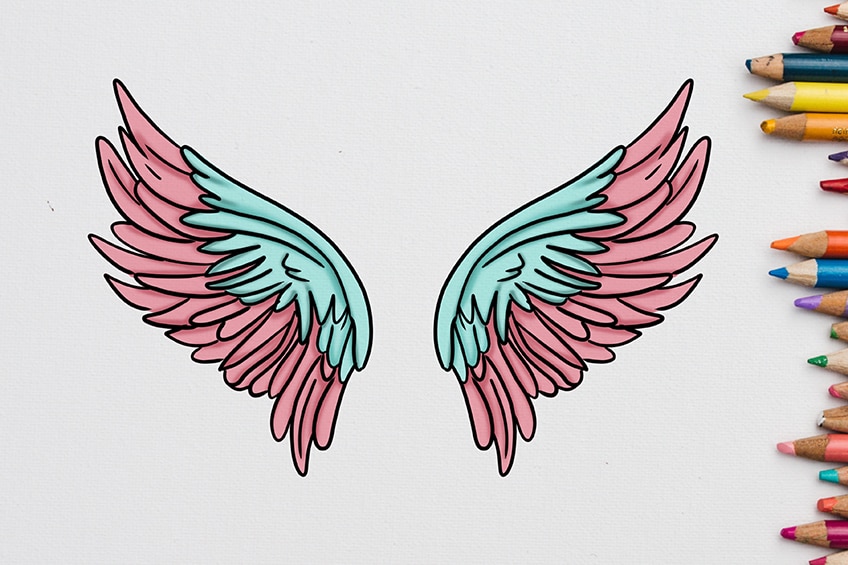
Congratulations on completing your drawing of wings! You have captured the essence of these ethereal and graceful symbols of divinity with stunning precision. The intricate details of the feathers and the curvature of the wings are beautifully depicted, bringing a sense of movement and life to your artwork. The play of light and shadow adds depth and texture, and the overall composition exudes a sense of peace and serenity. Take a moment to step back and admire your creation, and reflect on the inspiration and creativity that brought it to life. Remember, art is a journey, and there is always room for growth and exploration. Keep practicing and experimenting with new techniques, and allow your imagination to continue to soar with the angels!
Frequently Asked Questions
Can You Incorporate Different Colors into a Drawing of Wings?
Yes, you can certainly incorporate different colors into your drawing of wings! While white is often associated with angel wings, you can use any color palette that inspires you. You can use soft pastels or vibrant colors to create a sense of ethereal beauty, or darker shades to evoke a sense of mystery and depth. Experiment with different color combinations and textures to bring your angel wings to life. Keep in mind that the colors you choose can also affect the overall mood and tone of your artwork, so take the time to explore different options and find the ones that resonate with you!
How to Create a Sense of Depth and Texture in a Wings Sketch?
To create a sense of depth and texture in your drawing of wings, start by studying the individual feathers and the way they overlap each other. Use varying line weights and shading techniques to add dimension and texture to each feather. Play with the contrast between light and shadow to create a sense of depth and perspective. You can also experiment with creating a sense of movement in your drawing by adding subtle variations in the direction of the feathers. Remember to pay attention to the overall composition and ensure that the wings are balanced and symmetrical. Our easy tutorial on how to draw wings will take you through this process step-by-step.

Larissa Meyer is a 32-year-old mother from Michigan and creative spirit since childhood. Her passion for painting and drawing has led her to an education as an illustrator and a career as a freelance graphic designer. She has a Bachelor of Fine Arts in Illustration and a degree in Graphic Design. Larissa is a talented artist who is able to master a wide range of styles and techniques to bring her artistic vision to life. Her greatest passion is currently fluid painting and epoxy resin art. Larissa’s love for art and her knowledge and experience in illustration make her the perfect Creative Director for our fluid-painting.com team. She is the creative head of our team and shares her passion and knowledge with our community through articles and tutorials.
As a mother of a 2-year-old daughter, Larissa also understands the importance of fostering creativity in early childhood. She uses her experience and knowledge to help other parents inspire their children and develop their artistic skills as well.
Learn more about Larissa Meyer and about us.