How to Etch Glass – Your Easy-to-Follow Guide to DIY Glass Etching
This post may contain affiliate links. We may earn a commission from purchases made through them, at no additional cost to you.
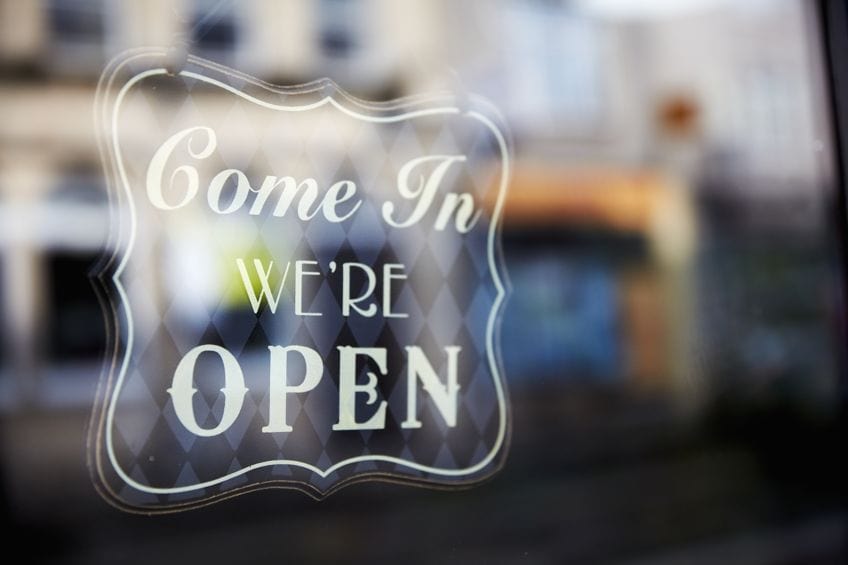
Create premium-looking gifts at a fraction of the cost! Etch your friend’s name into a wine glass for her birthday or etch an inspirational quote into a glass dish or even a mirror. Glass etching is not only a satisfying DIY project, it is also a permanent way to personalize glassware. Etched glass is dishwasher safe and durable and with today’s vinyl cutting technology the process of etching glass is easier than ever before. This article aims to introduce you to the best products for glass etching as well as show you how to etch glass.
What Is Glass Etching?
Glass etching, or french embossing, as it is sometimes referred to, dates back to the 18th century. The process involves removing a minute layer of glass from the surface of the glass through chemical means. A mask or a “resist” is used to protect the areas of the glass that you do not want to be affected by the chemical. The shape or the design of the mask will dictate the pattern that is etched onto the glass. This is called a stencil. There are other methods for etching glass such as sandblasting or chemical etching but these processes can be quite difficult, especially if you have not had any experience.

The glass etching method that we will be looking at involves the use of a glass etching cream. Glass etching creams contain chemicals like hydrogen fluoride and sodium fluoride. It is important to wear the appropriate safety gear when using these chemicals as they can be dangerous to your health. There are many reasons to etch designs onto glass instead of other methods such as using stickers or markers. Below is a list of pros and cons to help you decide whether or not glass etching is the right choice for your project.
PROS
- Durable
- Can withstand abrasion, heat, solvents, and dish soap
- An easy way to create luxurious products
- Indefinitely customizable
CONS
- It is permanent and impossible to remove
- Can weaken the glassware to a certain degree
- Glass etching creams contain harsh chemicals
Must-Haves for Etching Glass
Before we move on to how to etch glass, there are a few essentials that you might want to consider purchasing. You may be able to get away with skipping on an expensive vinyl cutting machine but you will need glass etching cream to get the job done. Below you will find out more about the best glass etching cream as well as some other products that will help you get started etching glass. Later we will look at how to etch glass with Cricut!
Best Glass Etching Cream: ARMOUR ETCH Glass Etching Cream
Armour Etching cream is the number one choice for etching glass. This etching cream allows you to make permanent designs on glass such as windows, mirrors, and kitchen glassware. The thick paste-like cream makes it easy to apply to glass surfaces. The specialized formula is fast-acting. It begins to etch as soon as it touches the glass. This etching cream is ideal for use with vinyl stencils and is the perfect product for all your glass etching needs.

- A fast-acting specially formulated glass etching compound
- Create permanently etched designs on windows and other glass
- Create your own custom glass etching stencil
PROS
- Fast-acting
- Specialized formula
- Ideal for use with vinyl stencils
- Effective glass etchant
CONS
- It is not effective on some pyrex
- Can be harmful to your health
Best Stencil Vinyl For Etching Glass: FRISCO CRAFT Stencil Film Roll
Frisco Stencil Film is ideal for creating masks for etching and painting projects and it comes in 12 inches by 30 ft. What makes this vinyl craft roll great is that it is removable which means it will not leave a sticky residue when you decide to peel it off. Although it is designed for painting stencils, it is made from a special PVC that will resist glass etching cream. Frisco Craft Stencil Film is compatible with electronic craft cutters like Cricut and Silhouette. It is perfect for creating glass etching stencils and for use with glass etching cream.
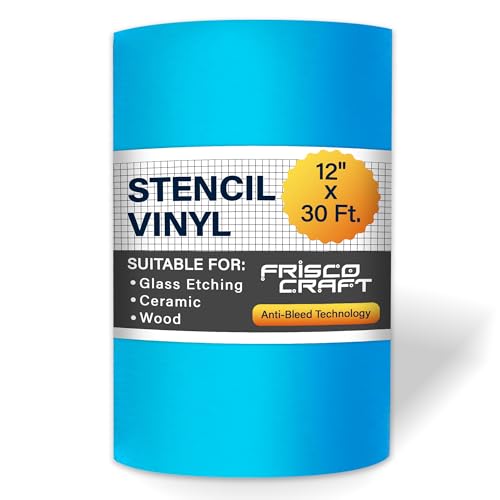
- Suitable for all paint and spray techniques on even surfaces
- Translucently blue-dyed stencil film (special PVC, 80 microns)
- The film is compatible with all brands of craft cutters
PROS
- Value for money
- Resists glass etching cream
- Removable
- Compatible with all craft cutters
- Ideal for creating glass etching stencils
CONS
- Not ideal for use on uneven surfaces
- Not reusable
Best Vinyl Plotter For Cutting Vinyl Stencils: CRICUT Explore Air 2
Cutting vinyl stencils for etching glass can be tedious. Why not learn how to cut vinyl with Cricut? This vinyl plotter will make creating vinyl stencils so much easier. Besides being able to cut various types of materials such as faux leather and card stock it is perfect for cutting stencil vinyl. The Cricut Explore Air 2 comes with its own software for your PC that will enable you to process your images before cutting them. This plotter is your stencil cutter and is perfect for creating glass etching stencils the easy way.

- Can cut over 100 types of material, including vinyl and glass
- Simply upload designs from your computer, tablet, or phone
- Set includes premium blades, a cutting mat, and fine point pen
PROS
- Software included
- Ideal for creating glass etching stencils
- Makes the stencil cutting easier
- Fast cutting
- Cuts a variety of materials
CONS
- Expensive
How to Etch Glass with Cricut
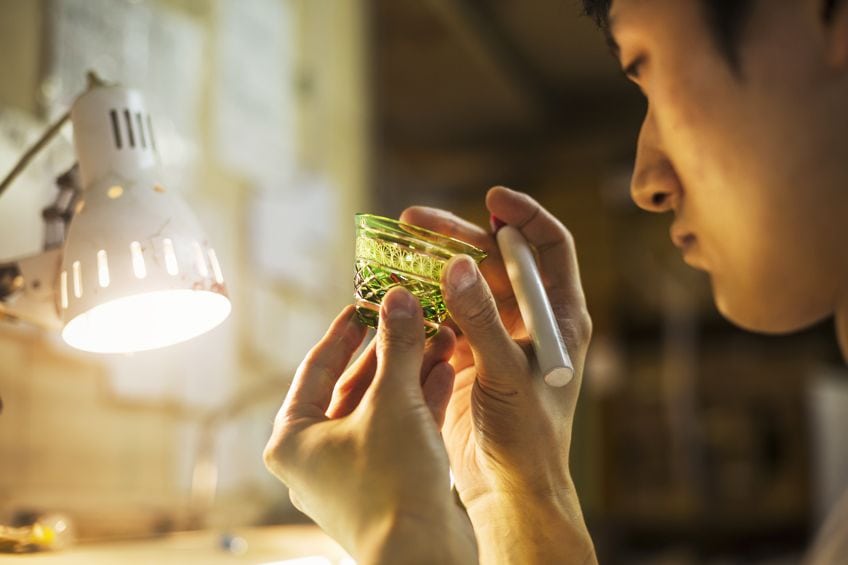
The process below will guide you through the process of etching glass, whether you are wanting to do some wine glass etching or etch glass windows or mirrors. However, it is important to note that some pyrex glass will not etch properly as it has been tempered at a high heat that can make it more resilient to glass etching cream. If this is your first time etching glass you may want to start with etching a small, flat piece of glass. Etching curved objects like wine glasses can be difficult for first-timers.

In this section, we will look at etching glass using vinyl glass etching stencil that is created with a Cricut plotter. If you do not have one of these machines it is still possible to etch glass using a handmade stencil. This will require you to use a hobby knife to cut out your design. If this seems like too much work you can even buy pre-cut vinyl stencils from art supply shops that are as simple to use as peel and stick. All of the above are acceptable glass etching stencils. Let us take a look at some of the supplies that you will need for etching glass.
Supplies
- Nitrile gloves
- Glass etching cream
- Paintbrush
- Plastic scraper
- Isopropyl alcohol
- Paper towel
- Painters tape
- A pair of Scissors
- Stencil vinyl
- Transfer tape
- Weeding tool
- Glass item
- Hobby knife or Cricut plotter
Create a Stencil
Before we get to etching glass we need to create a stencil. The stencil will act as a mask. The areas under the stencil will be protected from the glass etching cream. The exposed glass will be etched. Your stencil should be cut into a pattern or image that you want to be etched onto the glass. This can be done by hand by using a craft knife. Simply mark out the desired pattern onto the stencil vinyl and use a hobby knife to cut out the areas that you want to remove. Tape down the vinyl and cut it on a cutting board to stop it from sliding around. Remember that the negative space is what will be etched.
An easy alternative to the manual process is to use a Cricut plotter. Utilize Cricut Design space software to create your stencil or select a design from the Cricut Access library. Make sure to include enough space around the design. The extra vinyl will protect the rest of the glass from the glass etching cream. Always remember that the negative space is what will be etched onto the glass. Once you have decided on your design, load the stencil vinyl into the Cricut machine and click “make it”. Click continue if your design looks correct on the Prepare Screen. On the next window make sure to select “browse all materials” and click “stencil vinyl”.
Make sure that the fine point blade is loaded in your Cricut machine you can click the button that says “Go” when you are ready. If necessary use the weeding tool to weed out the negative spaces.
Clean the Glass
Cleaning the glass is very important. This will increase the adhesion of the vinyl which will prevent the glass etching cream from creeping underneath the stencil. If there is any grease or grime on the glass it could act as an invisible mask that will resist the etching cream and will ruin your image.
Clean the glass with a paper towel soaked in isopropyl alcohol. Use a dry paper towel to mop up any excess alcohol. This should remove any grease grime and fingerprints from the surface. If you are dealing with an old grubby piece of glassware you may consider washing it with dish soap and water before moving on to the isopropyl wash.
Apply the Glass Etching Stencil
Peel the backing off the stencil vinyl and stick it to the glass. Using transfer tape can make this process a little easier. Place the stencil on straight and make sure there are no creases or bubbles. The etching cream can seep underneath the stencil and ruin your design if there are any creases on the vinyl. Use a plastic gift card or plastic scraper to make sure that there are creases by using it as a squeegee. Remember that your etched image will be as good as your stencil.
Once you applied the glass etching stencil it is time to inspect the stencil to make sure there are no breaks or unwanted exposed areas of glass.
Hold the glass up to the light to see if there are any gaps or bits of hair or lint that may allow the etching cream to creep underneath the stencil. Use painter’s tape to mask the rest of the surrounding glass. Any etching cream that gets onto the glass will mark the glass permanently.
Apply The Glass Etching Cream
Now that your stencil is on the glass firmly you are ready to begin etching glass! Put on your safety goggles, respirator, and nitrile gloves, and be sure to work in a well-ventilated area. Use a paintbrush to dab a thick coat onto the glass etching cream onto the stencil. The etching cream will get to work as soon as it touches the glass. Use your paintbrush to move the etching cream around the design to make sure that all the corners and nooks are being treated with the etchant.
Allow the glass etching cream to sit on the design for about five minutes. Be careful not to leave it too long as the etching cream will begin to seep under the stencil resulting in blurry lines. The aim is to achieve crisp lines, this will increase the contrast between the etched and unetched areas of glass.
Rinse and Repeat if Necessary
Once you have allowed enough time for the glass etching cream to work its magic, rinse the glass under running water. You may want to use a jug and a bucket to collect the water as you pour the water over the glass. This is especially the case if you have a porcelain or ceramic sink as the etching cream can damage such surfaces. Once you have rinsed the glass thoroughly you will be able to see if you have archived a decent etch. If you feel that you need to repeat the etching process you can apply another coat of etching cream to the glass.
But be careful as you do not want to ruin the image by leaving the etching cream on too long and having it creep underneath the stencil.
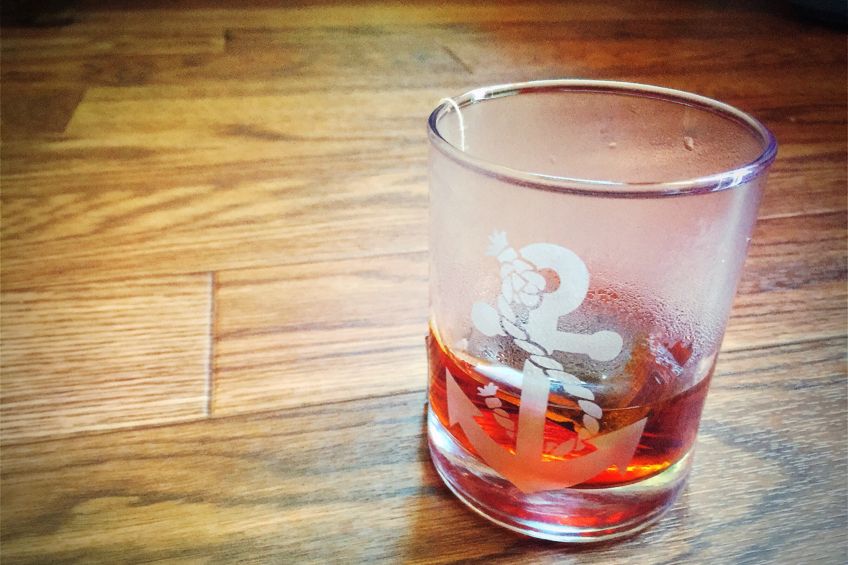
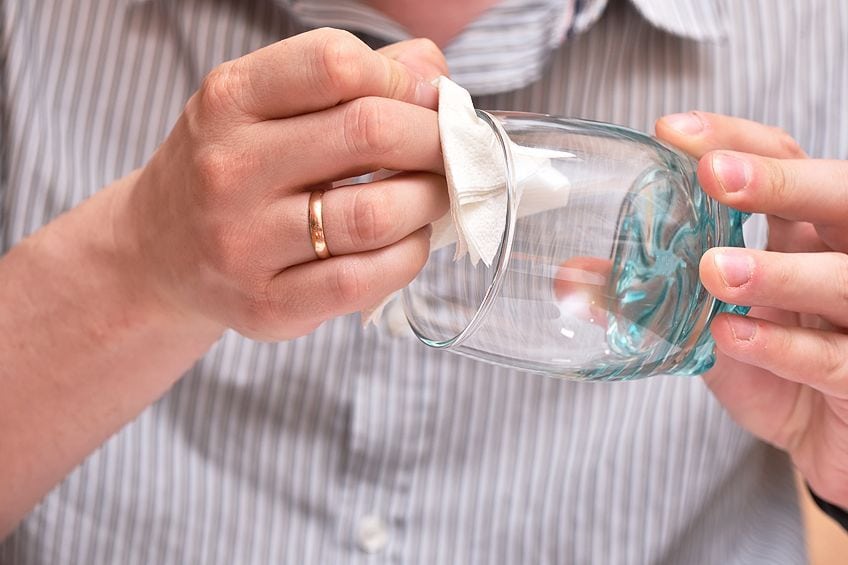
If you feel that the image has been sufficiently etched you can remove the stencil and give the glass a final rinse with water and a sponge. It is only at this stage when you will fully assess the results. At this stage, nothing further is needed. Your etched glassware is dishwasher safe and will last as long as you do not drop it! The process outlined above will work on all your glass etching projects from etching glasses to mirrors. However, this process is not ideal for large designs on shower doors or windows.
Tips and Tricks For Etching Glass
As it is such a delicate and tricky process, we have gathered all of our best tips and tricks for glass etching to help you along.
- Be sure that the glass and the vinyl stencil are both at room temperature. If the glass or the vinyl is cold the vinyl may not stick properly to the glass. Warm the vinyl stencil between the palms of your hand to warm it up.
- Armour etch recommends that you leave the glass etching cream on the glass for one minute. However, you may want to increase this time to five minutes to achieve a more defined etch. Becare not to leave it on too long as the etching cream may start to creep under the stencil which will ruin your design.
- If your stencil is not laying flat and you have folds or creases, it is best to remove the stencil and cut another one. Bubbles that form under the stencil are fine but folds can allow etching cream to seep underneath your stencil.
- If you are feeling extra creative, you can always add a touch of paint to your etched glass.
- When etching designs into glass plates and bowls, etch the design to the underside of the glass. This will prevent the etched areas from collecting food stains that may be difficult to clean due to the nature of etched glass.
- When etching underneath dishes or bowls, make sure to mirror the image before cutting the stencil. By doing this the image will appear correctly when viewing the image through the glass from the opposite side.
- To place your stencil on the glass correctly, you can place some paper grid paper behind the glass. This will make aligning your glass etching stencil much easier than just sighting it.
- If you have experience with a rotary tool and a steady hand, you may want to try etching glass manually. Make sure to wear safety goggles, gloves, and a respirator when attempting this. Use diamond or silicon carbide tips and draw the design with a sharpie before moving from one side of the design to the other with your rotary tool.
Whether it is wine glass etching or window frosting, etching glass is a very effective way to decorate glass. This process is not too difficult provided that you have the correct supplies. Be Careful when using glass etching cream as the chemicals it contains can be damaging to your health. Always make sure that you clean the glass before applying the vinyl stencil, make sure the vinyl has no creases, and that it has adhered to the glass properly before applying the etching cream. And most of all enjoy the process!
Frequently Asked Questions
Can All Types of Glass Be Etched?
Most types of glass can be etched. However, certain types of pyrex glass will not etch properly, if at all. Pyrex has been tempered using high heat which can make it more resilient to glass etching cream.
Can I Etch Colored Glass?
The glass that has a colored pigment in it can be etched. Etching colored glass can be very effective as it creates a striking contrast between the etched and unetched areas. Glass with a colored coating on it will resist the etching cream and you will not be able to etch it.
Does Etching Weaken Glass?
When you are etching glass you are essentially removing a small amount of glass from the surface. This can weaken the glass to a certain degree but glass etched using etching cream is dishwasher safe.
Can I Fix Glass Etching Mistakes?
Etching glass is permanent. The only way to correct etching mistakes is to etch over the etched areas. It is impossible to undo etching. A touch of clear nail polish may be able to cover up a small area of unwanted etch, although this will only make it slightly less noticeable.
Does Etched Glass Need to Be Sealed?
There is no need to seal etch glass. The etched glass needs no further treatment as it is permanent. When etching glass, always etch the design on the side of the glass item that will not be subject to food or drink as etch areas may prove difficult to clean due to their porous nature.
Can I Etch a Glass Mirror?
It is possible to etch a mirror provided that it is made from glass or is not coated. Using an adhesive vinyl and glass etching cream will get the job done. The nice thing about etching glass is that it creates a better contrast than etching glass because of the reflective background.
Does Glass Etching Come Off?
Etching glass is a permanent way to decorate glass and the etched design will not come off. If you are looking for a temporary decorative option you can buy frosted adhesive film which will provide a similar look to etched glass but is easy to remove.

Larissa Meyer is a 32-year-old mother from Michigan and creative spirit since childhood. Her passion for painting and drawing has led her to an education as an illustrator and a career as a freelance graphic designer. She has a Bachelor of Fine Arts in Illustration and a degree in Graphic Design. Larissa is a talented artist who is able to master a wide range of styles and techniques to bring her artistic vision to life. Her greatest passion is currently fluid painting and epoxy resin art. As a mom of two kids, Larissa also understands the importance of fostering creativity in early childhood. She uses her experience and knowledge to help other parents inspire their children and develop their artistic skills as well.
Learn all about Larissa Meyer and Fluid Painting.