How to Paint Wine Glasses – A DIY Guide on Wine Glass Painting
This post may contain affiliate links. We may earn a commission from purchases made through them, at no additional cost to you.
When it comes to do-it-yourself glass projects, painting wine glasses seem to top the list. The reason being that you can create beautiful and unique items at an affordable price. Next time you have a dinner party, you can wow guests with how you decorate wine glasses. Wine glass painting or glass painting in general is a fun and simple way to be creative – even the kids can get in on the action. To make things even easier, read further to discover how to paint wine glasses and learn a few tips and tricks along the way.
What Are the Best Paints for Wine Glasses?
When you want to do a DIY painted wine glass, you need to find the right paint for the job. Glass has a non-porous surface, which means that the best paints for wine glasses would be acrylic enamel paints. These paints are water-based and are made specifically for application on glass surfaces. They can be washed once they have cured, but should not be placed in the microwave. Most of these paints are also dishwasher-safe if placed on the top shelf.
You can use craft acrylic paints to paint glass, which is something most of us have at home already. However, you will need to use an enamel medium or apply a sealant to make sure that the paint adheres properly to the glass surface.
To achieve the best results, you should use acrylic paints that are designed specifically for glass painting.
Most glass paints come in two main forms: you can either air dry the paint or use heat to cure the paint. Using heat and baking the painted glass is usually the option that will last the longest. There is also a variety of paint types that you can choose from, including:
- Transparent Paint: Great for creating stained glass effects.
- Opaque Paint: Provides a more solid color and can be used with stencils or free-hand.
- Frosted Paints: Specialty paints that will give you a glitter or frosted look for a more unique glass item.
Today, you can even get paint pens or markers for glass. These can help you create more detailed effects and can also be baked onto the glass surface. Additionally, you get simulated glass liquid leading, or paints with fine tips and thicker paint, which adds a three-dimensional, raised look. So, there is quite a range of products available that you can use to create amazing glass-painted items.
In addition to water-based acrylic, solvent-based paints for glass are also available. However, these are toxic, contain volatile organic compounds (VOCs), and are difficult to clean up. These paints do offer a more superior stained glass look, but they are not as easy to find and are not as popular as other options. They are aimed more at the professional who understands and knows how to work with these types of paints.
You might be thinking about whether you can use oil paints on glass, and the short answer is no. Oil paints work best on porous surfaces like canvas or wood. However, it is still possible to paint on glass with oil paints, but it involves a lot more preparation. Watercolor paints are also unsuitable for painting glass and will wipe off easily; a transparent acrylic paint for glass would be a better option.
A Summary of the Different Paints for Wine Glasses
| Type of Paint | Suitable for Wine Glasses | Not-Suitable for Wine Glasses |
| Acrylic Paints | ✔ | |
| Acrylic Enamel Paints | ✔ | |
| Watercolor Paints | ✘ | |
| Oil Paints | ✘ | |
| Enamel Paints/Solvent-Based Paints | ✘ |
Best Paints for Wine Glasses
We have now established that the best paints to decorate wine glasses with are acrylic enamel paints. There are various brands available, some of which have been designed specifically for glass and others that can be used on multiple surfaces including glass. Below are a few recommendations you might want to consider for your next glass painting project.

Most Popular Acrylic Enamel Paint: FOLKART Gloss Finish Acrylic Enamel Craft Set
This acrylic enamel paint set comes in 16 amazing colors, each of which is richly pigmented, water-based, and safe to use. The vibrant colors offer good opaque coverage if applied in several layers. Once oven-baked, you should be able to place the painted item in the dishwasher without problems. The paint should remain durable and offers a glossy finish that is also scratch-resistant.
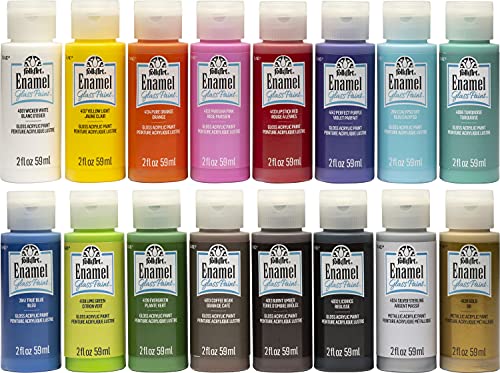
- A wide range of acrylic enamel colors specialized for painting glass
- A set of durable, scratch-resistant paints that will leave a gloss finish
- A highly pigmented water-based enamel paint with opaque coverage
PROS
- Vibrant colors
- Easy to use
- Dries quickly
- Durable once baked
CONS
- May have to apply several layers for more of an opaque appearance
- Needs to be baked for durability
Best High-Quality Glass Paints: PEBEO
This glass paint by Pebeo is a water-based and non-toxic paint that can easily be mixed to create custom colors. There are also different finishes available, including gloss, frosted, and shimmer. The paint is highly versatile and can be applied to all kinds of surfaces, including glass, ceramics, terracotta, metal, and more. Once the paint is dry, it must be baked to become dishwasher safe. The paint also offers UV resistance and can be placed in the microwave.

- Formula is a non-toxic, transparent, water-based, and intermixable
- Comes in a wide array of stunning colors and a variety of finishes
- Waterproof paints can be used on all surfaces that can be baked
PROS
- Wide range of color options
- Non-toxic
- Intermixable
- Heat- and water-resistant finish once baked
- Works on a variety of surfaces
CONS
- Expensive
- You need to bake the paint before it becomes durable
Best Paint Pens for Glass: ARTISTRO Acrylic Paint Pens
These Artistro paint markers will give you a high gloss and opaque finish on a variety of surfaces, including glass. The markers are non-toxic with no odor to worry about, and the set comes in 12 vibrant colors. The marker barrel is transparent, so you will be able to check on how much paint is still available. The paint will only become permanent on the glass once it is baked, however. The pens have a medium-sized tip, which is effective for applying finer details as well as filling in larger areas.

- Vivid, highly pigmented ink dries quickly to an opaque, glossy finish
- Resistant to water, fading, and abrasion on a variety of surfaces
- Medium tips are ideal for both fine details and filling in large areas
PROS
- Affordable
- Bright colors
- Easy to use
- Becomes permanent once baked
- Can be used on different surfaces
CONS
- Markers will stain clothing
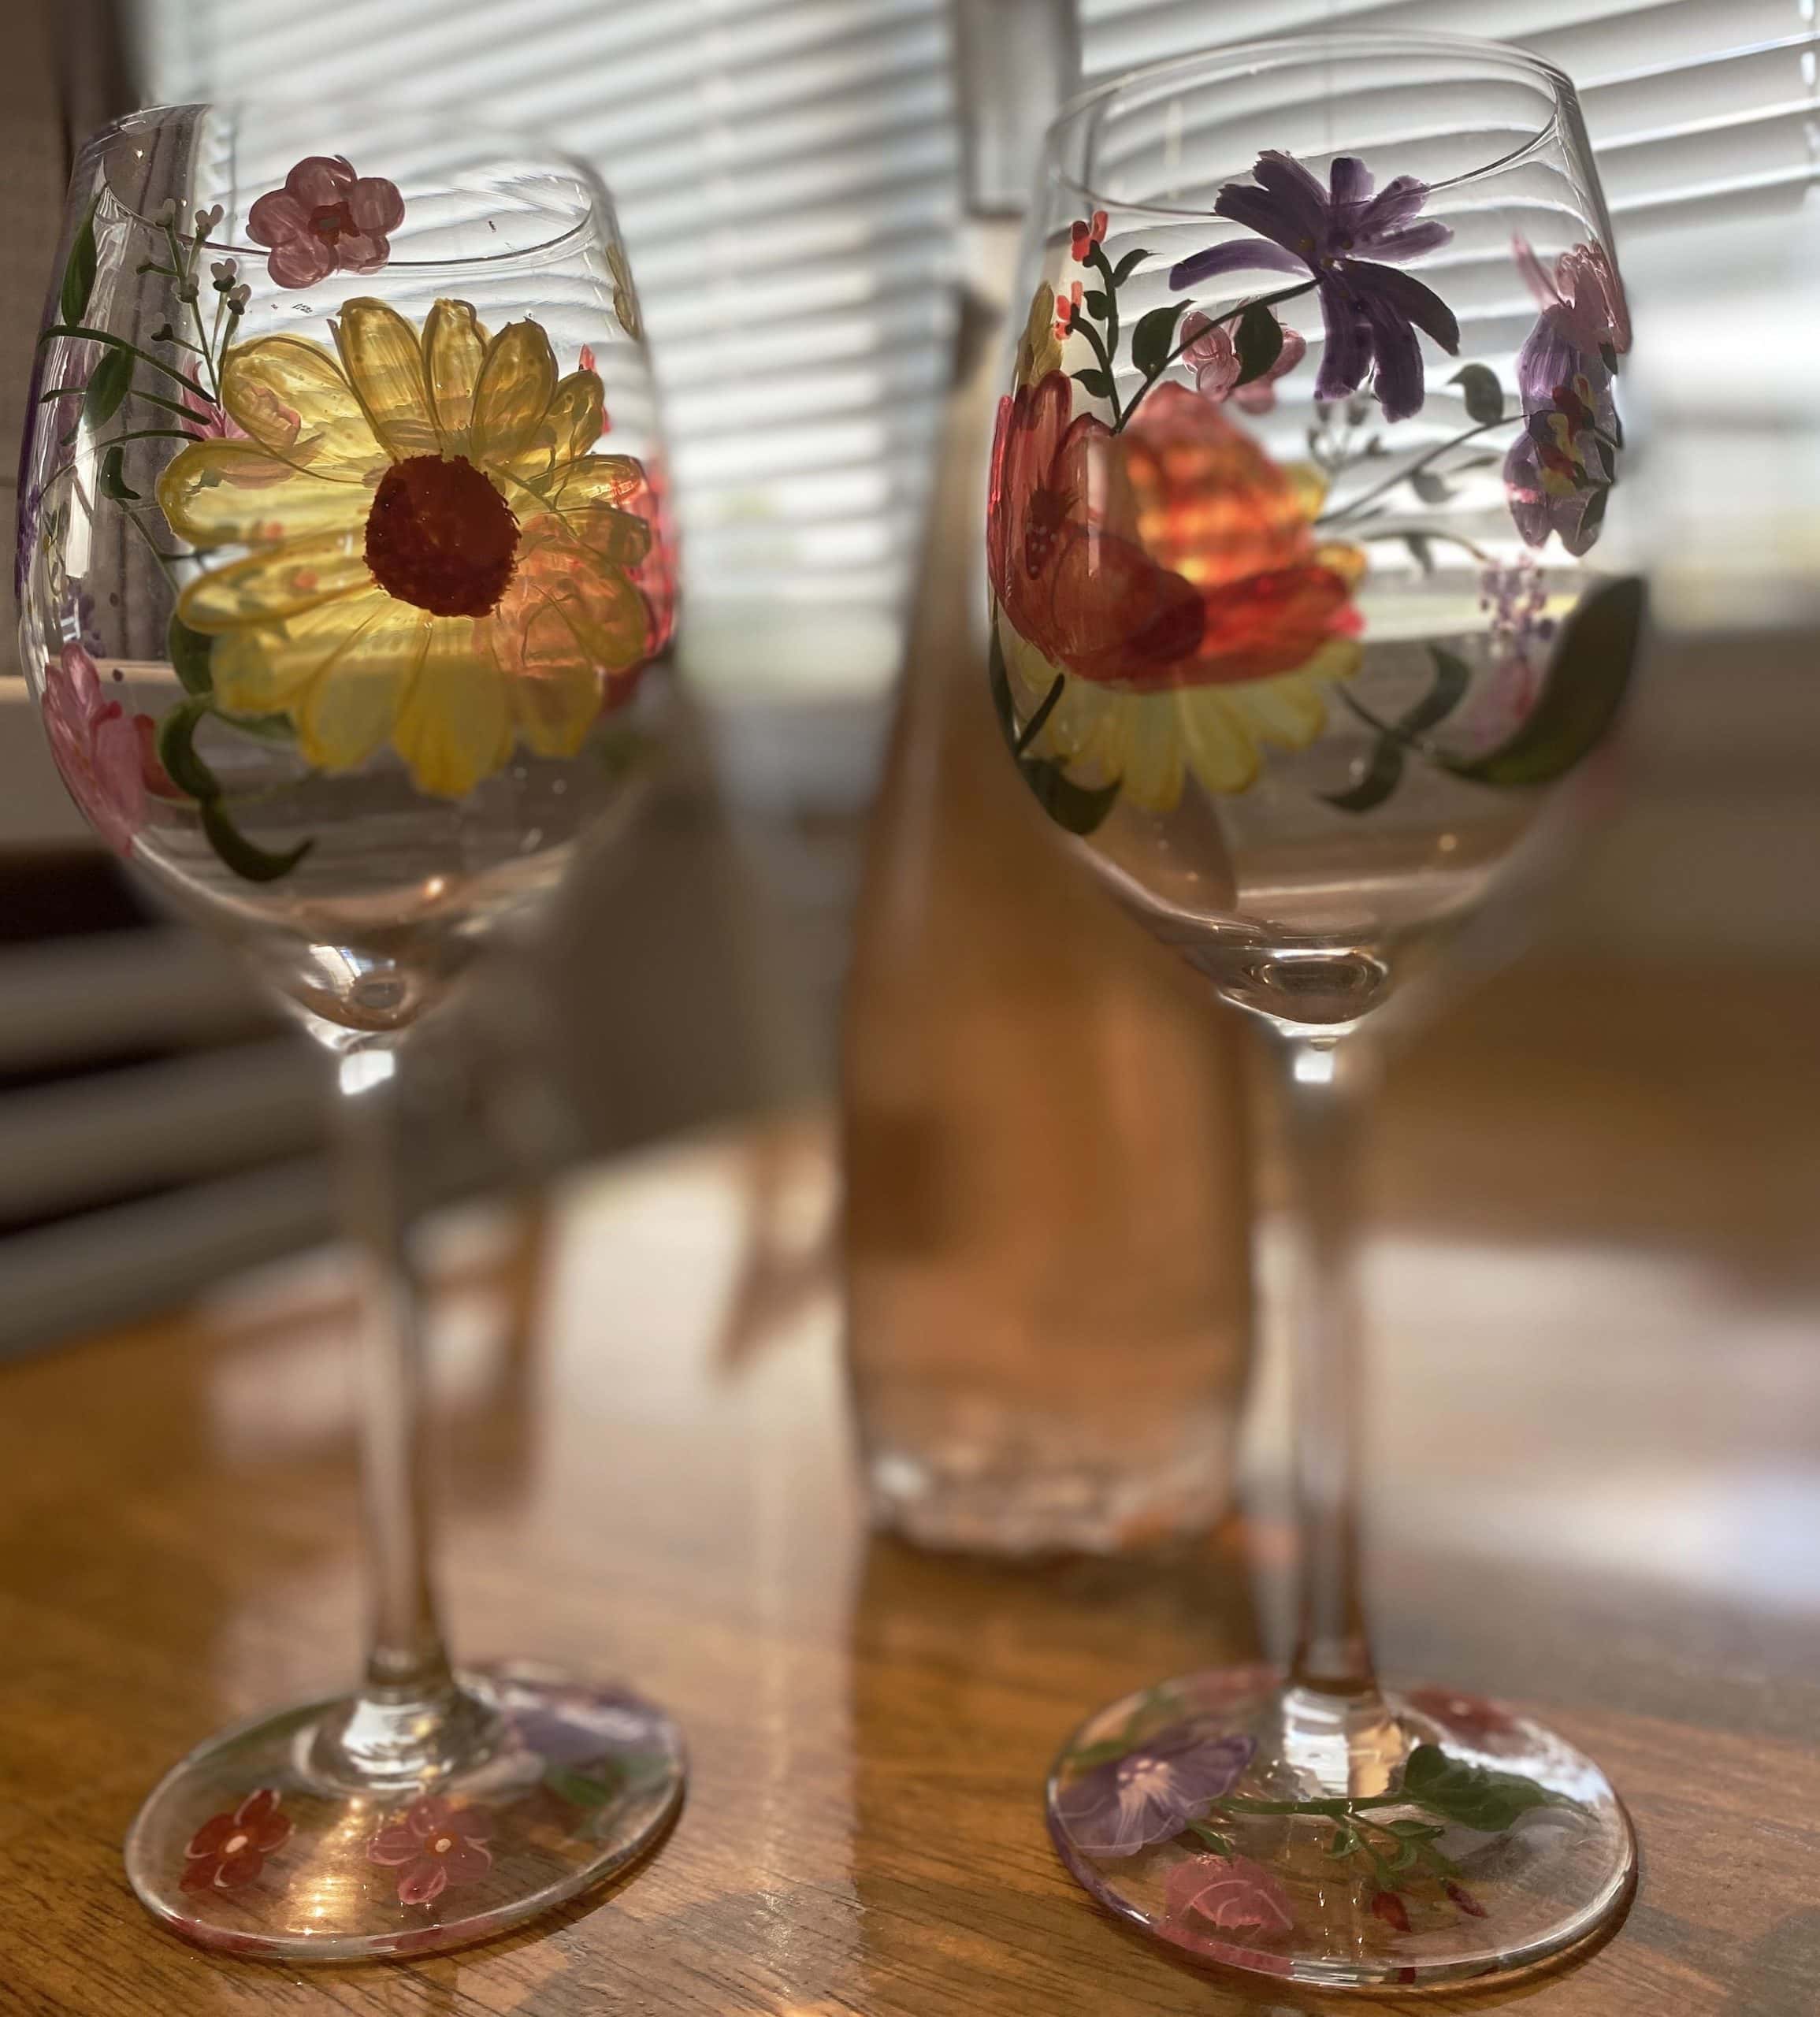
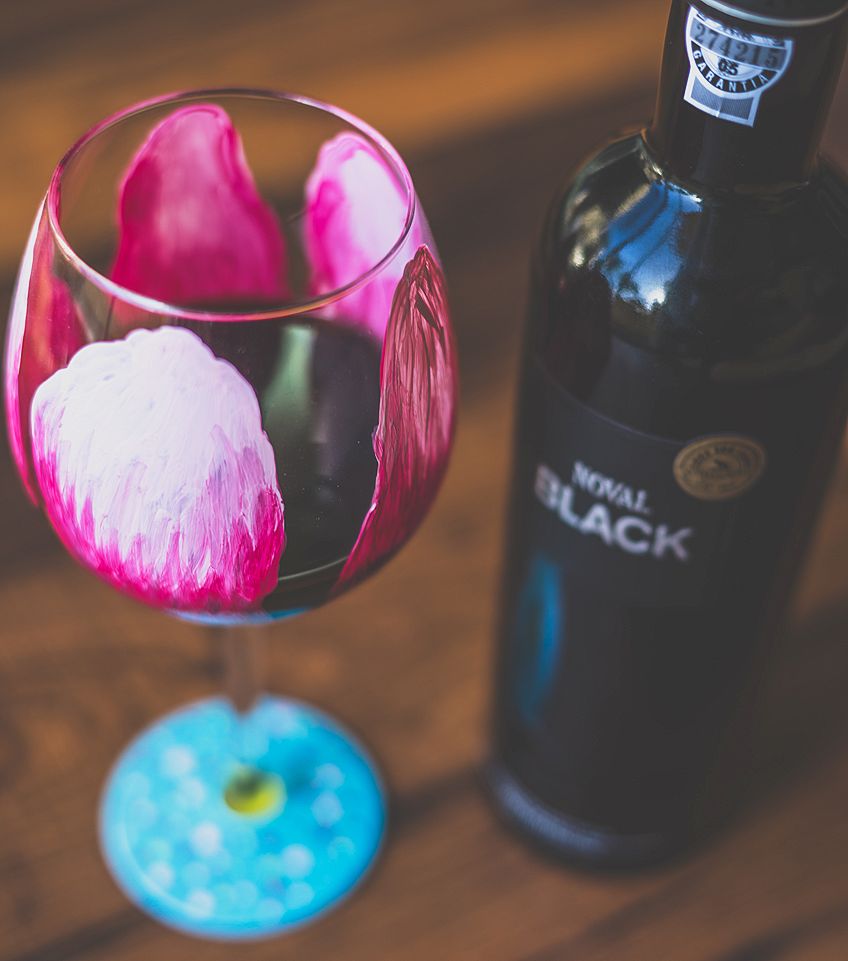
Painting Wine Glass Ideas
Painting wine glasses is an easy and fun way to be creative, and with most of the glass paints being non-toxic, you can easily do some glass painting with the kids. There are many designs and ways you can decorate wine glasses, so it is an extremely creative process. Here are a few painting wine glass ideas to help you get started.
- Applying lines, dots and swirls is the easiest free-hand design idea.
- You can use templates to trace designs onto the glass.
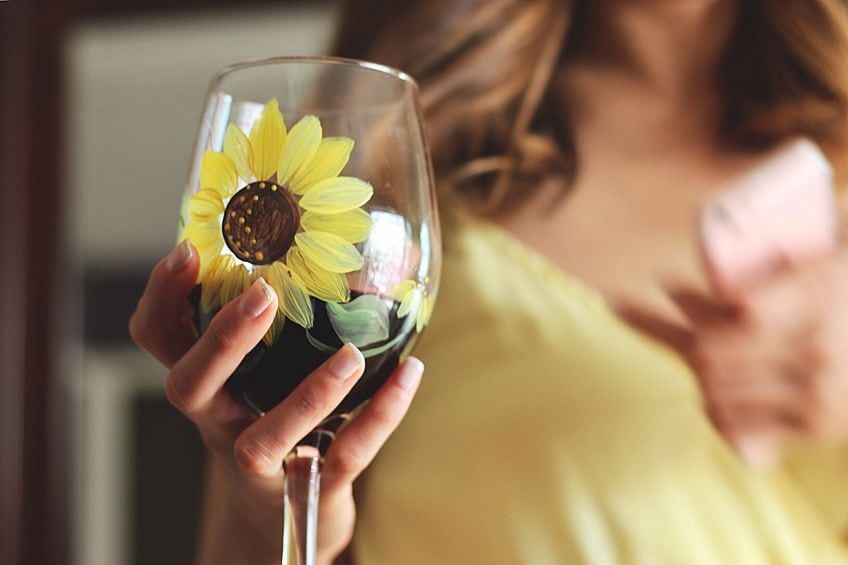
- If you are feeling artistic, you can paint flowers or other images freestyle.
- How about simply creating a frosted or glitter look?
- You could create a marble effect on the glass.
- Personalize the wine glass by adding names.
- Design according to themes – Christmas glass bottle painting, or any glass object for Easter, Valentine’s Day, or Halloween.
How to Paint Wine Glasses
A DIY painted wine glass should be an easy project, however, there are things to take note of. When it comes to painting any surface, preparation is extremely important, as well as having the correct tools ready and waiting for you to begin.
Wine Glass Painting Tools
To paint glass without problems and to produce the best results, you need a few more things than just your paint and glass. Depending on your design, you will also need a few tools to make it happen. Here is a list of items that you will need and a few you might want to add.
- Newspaper, paper towels, and some rags for any messes
- Rubbing alcohol
- Brushes and sponges, depending on what you want to do
- Cotton buds and toothpicks can add effects, and can also help to remove dry or wet paint if you made a mistake
- Painter’s tape
- Stencils (bought or made)
- Paint palette or small plastic shot glasses for different paints
Preparing the Glass Surface
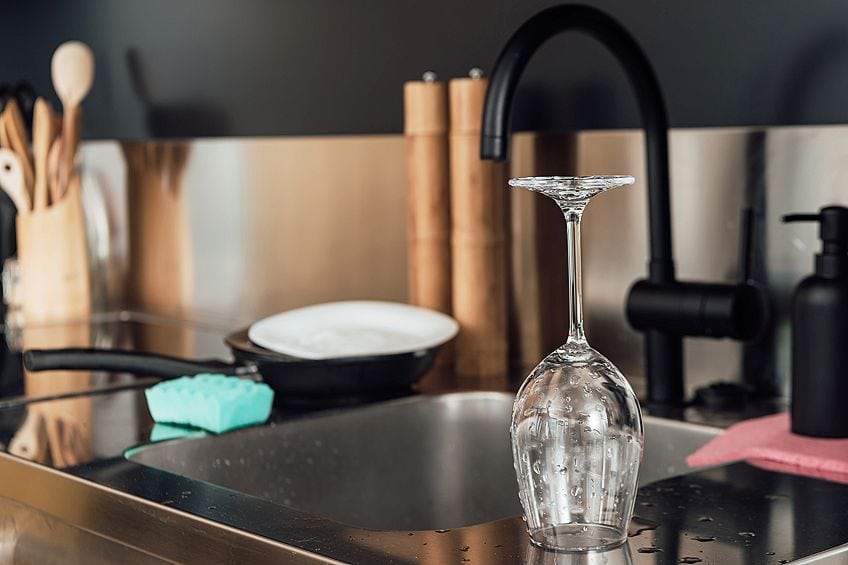
To have the paint go on evenly, you need to prepare the wine glass surface. This is a simple process that begins with washing the glass with some soapy water to remove any dirt. Then, you can rinse it and allow the glass to dry.
Once dry, take a piece of paper towel and moisten it with some rubbing alcohol. Wipe off the surface of the glass with this to make sure that any grease marks and soap have been removed. Instead of rubbing alcohol, you can also use white vinegar to wipe the glass surface.
Leave the glass to dry and then you will be ready to begin painting! If you are going to paint the lower end of your wine glass, you can tape the edge of the upper lip to help prevent any paint or fingerprints from getting onto the glass.
Painting the Wine Glass
As mentioned, there are many ways you can decorate wine glasses. The simplest ways include using a paintbrush or sponge for painting. Go for lines, stripes, or swirls. The sponge itself will have its own effect as you apply the paint. You can also use stencils that are flexible and can fit around the glass shape.
Additionally, you can use templates or create your own design on paper. For this, simply place the design on the inside of the glass so that the design can be seen from the outside. Then, follow the visible design with the paints you are using. Another easy way to apply paint is to use a cotton bud, where you would dip the tip into some paint and apply it to the glass in dots. Use a single cotton bud or tie a few together for a broader and different effect.
Creating a Marble Effect
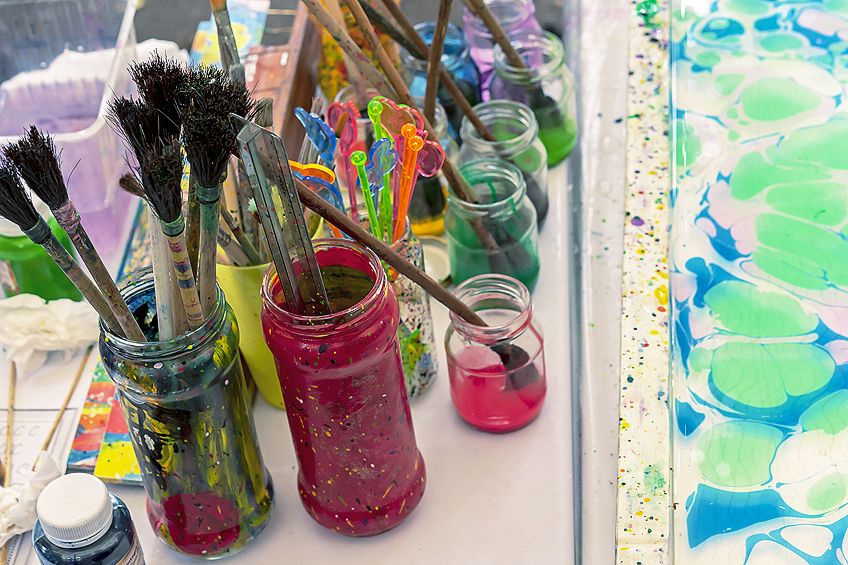
The DIY painted wine glass with a marble design is perfect for those who want a unique design yet have little painting experience. Once done, the wine glasses will make a beautiful addition to your collection, or a fabulous gift idea for somebody else. You will need the following for this project:
- Acrylic enamel paints – try white and black as your base colors along with three or four other colors that complement each other
- Marbling Medium – this thins the paint to produce a better marbling effect
- Set of stemless wine glasses
- Piece of cardboard to use for drying the glasses
- A couple of thumbtacks, about three per glass
- Plastic cups
- A couple of spoons or mixing sticks
- Rubbing alcohol
- Large-enough foil pan (one that you can dispose of afterward)
Step 1
Whenever painting wine glasses or any other glass surface, you should always clean it first. Wash it with some warm soapy water, rinse, and let them dry. Once dry, wipe the glass with some rubbing alcohol and allow it to dry again thoroughly before painting.
Step 2
Prepare your drying board by taking a piece of cardboard and pushing the thumbtacks in so that the points show on the other side. Make groups of three by placing them close together, and then space these three groups out for each glass.
Step 3
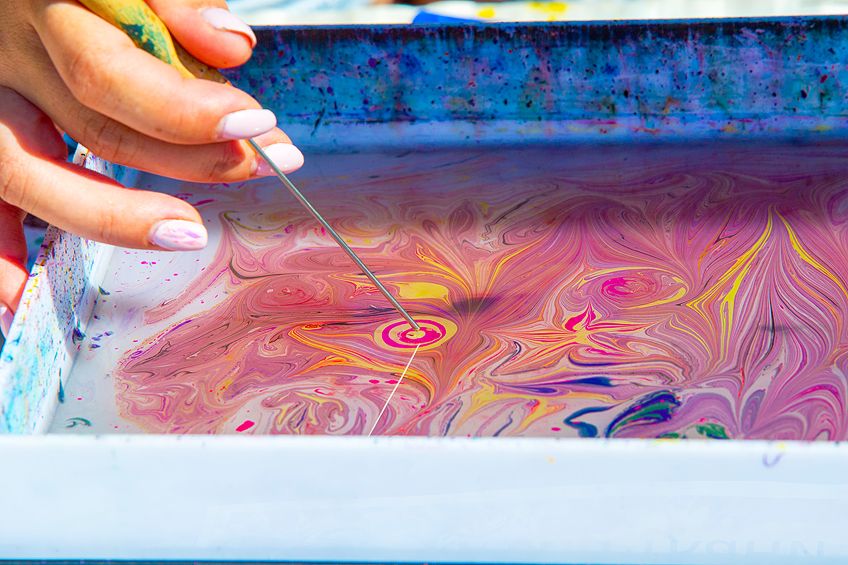
Take each paint color and add a fair amount into separate cups. Then to each cup, add some marbling medium. You should add twice as much medium as paint, in other words, a 2:1 ratio. Blend each with a mixing stick. The consistency should be runny but not too runny – more like melted ice cream. If you do not add a marbling medium, the paint might be too thick, and it will not dry properly, resulting in an uneven application.
Step 4
Take the paint and, using a spoon for each paint color, drip the paint all over the bottom of the pan. Layer each color like this. If you do use black, use this sparingly as it can take over if there is too much. Once there appears to be a good amount at the bottom of the tray or pan, take a mixing stick and run it through the paint to create more swirls.
Step 5
Then, take each glass and dip the bottom into the paint, moving the glass around to cover as much of it as you want. You can also use some tape at the mouth of the glass so that you do not touch it with your fingers. Gloves can also be worn to prevent any fingerprints from getting on the glass surface.
Step 6
Once you have dipped the glass, hold it for about a minute over the pan to make sure that any excess paint has dripped off. Then, gently place the glass upright onto the three thumbtacks, pointy side up. Let the glasses dry for about 30 minutes.
Step 7
Now, take the glass and dab the bottom onto the cardboard. This will also remove any excess paint that has pooled underneath. Wipe the point of the thumbtacks off and replace the glass to dry overnight. Turn the glasses around, do any touchups if needed, and leave them to dry a further 48 hours (for a total dry time of 72 hours).
Step 8
Read the instructions on your paint product to check about baking and curing times. Many of the paints can be left to air dry for 21 days before use, although baking does provide more durability. To cure glass in the oven, place the glasses in a cool oven to help prevent the glass from cracking. Then, set the oven to 350 degrees Fahrenheit (176.67 degrees Celsius) and wait 30 minutes.
Switch the oven off and leave the glasses to cool inside. It is imperative that the glasses are left to warm up and cool down in time with the oven. Once cool, leave the glasses for another 72 hours before doing any washing. Do not rush through this time and make sure that you leave the glasses to dry properly for better and longer-lasting results.
Note: If you are using glitter or any metallic paints, it is best to air dry these. Also, whether they are air-dried or oven-baked, we recommend hand washing to prolong the use of the painted wine glasses. Although, you can place some painted glass items on the top shelf of the dishwasher.
Wine Glass Painting Tips
When doing DIY painted wine glass projects, there are more ways than you can count when it comes to design ideas. Some are simple and easy, where the kids can even join in on the fun. Others require more artistic experience and can become works of art. Whatever your skill level, painting wine glasses and other glass items is a great way to relieve stress and enjoy yourself. Some helpful tips are always welcome to make things even more effortless.
- You do not have to go for expensive glass items to paint. You can find cheap glass items at garage sales, thrift stores, or craft stores.
- Always clean the glass surface thoroughly for better paint adhesion.
- When using a design on the inside of the glass, you can either tape it to keep it in place or consider using a sock or crumpled piece of fabric or paper to do the same
- Create straight lines on the glass surface by applying painter’s tape. Remember to remove the tape while the paint remains wet to avoid peeling the dry paint off with the tape.
- You can use a blade to remove any dried paint that you do not want.
Make use of earbuds to create painted dots. When applying, go in straight, gently twist, and then lift to remove.
- Avoid painting close to the rim of a glass, as this is the part that your mouth will come into contact with.
- Plan what you want to do and make sure that you have everything you will need ready when you start to paint.
- Always read the product’s instructions and make sure that you choose the right paint. Follow the instructions for drying and curing times.
- You might require more than one coat of paint in order to get the look you want.
- Always wait at least 24 hours before you oven bake the glass to cure the paint.
- Glass items that air dry cannot be washed in a dishwasher; only oven-cured items can be placed on the top shelf of the dishwasher.
- Never soak or microwave any painted glass items.
Frequently Asked Questions
What Paint Is Best for Glass?
The best paints for wine glasses and other smooth surfaces are acrylic enamel paints. These offer the best adherence to glass surfaces and are usually water-based, non-toxic, and safe to work with.
Can You Paint Glass with Acrylic Paints?
Yes, acrylic paints work fine on glass. However, you will need to include an enamel medium or apply a sealant over the paint, or it will easily wipe or wash off.
How Do You Make DIY Painted Wine Glasses Permanent?
There are two ways you can make the paint more permanent on a glass surface. First, you can leave the paint to air dry for at least 21 days. The second method is oven baking, which is the better option if you want your glass item to last. Place glass items in a cool oven and then set the temperature to 350 degrees Fahrenheit (176.67 degrees Celsius). Allow the glass to heat up with the oven, and then leave to bake for 30 minutes. When you switch the oven off, make sure that you leave the glass items to cool in the oven and wait until it is completely cool before opening the door. Always wait at least 24 to 72 hours after curing before you wash the glass.
Can Mod Podge Act as a Sealant When Used on Glass?
Mod Podge is used for many things when it comes to crafting, as it can act as a sealer, finish, and glue. So, yes, Mod Podge can be used as a sealer over acrylic paints and will provide a clear and protective coat over the glass.

Larissa Meyer is a 32-year-old mother from Michigan and creative spirit since childhood. Her passion for painting and drawing has led her to an education as an illustrator and a career as a freelance graphic designer. She has a Bachelor of Fine Arts in Illustration and a degree in Graphic Design. Larissa is a talented artist who is able to master a wide range of styles and techniques to bring her artistic vision to life. Her greatest passion is currently fluid painting and epoxy resin art. As a mom of two kids, Larissa also understands the importance of fostering creativity in early childhood. She uses her experience and knowledge to help other parents inspire their children and develop their artistic skills as well.
Learn all about Larissa Meyer and Fluid Painting.