How to Stabilize Wood – A Guide on Stabilizing Wood
This post may contain affiliate links. We may earn a commission from purchases made through them, at no additional cost to you.
Wood is an amazing, versatile material, as it can be used to make everyday objects, furniture, and even art items. The greatest disadvantage of wood, however, is that it ages and can rot over a long enough period. If you are an experienced and skilled craftsman, you will know the different methods of preserving the wood so as to make it more durable, thus ensuring that it is stabilized completely. In the following guide, we will advise on ways to achieve this.
What Does it Mean to Stabilize Wood?
To stabilize wood, you would take a piece of softwood (it can also be referred to as punky) and insert resin into it via injection. In doing this, you then create a hardened wooden piece that is both stable and safe for you to woodturn.
Why Do You Need to Stabilize Wood?
The majority of wood is sufficiently hard to be used as a material for a variety of items, such as art, pencil handles, knife handles, and other everyday objects. There are alternative types of wood, however, they can be too soft. These woods are at risk of being damaged by processing them. After processing, they can begin to lose their grip and hardness and can even lose their substance.
To work against the natural aging process, you can stabilize rotten wood. You can do this by using a very low-viscosity MMA (liquid plexiglas) and a vacuum chamber. You will be removing any air from the wood’s pores through building up a vacuum.
The space left behind by the removed air needs to be filled with a stabilizing medium. You can fill the space using a built-up overpressure. Through this process, you must ensure the least possible residual moisture. This allows the stabilizing medium to be distributed optimally. You will have insufficient stabilization if your wood is too moist when tackling this process.
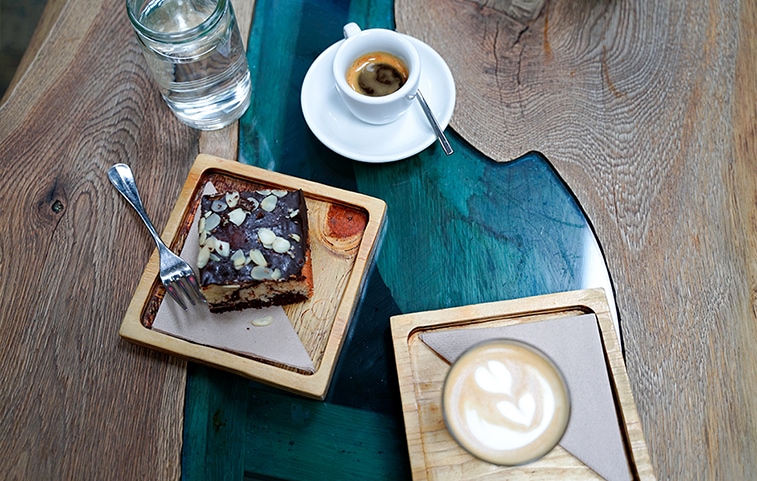
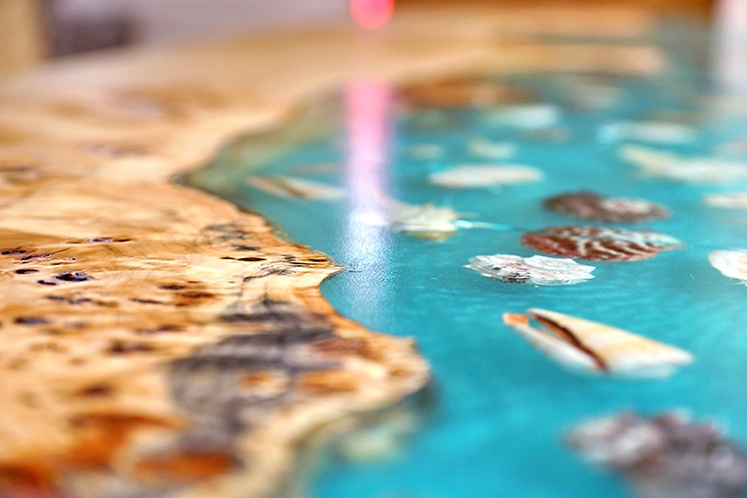
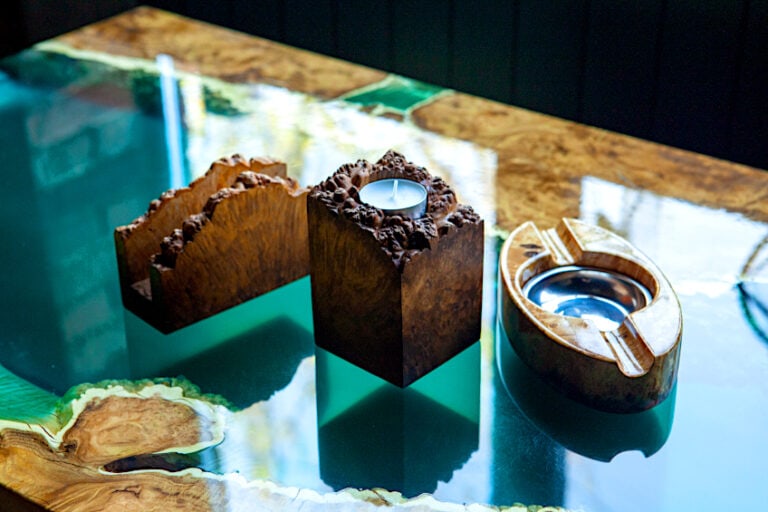
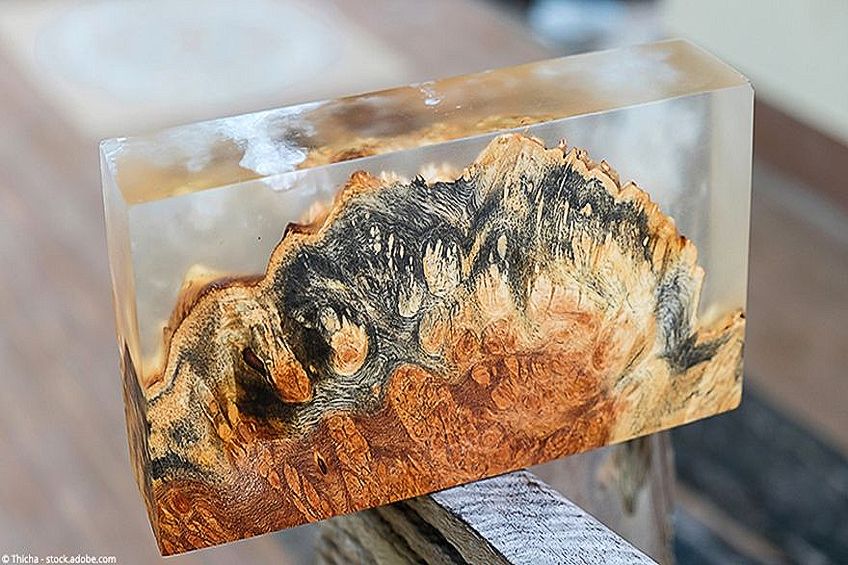
Through stabilizing, you create a hybrid material, as you have characteristics of both the wood and the basic material. Once you have stabilized the wood, it will be able to withstand higher loads and will become a more durable material.
The likes of weather-related damage, solvents, acids, temperature fluctuations, and a variety of other chemicals will have hardly any harmful impact on the wood. The wood will also now be protected by intense UV radiation and high humidity.
The hybrid wood created through this process often has a very strong grain and is considered quite attractive, where in many cases the artist may even choose to stain the wood. The stabilized wood can be worked well mechanically, but you should avoid high temperatures. The surface of the processed wood will begin to smear if it is exposed to temperatures of 248 degrees Fahrenheit (120 degrees Celsius) or higher, which can potentially result in visual impairment.
If you have performed the stabilization with a form of liquified plexiglas such as MMA, your stabilized wood will be non-toxic for both humans and animals. If you use a thermal hardening resin like Cactus Juice, you will need to be a little bit more careful. However, even Cactus Juice does not have any negative effect on one’s health after hardening. You are also able to stabilize other materials such as bone and horn.
What Can You Use Stabilized Wood for?
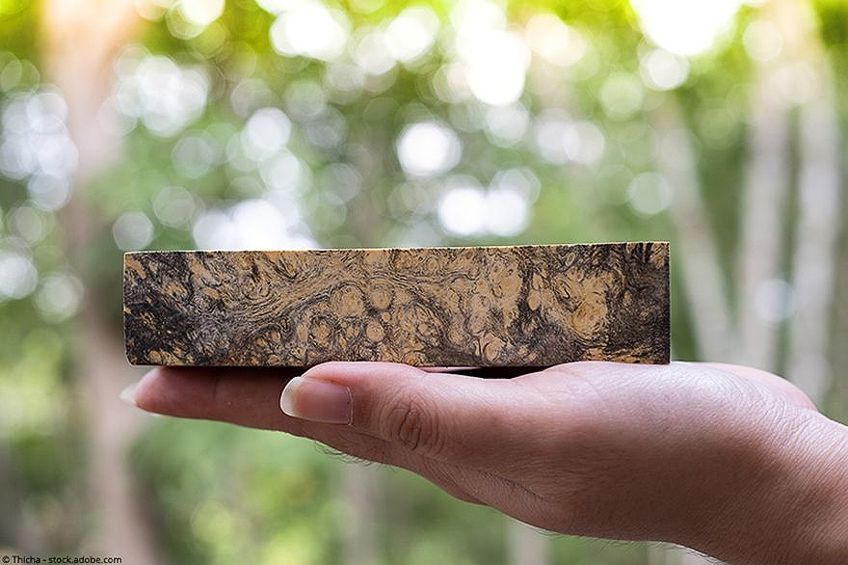
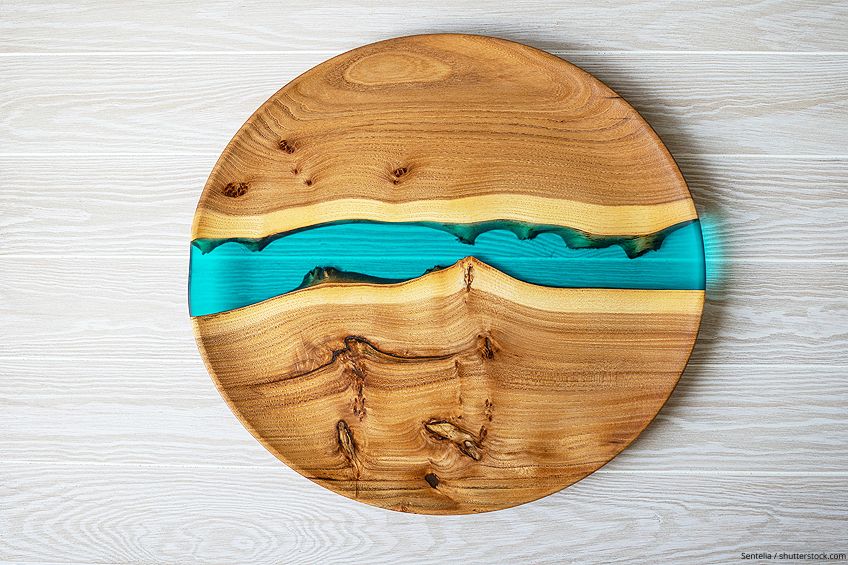
Once your wood has been stabilized, you can use it for an assortment of items, such as a knife handle. Stabilized wood is used for pen blanks (which are the handles of pens). Theoretically, any piece of wood can be stabilized, such as everyday objects, wooden works of art, or bowls and dishes.
Items made with stabilized wood naturally have a premium price, but you do need to take into consideration the effort that has gone into making the item, including the stabilization.
Stabilizing a Variety of Types of Wood
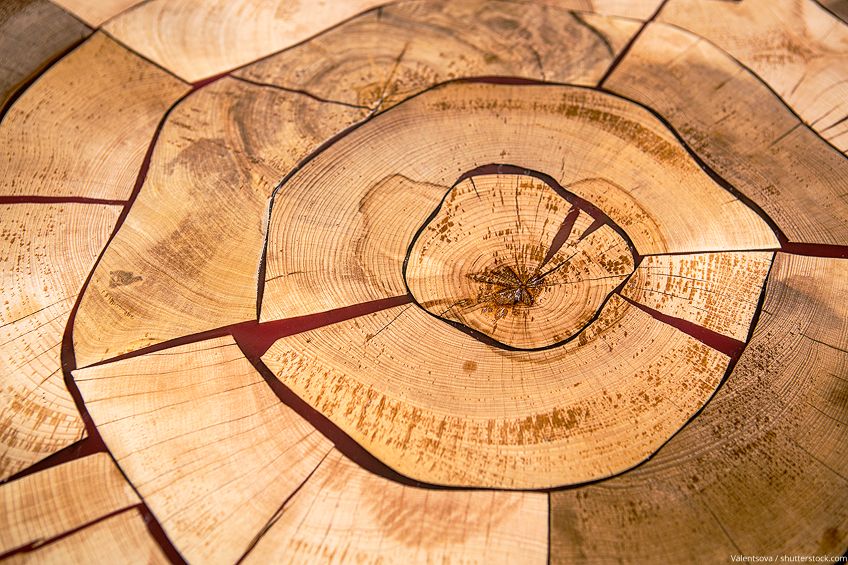
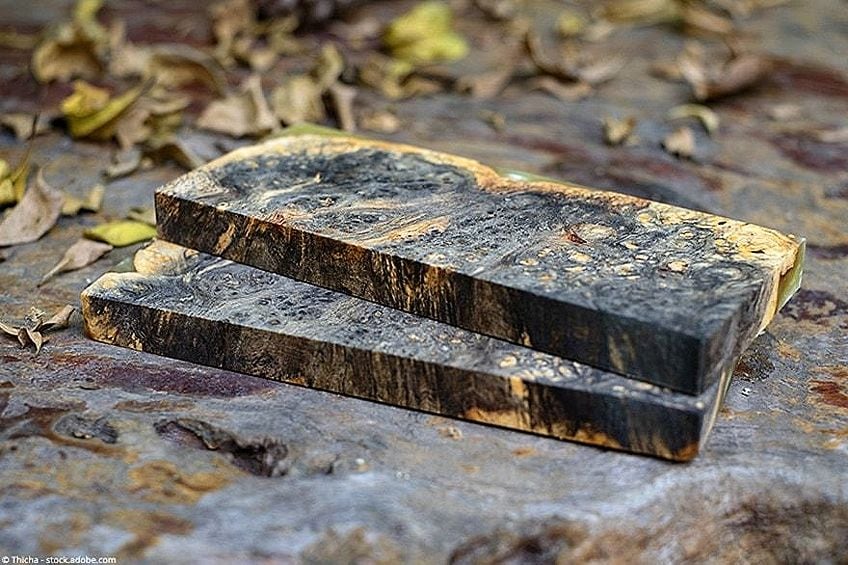
Not all wood is ideal for stabilization. The best-suited wood types for stabilization have a low density and larger pores. Felled woodcuts are a good option thanks to their large pores. The large pores allow the wood to absorb a significant amount of the stabilization medium. What you end up with is a stunning structure that can be made even more beautiful with subsequent polishing. Examples of such woods are:
- Beech
- Birch
- Poplar
You can also add dyes, thus allowing the wood to show its best side whilst remaining very long-lasting and durable.
There are some woods that are not suitable for stabilization, however. These include:
- Softwoods
- Olive
- Rosewood
- Ebony
These particular types of wood are very oily, have tiny pores, a resinous component, and are known for being of a higher density. These issues in addition to others such as traces of tanning agents, will negatively impact the likelihood of the stabilization resin being absorbed sufficiently. As the stabilization medium will not saturate these woods sufficiently, the overall hardening process will not be optimal.
Stabilizing Wood With a Thermal Hardening Resin
In order to ensure the best stabilization, we suggest thermosetting the resin to ensure that it penetrates the wood completely. Through thermosetting, the stabilizer is both introduced to the wood and cured by the exposure to heat. The stabilizer will therefore impregnate the wood as opposed to just staying on the surface.
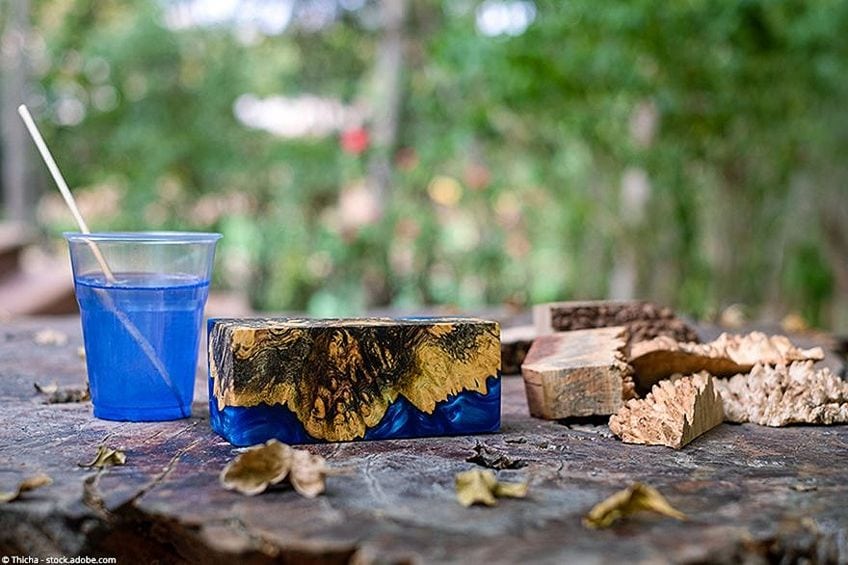
A good resin to use is Cactus Juice. This particular resin is mixed prior to use and sets with its final stability and hardness when the item is baked in the oven. Cactus Juice is also really easy to color if you wish to. We do suggest using a coloring agent made by the same manufactures to color the resin for the best results.
When working with a thermal hardening resin, it is imperative to keep any forms of residual moisture as low as one can. Even if your wood has been stored for a long time, it is still possible that there is residual humidity remaining. This humidity can be too high and can negatively impact the stabilization process. The best way to ensure that the wood you wish to work with is dry is to dry it at 219 degrees Fahrenheit (104 degrees Celsius) in an oven for 24 hours prior to use.
Once mixed, Cactus Juice is used pretty much exactly the same way as we will describe later in this article in terms of the detailed wood stabilization instructions. It is imperative that you never store Cactus Juice at a temperature higher than 84 degrees Fahrenheit (29 degrees Celsius). When exposed to higher temperatures, the properties of the Cactus Juice resin are significantly impacted.
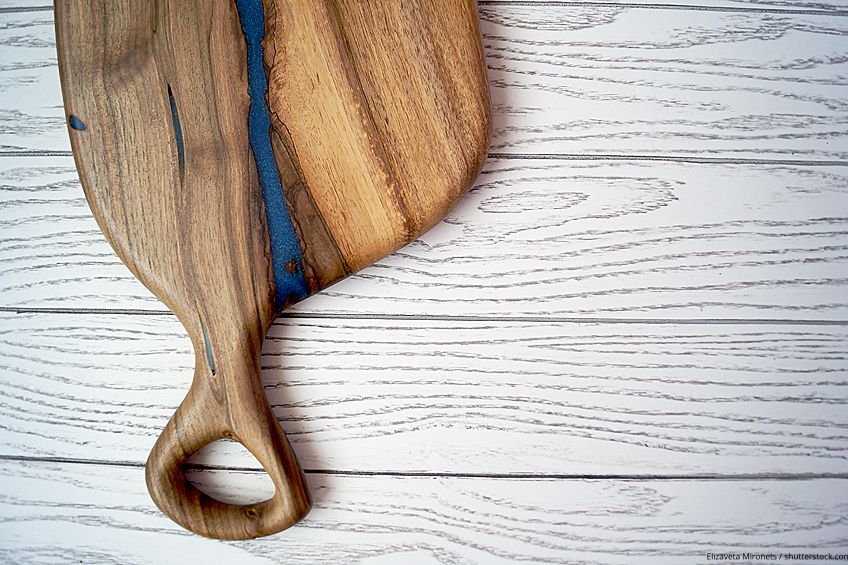
Stabilizing Wood Surfaces With Epoxy Resin
You can use epoxy resin to repair wood and stabilize it to a sufficient level for most applications. If you are dealing with a load-bearing piece of a building, it is imperative that you consult with a structural engineer to ensure that the wood has in fact been stabilized sufficiently.
There is one negative to using epoxy resin in that it only stabilizes the surface of the wood, and does not penetrate deep enough. It can therefore make the wood firmer, but not hardened to its original state.
The ideal temperature to process epoxy resin is between 59 and 77 degrees Fahrenheit (15-25 degrees Celsius). Epoxy resin is made up of two separate parts, namely the hardener and the actual resin. The mixing of these two parts causes them to react with each one another, thus resulting in the required hardening.
If you are applying epoxy resin to wood, you need to ensure that the surface is completely dust-free, and that there is no dirt. Be sure to remove any crumbling wood and ensure that the pieces of wood you are working with have been cleaned sufficiently.
By adding a reactive thinner to your resin, you can ensure that the wood absorbs as much epoxy resin as possible. Another option is to drill small holes in the wood so as to increase the amount of absorption.
Remember to adhere to all safety requirements when you are working with epoxy resin, such as wearing long-sleeved clothes and wearing gloves. Also, it is imperative that you work in a well-ventilated area.
Consolidating Wood Surfaces With Wood Hardener
You can also use wood hardener to assist in repairing porous areas in the wood. Wood hardener is the same as resin, however, in that it only has an impact on the surface and does not actually penetrate the wood.
A positive aspect of wood hardener is it is a great way to prevent future damage, and can be used both outdoors and indoors. It is so easy to do, even a beginner could handle it. As a standard, you will see that wood hardener is clear in order to ensure that it does not alter the wood’s natural color.
Vacuum Chambers for Stabilizing Wood
Vacuum chambers work by removing the compressed air in the wood so as to allow space for the Cactus Juice. The more air that leaves the chamber, the more Cactus Juice will enter into and saturate the wood, thus creating more stability.
BACOENG Vacuum Chamber Kit
We highly recommend you look at the Bacoeng vacuum chamber if you are looking to purchase a vacuum chamber to assist in stabilizing your wood. You are able to purchase this stainless steel vacuum in an assortment of sizes and overall capacities. It is a reasonably priced item that still provides high-quality performance.
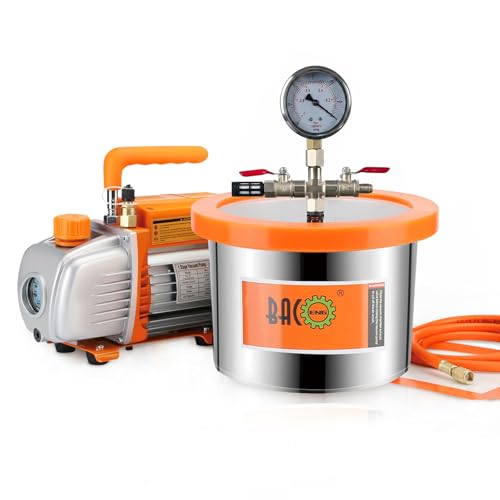
- 1.5 Gallon Vacuum Chamber kit
- Silicone mat can be used over 10 000 times
- Unparalleled quality and lasting effective use
The vacuum chamber can also extract any essential oils from organic materials and degasses urethane, epoxy, and other such materials. So it is useful for more than just stabilizing wood.
The Bacoeng vacuum chamber is the perfect solution to assist with stabilizing wood. Even the one disadvantage of it occasionally bulging inwards is not a concern as customer service will be more than happy to repair it should this occur. We can highly recommend this product, especially as the performance-to-price ratio is great.
Pros
- The liquid-filled display is simple to read.
- It comes with a silicone non-adhesive mat that can be used for at least ten thousand uses without showing any form of wear or tear.
- The vacuum chamber’s processing is of a very high quality.
- You will not have to buy any additional equipment, as it is all included in the affordable price.
Cons
- Sometimes you may find that the base of the overall container begins to bulge inwards when it is being used.
How to Stabilize Wood With Thermosetting Resin
As the name implies, you set thermosetting resin by applying heat. You will therefore require an oven to use the thermosetting resin. The ideal temperature to set the resin is at 203 degrees Fahrenheit (95 degrees Celsius) or less. Should you incorrectly use a higher temperature, this will cause the resin to bleed from the wood and can also cause the resin to set insufficiently.
Try to ensure that the residual moisture in the wood is as low as it can be; the ideal amount is 5%. We highly recommend only using wood that has been stored for a significant period of time. Another way to ensure minimal residual moisture is to dry the wood at 219 degrees Fahrenheit (104 degrees Celsius) in the oven at least 24 hours prior to beginning the stabilization process.
If you are looking to stabilize rotten wood using thermal hardening resin, you will need the following equipment and materials:
- A vacuum pump;
- A vacuum chamber, including the corresponding equipment (valves, suitable hose, and a vacuum meter);
- Aluminum foil (standard household variety is fine);
- Sufficiently dried wood, ensuring a residual moisture of 5% or less;
- The relevant protective gear, including oven-proof gloves, an apron, protective goggles, and protective gloves;
- A stabilizing resin (a thermally hardening resin for this method);
- Should you wish to color the wood at all, you will also require a coloring agent or dye; as well as
- A good quality furnace thermometer, which will allow you to ensure that the temperature is as accurate as possible.
Ensure that you are using a vacuum pump that can create a vacuum of 30 mmHg. You will use the aluminum foil to stabilize the wood in order to be able to bake it. You will use the oven-proof gloves to take the hot blanks out of the oven once the baking process is complete. An oven that is used for stabilizing should never be used to cook food in, as this is a serious health risk.
When you use thermosetting resin, you can clean all the equipment with soapy warm water. If, however, you choose to use time-curing resin, you will need a solvent to clean the equipment.
Preparation
- The first step is to ensure that none of your equipment is in any way dirty or damaged. Dirt can negatively impact the overall stabilization process. It is imperative that you check the vacuum chamber in particular is in no way damaged, as this is important in terms of the safety of the overall process.
- You should have a solid and clear workplace for all of the necessary tools, thus ensuring that you can work without any issues. The space should be safe and heat-resistant. Always have your equipment laid out and easily accessible before you begin.
- It is important to always wear the necessary safety gear, including long-sleeved clothes, safety goggles, gloves, and an apron. Rinse immediately should you get any resin on your skin.
Load Vacuum Chamber
- Your next step is to place the blanks that you wish to stabilize in the vacuum chamber. Ensure that the stabilizing liquid is not hindered in any way from reaching all sides of the blanks. You can ensure this by making sure that there is enough space between each of the blanks.
- You will need to weigh the blanks down so as to prevent them from floating away. You can use an anti-floating mat, or a large-mesh grid to weigh down the blanks.
- Next, you will add the resin, ensuring that the blanks are continually covered by the stabilizing medium. Throughout the stabilization process, the levels of resin will drop as the blanks absorb the resin. Remember to take this into consideration and ensure that the blanks are sufficiently covered with resin to compensate for this.
- Now that the chamber is closed, you can start the evacuation process. You will note the stabilization medium will begin to bubble or ‘boil’, which is a result of the air escaping from the blanks. Watch out that the resin does not begin to bubble over. If you are hesitant about this stage, we suggest that you allow the air to escape gradually and slowly at first. You can never go wrong by allowing the blanks more time. Should a large amount of foam form, allow yourself a few minutes between the evacuation steps for the foam to dissolve and settle. Once the resin foams no longer, and there are no more bubbles coming up to the surface, this means that all the air has escaped and that the blanks have absorbed the resin accordingly.
- Once the resin has been absorbed by the blanks you have finished the process. On average, the whole process takes an hour, but do not be surprised if it takes longer. Turn the vacuum chamber off once you are finished. It is suggested that you allow the blanks to rest in the chamber for a little bit before removing.
It is important that the valve of the vacuum chamber is closed before you switch it off. Ensure sufficient ventilation when opening the vacuum chamber, and avoid opening it too quickly.
Baking/Curing
- You can remove the blanks once the evacuation process is finished. Allow them to drain well. You can blot the blanks with kitchen paper. The remaining resin in the vacuum chamber can be decanted to an airtight container.
You can store it away from light in a dry place, making sure that the temperature is below 68 degrees Fahrenheit (20 degrees Celsius). What is wonderful is you can reuse that resin when you perform the stabilization process next. Resin, if stored correctly, can be kept for a long time.
- Any tools that have come into contact with the resin need to be cleaned with warm, soapy water.
- Next, use a single piece of aluminum foil for each blank and wrap each one individually. Ensure that you have tightly wrapped the foil and that the matte surface of the aluminum foil is facing outwards. The shiny side should be wrapped close to the surface of the blanks.
- You will need to pre-heat the oven to between 159 and 199 degrees Fahrenheit (71 degrees and 93 degrees Celsius). You can use your oven thermometer to ensure that the temperature is correct. Once the oven has pre-heated, you can place the blanks in it. You can then leave the blanks in the oven for anywhere between 60 and 90 minutes.
Tips and Tricks
- Be aware that the wood becomes heavier after it has been put through the stabilization process. You should definitely take the increased weight into consideration. If you are making the likes of a knife, the weight needs to be distributed evenly, whereas if you are making a pen, you do not want it to be too heavy.
- You are able to save a stabilizing medium within the vacuum chamber by creating a cavity. All you will need is a plastic bucket and a metal salad bowl. Start by cutting a ring out of the plastic bucket and glue it directly onto the cavity portion of the salad bowl, allowing it to stick out a fair amount. Ensure that the ring is sealed sufficiently. Then place the container you have created into the vacuum chamber and, when stabilizing, place your piece of wood inside the container. You will require a lot less resin to fill the container.
- You can expect that some of the stabilizing resin may escape after the baking is completed. If you find that a lot of resin escapes, this can be a result of the wood containing too much residual moisture.
We cannot stress enough how important it is to ensure there is no more than 5% residual moisture before beginning the stabilization process.
- Your evacuation target is 30 mmHg. You will achieve the best penetration of the resin the deeper the evacuation. You will then be able to create a robust and durable piece of work by using a deeper evacuation.
Frequently Asked Questions
What Should the Moisture Content Level Be to Stabilize Wood?
The drier the wood, the better outcome you will have from stabilization. The residual moisture content should never be more than 5%. You can help to get the correct level of residual moisture by drying your wood for 24 hours at a temperature of 219 degrees Fahrenheit (104 degrees Celsius) in an oven.
Is Stabilized Wood Waterproof?
Unfortunately, stabilized wood is not waterproof, as the natural pores of the wood are still open, even once the treatment has been completed. The stabilized wood still takes in moisture through capillary action. If a stabilized piece of wood is placed in water, the wood will become completely saturated with water within a few hours.
Which Color Mediums Should You use For Coloring?
As there are so many different color mediums available on the market, we recommend that you use one manufactured by the same manufacturer of the MMA or resin you are using. This way, you will be most likely to have the best results.
Does Wood Hardener Stop Rot?
You are able to strengthen and revitalize rotted wood through the use of a liquid wood hardener or wood petrifier. These products will be absorbed by the rotted wood, hardening it once again.
Why Do You Need to Stabilize Wood?
Wood is a material that can expand or contract, impacted by the temperature and humidity of its surroundings. This can result in the wood changing size and potentially even warping. Stabilization strengthens the wood, as the resin adds a lot of strength to the structure of the wood itself.
How Do You stabilize Softwood?
You can use a mixture of 50% water and 50% thinned PVA glue to stabilize softwood. Soak the wood in the mixture. Once done, wipe off any excess of the mixture from the surface and allow the wood to dry overnight.
What is the Length of Time Required to Stabilize Wood?
The length of time required to stabilize wood is impacted by the type of wood you are stabilizing and which vacuum pump you are using. The time can vary from 4 to 6 hours, or even as long as 24 hours to ensure that the air has been completely removed from your material.

Larissa Meyer is a 32-year-old mother from Michigan and creative spirit since childhood. Her passion for painting and drawing has led her to an education as an illustrator and a career as a freelance graphic designer. She has a Bachelor of Fine Arts in Illustration and a degree in Graphic Design. Larissa is a talented artist who is able to master a wide range of styles and techniques to bring her artistic vision to life. Her greatest passion is currently fluid painting and epoxy resin art. As a mom of two kids, Larissa also understands the importance of fostering creativity in early childhood. She uses her experience and knowledge to help other parents inspire their children and develop their artistic skills as well.
Learn all about Larissa Meyer and Fluid Painting.