Glaze Coat Epoxy Problems – How to Fix Epoxy Mistakes
This post may contain affiliate links. We may earn a commission from purchases made through them, at no additional cost to you.
While working with epoxy is not very hard, it is understandable that from time to time you may make mistakes. In the following article, we will assist you with solution on how to fix possible mistakes when working with epoxy. It is very important to remember that it is always easier to repair mistakes when the epoxy is wet as opposed to dry or set. Once the epoxy has set, it becomes a lot more difficult to fix any mistakes. There is always, however, the option of applying a second coat of epoxy, which can often correct many mistakes.
Common Epoxy Mistakes
While some epoxy errors cannot be helped, most of the time you should be able to determine the cause of your epoxy mistake. Especially with regards to beginners, there are a number of common mistakes made my the average epoxy user.
Incorrect Mixing of the Epoxy
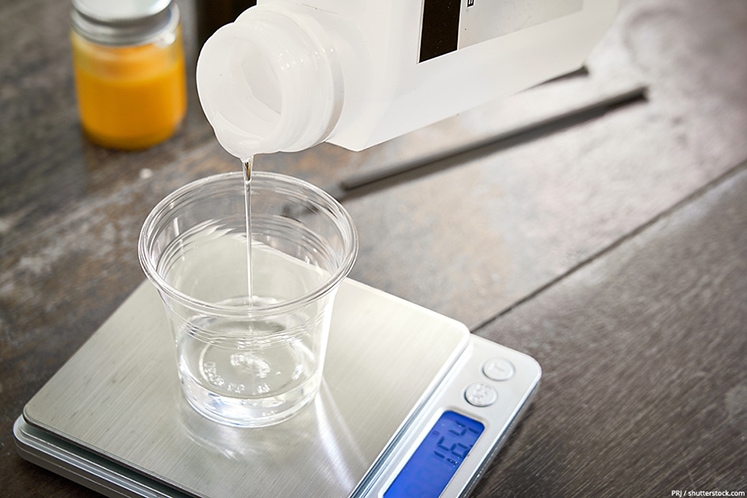
Most epoxies can be bought in a two-part kit and need the parts need to be mixed before you use the epoxy. One of the most important aspects when mixing two-part epoxy is to ensure that the mixing ratio advice is followed to the letter. Some instructions call for you to mix the combination and will state the weight of each part required, while others will give the volume of each part required.
Always follow the instructions. If you make an error when measuring out the two components, you could end up with the epoxy taking too long to set or setting too quickly, or even not setting at all.
Selecting the Wrong Product
It can be difficult selecting the correct epoxy sometimes, as there are many uses for epoxy. Some epoxy can be used for casting compounds or bonding agents. Other uses for epoxy include molding, structural fillers, and many more options. You need to ensure you are selecting the right type of epoxy for your desired project.
Not considering the Weather and Temperature
The temperature has a big impact on the overall setting process when working with epoxy. The majority of epoxies on the market dictate its setting or curing time linked to the temperature. If you work with epoxy under the wrong temperature environment, your epoxy will not cure correctly.
Improper Storage
Leftover epoxy that is not in use should be stored at an appropriate temperature. If the temperature changes too much, it can cause the epoxy to solidify or even crystalize. Epoxy should be stored between 60 and 70 degrees Fahrenheit (16 to 21 degrees Celsius).
No Surface Preparation
You will need to prepare your surface before you begin working with epoxy. You need to ensure that the surface is clean and free from any dust, dirt, or oil. If you do not have a clean surface, your epoxy might not adhere or bond to the surface.
How to Fix an Uneven Epoxy Resin Finish
Although most epoxies available to buy are self-levelling, you will find that some epoxy resins do not level out to the level you require. This can be a result of you using too little resin. That is not a problem and you can use the following steps to assist with your epoxy resin levelling out.
Firstly, make sure that the surface your project is sitting on is level. If your resin is not levelling out, you can mix a bit more epoxy resin than you first thought you needed, and make sure that you cover the surface completely. If your epoxy resin has already hardened, but you have found that it is not level, you would then need to sand down the surface. You can then apply a second coat after the sanded surface has been cleaned.
The sanding will allow the two layers of resin to bond sufficiently. If you realise that your epoxy is uneven while it is still wet, you can add an additional coat without having to sand the original coating. Then, you can allow the resin to set completely, which should then solve your problem.
Preventing Uneven Epoxy Finishes
It is very important to ensure that your surface is clean and has been prepared sufficiently before you start working with the epoxy. It is also relevant to ensure that the epoxy you are going to use is fresh; this is also relevant for the hardener. If you do not mix or apply the epoxy correctly, this can result in an uneven finish. So, remember to follow the instructions carefully to ensure that you do not have any uneven finishes.
Removing Waves and Ripples From Your Epoxy finish
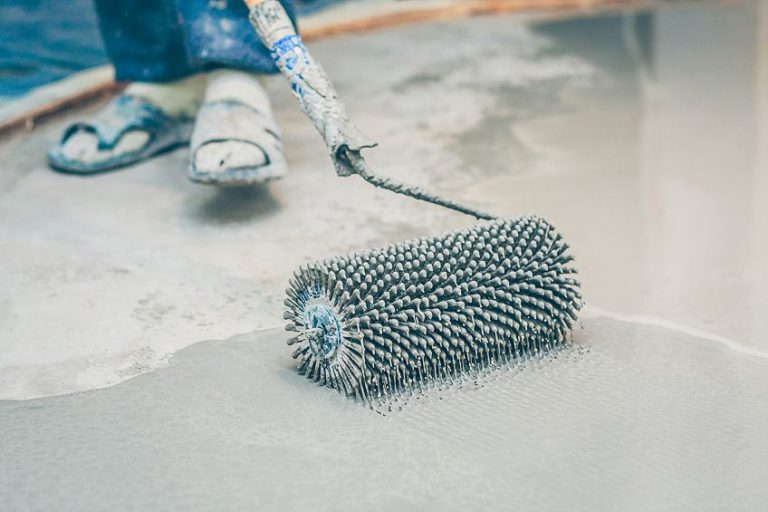
When you are working with wood, you will find certain problems such as bubble-like imperfections, or even ripples or waves on the wood’s surface. It will become apparent that only applying one coat of epoxy will not be enough, and layering additional coats will often be the solution to your problem. Your first coat is known as the flood or seal coat, and should be applied thinly.
You will need to apply the initial coat over your whole piece at a thickness of 1/8” (3mm). Do not forget that you will be applying your epoxy resin coating in two steps. The first step is the flood coat, which should only be a thin layer. The thin layer helps you avoid creating any bubbles on the surface. Secondly, you will apply the next, thicker coat which is called the float coat. You will be using the same product for both layers.
You can then continue to apply additional layers until you have the levelling you require. You should note that when you are working with the likes of formica, steel or other similar materials you will not be required to do a seal coat.
Remember how important the temperature is to the overall epoxy process, too much heat can result in bubbles or ripples. When working with any epoxy always make sure you are working in a well-ventilated environment and that you are sufficiently protecting your eyes and skin.
Repairing an Epoxy Resin Countertop
With time, your countertops will have scratches or may even begin to peel as a result of daily wear and tear. These are both signs that it is time to repair your countertops. This particular repair job is not difficult at all and is a simple DIY operation. It will allow you to save a lot of money, as a repair job is cheaper to do than simply replacing the countertops.
How to Fix Your Epoxy Resin Countertop
The first step is to tackle any peeling or deep scratches on the surface. You can do this by using a good surface abrasion to cover the issues. As always, remember to follow the instructions carefully to make sure that you get the clear finish you require.
Next, you would need to sand down all the imperfections, as well as any scratches. We strongly suggest using a wet or dry 650-grit sandpaper. When sanding, you need to ensure that you are sanding parallel to the imperfections. When you are finished, remember to clean the surface so as to ensure no dust or dirt remains.
You can use a 50/50 cleaning solution, combining one-part commercial cleaner with one-part water. When you have finished using the cleaning solution, make sure you wipe down the area to ensure all the cleaning mixture has been removed.
Finally, you can polish the surface and then add a thin layer of epoxy resin to your countertop. This layer will seal the surface and will give a clear, glass-like finish. It is important to wait at least 24 hours for the epoxy to set before checking to see if it is completely dry and no longer sticky.
In order to remove any chips that may appear at the edges you can use a little alcohol on a towel or clean cloth.
How to Fix an Epoxy Surface That Failed to Cure
When working with epoxy resin, the first question most people ask is how long it takes to cure. The curing time varies from resin to resin, but this is not something you should worry about as the curing instructions are always included with the epoxy kit.
The rule of thumb is that most epoxies take roughly 24 hours to become dry to the touch and are completely cured within 48 to 72 hours. There are some options available that offer quicker drying times, although these are not recommended unless you have extensive experience working with epoxy resin.
There are a variety of reasons as to why your epoxy does not set in the time advised. It can be due to the wrong mixing ratio, cold temperatures, or using the wrong product.
Incorrect Mixing Ratio
Your epoxy may have failed to cure due to an incorrect mixing ratio, where you perhaps added too much or too little hardener to the mixture. Adding water-based color pigments will also affect the mixing ratio, as it is very sensitive and needs to be adhered to exactly as prescribed.
You can fix this by making sure that you mix the correct ratio of hardener and only add any additives or fillers afterwards. To make sure you have a good finish, remove the unset epoxy completely and start again; do not try to simply cover it up.
Cold Temperatures
Temperature can also impact the curing of epoxy. Working in a space with too low a temperature can impact the curing time and prevent the epoxy from setting. To fix this, you can try to give your epoxy resin additional time to set, which may be longer than the kit’s instructions.
There are also products available that are designed to assist epoxy in curing at a lower temperature. Alternatively, you can apply heat. Adding heat to the epoxy will promote the chemical reaction and help the setting process take place.
Wrong Product
There is of course a chance that your epoxy resin will not setting because you may have used the incorrect product. When you buy your epoxy, you must always verify the compatibility of the hardener and the resin. If you use different brands when mixing your epoxy resin or mix it with a polyester catalyst, this will often result in it not setting.
Try removing the epoxy completely, rather than simply adding additional layers. Once removed, you can start the process from the beginning.
It is common for epoxy to fail to bond to the surface itself due to it curing improperly. You can ensure that the epoxy bonds to the surface by adhering to the tips above for curing. You should also make sure that your surface is clean and dry before applying the epoxy, as it will not adhere to a contaminated surface area.
Glaze Coat Epoxy Problems
You do run the risk of your epoxy coat becoming cloudy, which is referred to as glazed coat epoxy. A clouded epoxy surface can be due to a number of reasons, such as humid conditions or air bubbles. This problem will also stop the surface from curing correctly, resulting in a tacky finish.
Humid Conditions and Moisture
Glazed coats can be a result of moisture from condensation or humid conditions, as these react to the components of the mixture prior to the epoxy curing. To correct this, you can try applying heat directly to the epoxy layer, as this will help remove any moisture and can assist in the epoxy setting properly.
Trapped Air in the Epoxy
Glaze coat can be a result of trapped air in your epoxy, which may be seen as bubbles. You can prevent this from happening by applying your epoxy in thinner coats. Alternatively, you can remove air bubbles by applying heat directly to the epoxy layer, as doing so will release any trapped air and allow the coating to set. You could also wait for warmer weather, as epoxy tends to be of a thinner consistency in warmer climates.
Sticky or Tacky Epoxy
The problem of glazed coat epoxy can result in your epoxy being tacky or sticky even though you have left it for a few days to cure. The is only real solution to this problem, unfortunately, and that is to remove the epoxy completely. Simply adding another layer will not work, so you will need to try to remove as much of the epoxy as possible.
When you have removed as much of the resin that you can, you will then be ready to being applying a fresh new layer of resin. Once you have added the first coat, remember to allow it time to cure completely. Next you can give the surface a light sanding before wiping it clean.
Now, you are able to apply your second coat of resin. If you ensure that you follow the steps, you will find that your epoxy cures properly and will not leave the surface feeling tacky or sticky.

Larissa Meyer is a 32-year-old mother from Michigan and creative spirit since childhood. Her passion for painting and drawing has led her to an education as an illustrator and a career as a freelance graphic designer. She has a Bachelor of Fine Arts in Illustration and a degree in Graphic Design. Larissa is a talented artist who is able to master a wide range of styles and techniques to bring her artistic vision to life. Her greatest passion is currently fluid painting and epoxy resin art. As a mom of two kids, Larissa also understands the importance of fostering creativity in early childhood. She uses her experience and knowledge to help other parents inspire their children and develop their artistic skills as well.
Learn all about Larissa Meyer and Fluid Painting.