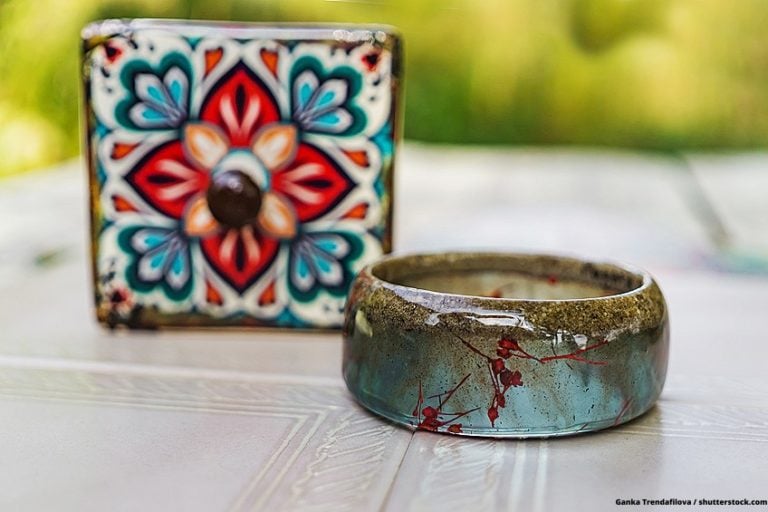
Resin Coasters – Creating Your Own DIY Resin Coasters
This post may contain affiliate links. We may earn a small commission from purchases made through them, at no additional cost to you.
The popularity of epoxy resin can be attributed to this material’s glossy, durable finish as well as its versatility. Indeed, you can create almost anything out of epoxy resin, and with the option of adding additional pigments and decorations, your possibilities for design are limitless. One such creation you can try for yourself is that of making epoxy coasters to protect your tables and countertops. Resin coasters are both decorative and functional, as they can be used for glasses, cups, and even plates. This guide will show you how to make resin coasters so that you can begin working on your own designs!
Table of Contents
What Are Resin Coasters?
A resin coaster is quite simply a coaster that has been made out of epoxy resin. Coasters are used as a kind of barrier between the bottom of a glass or mug so as to protect the surface on which it is placed. You can use epoxy coasters for this purpose, or you can use it as a decorative piece.
Required Materials for DIY Resin Coasters
You will need a range of materials for your DIY resin coasters. These include the following:
- Casting resin of a low to medium viscosity
- Your choice of pigments, glitter, stones, crystals, and other decorations
- Silicone coaster molds
- Mold release agent
- Mixing cups (two small 30ml cups and one big 300ml cup)
- Wooden mixing sticks
- Hot air dryer or torch for removing bubbles
- Toothpicks for removing bubbles
- Protective film or mat for nearby surfaces
- Empty box for covering the resin coasters
- Protective nitrile gloves, goggles, and a respiratory mask
- Lacquer for finish (we suggest silver or gold)
- Cork feet or slip-proof pads for under the coasters (optional)
Resin Coaster Molds
For the design and overall shape of your resin coaster, you can choose between purchasing a pre-shaped silicone mold or you can try your hand at creating the mold yourself. We suggest using a pre-shaped mold if you are a beginner. Polished silicone molds are great because they are designed specifically for use with resin, are long-lasting and of a high quality, and will result in your resin mold looking polished once removed. Some common shapes and designs for resin coaster molds include:
- Basic shapes (rectangular, square, round, oval)
- Multi-faceted shapes of various sizes (hexagons, octagons)
- Symbolic shapes (hearts, flowers)
- Irregular shapes (geodes)
A Step-by-Step Guide on How to Make Resin Coasters
Once you have all of your tools and materials ready, you can begin the process of creating your resin coasters. Follow our detailed instructions on how to make coasters in order to create decorative and functional pieces for yourself and to give as gifts.
Getting Ready
- When working with epoxy resin, it is always important to prepare everything beforehand. Have all of your tools and materials ready and at hand, ensuring that you are working in a well-ventilated room.
- Make sure that you are wearing nitrile gloves and goggles for protection, as well as a respiratory mask to protect yourself against potential fumes and volatile organic substances (VOCs).
- Cover all nearby surfaces with a protective film or mat so that you do not get resin in unwanted places.
- Your room temperature should be between 71- and 73-degrees Fahrenheit (22-23°C), as this is the ideal temperature for epoxy resin.
- Prepare your silicone mold by spraying it with a suitable mold release agent. This will enable you to remove your resin coasters from their molds with ease once they have cured.
Mixing Your Resin
- Before you mix your resin, we suggest leaving the resin and hardener containers in a bowl or warm water for a few minutes. This will lower the number of bubbles that will be produced later on. However, this will extend the curing time.
- Ensure that you read and follow your resin product’s instructions properly. Most resins can be mixed at a 1:1 ratio of resin to hardener, but this can vary depending on the brand.
- Pour each component into each of your small 30ml cups. Take these two cups and pour them into the larger cup to combine them.
- Stir the combined mixture thoroughly for 3 to 5 minutes. Ensure that you stir over the bottom and the sides as thoroughly as possible, as this will prevent bubbles.
Adding Color
- Once your resin and hardener have been mixed together for the required length of time, you can add any colors or pigments to the mixture. We suggest choosing a product that explicitly states that it can be used with resin. Unsuitable pigment types will affect the curing time as well as how the color shows in the finished product.
- The way you add and mix the pigment will depend on the effect you desire. You can either mix the color thoroughly for an even shade, or you can add the color in random ways so as to achieve certain effects.
- You can use the following types of pigments for adding color to your resin:
- Powdered pigments
- Specialized dyes
- Alcohol-based inks (although these may fade with time)
Tip: Try to choose a pigment with a high concentration of color, as this will minimally affect the resin’s sensitive mixing ratio. You should never exceed more than 6% of the total amount of resin, as any more than this will affect how your resin cures.
Casting Your Resin
- Once your resin has been mixed and you have added any desired pigments, you can pour the resin mixture into your mold. Never scrape the sides of the cup of resin you are pouring, as the excess resin is often not mixed properly and will cause bubbles as well as issues with curing.
- If you plan on embedding objects, you must first pour a thin layer of resin as a base coat. This should be approximately 2-3 mm thick.
- Add in your desired objects. These can be anything from glitter, confetti, and beads to shells, small stones, and little trinkets.
- Fill up the rest of the mold with resin. Remove any bubbles that may appear by pricking them with a toothpick or going over them with a hot air dryer or torch.
- If you want to pour different layers, allow the first layer to dry. When the first layer feels tacky to the touch, you can pour the next layer of resin.
- Allow the piece to dry and cure for the stipulated length of time. You can refer to the manufacturer’s instructions for the required curing time.
Creating Effects
- You can achieve a number of unique color effects by experimenting with the second layer of your resin.
- Do this by pouring two or more differently colored resins into your molds. See what effects you can achieve by pouring the colors in at the same time as opposed to different times.
- Use a toothpick to create interesting patterns and effects in the colored resin. You can create swirling patterns that blend the colors together, or you can create a stippled effect to add texture.
- When mixing two colors together, we suggest using a base color and a complementary metallic color. These two colors, when combined, can creating a watery effect in the resin.
Removing Air Bubbles
- It is best to remove air bubbles by applying heat. This is because hot air causes the bubbles to rise to the surface and burst. You can use a hot air dryer, a torch, or even a Bunsen burner to do this.
- When heating the bubbles, do not hold the heat source in one section for too long. You should also ensure that you don’t keep the heat too close to the surface. The source of heat should move constantly and evenly.
- You can use a toothpick to remove larger bubbles.
Curing
- As your resin hardens, you should check your coasters frequently to ensure that no new bubbles have developed.
- Curing periods will vary from resin to resin. Most brands require between 48 and 72 hours to cure completely, and should become dry to the touch within approximately 24 hours. You should always consult your manufacturer’s instructions for this information.
- Cover your resin coasters with a box or something similar while they are curing. This will ensure that no dust or other forms of contamination can settle on your drying resin.
Demolding Your Coasters
- Do not try to remove your resin from its mold until it has hardened completely. If the resin is still flexible, removing it from the mold can cause it to lose its shape.
- It is best to prepare your molds with a mold release agent before pouring in the resin. This will allow you to remove your resin coaster from its mold with ease.
Sanding and Polishing
- It is best to use a polished silicone mold for casting resin, as these result in the resin surface maintaining a shine that it would not have had otherwise.
- If this is the case, you can apply some resin polish to make the surface shine even more. You can apply the polish with a microfiber cloth to achieve a glossy surface.
- If you do not have a polished mold, as in the case of making your own resin mold, your resin surface will likely come out looking quite dull or scratched. You will need to sand and polish your resin surface, which can be done by hand due to the small size of a coaster.
- Wet sand the surface of your resin coaster. You will need a coarse 120-grit piece of sandpaper as well as a fine 3000-grit piece. You will find that using a sanding block will make things easier.
We suggest wet sanding the resin due to the fact that sanding causes frictional heat to occur, which can damage the resin. By adding water, you are lowering the temperature as well as capturing all excess dust and dirt that is produced as a result.
- Work your way gradually from the coarse sandpaper up to the fine sandpaper, operating in circular movements. You will need to wipe the surface clean and add fresh water frequently.
- When you are done sanding, the surface should feel flat, smooth, and dry. You can now begin to polish the resin coaster with a good-quality polish and a microfiber cloth.
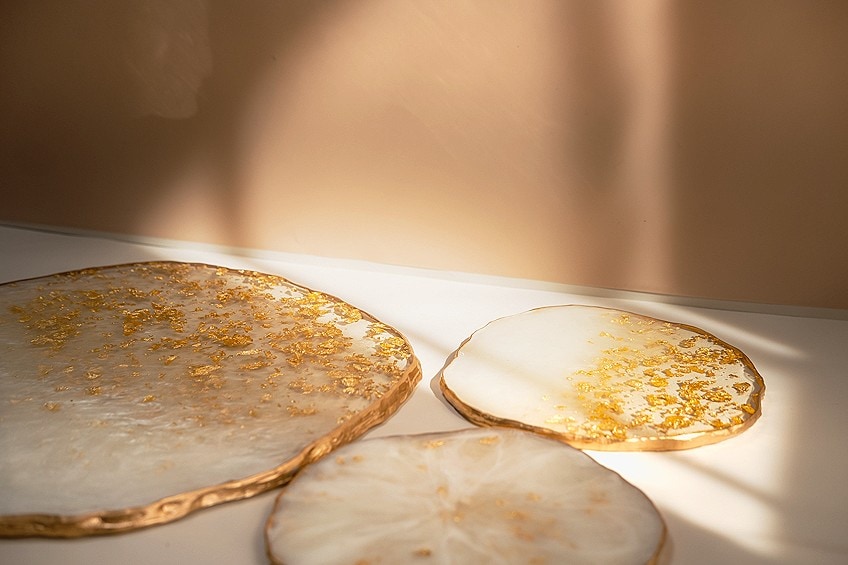
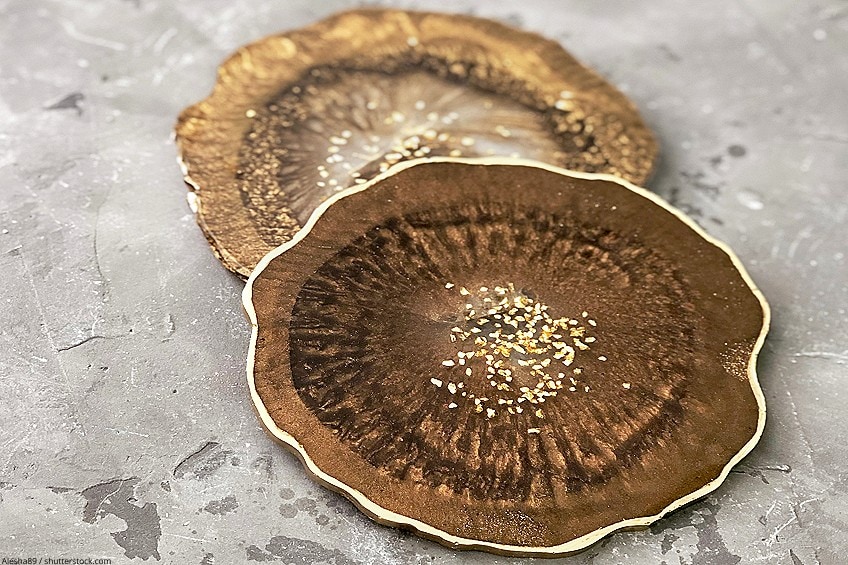
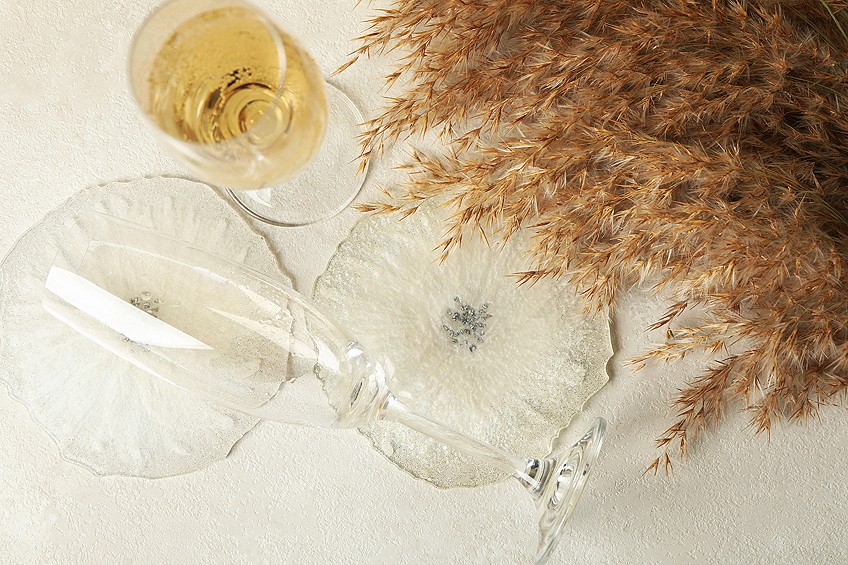
- For the perfect finish, you can paint the edges of your epoxy coasters with a silver or gold lacquer.
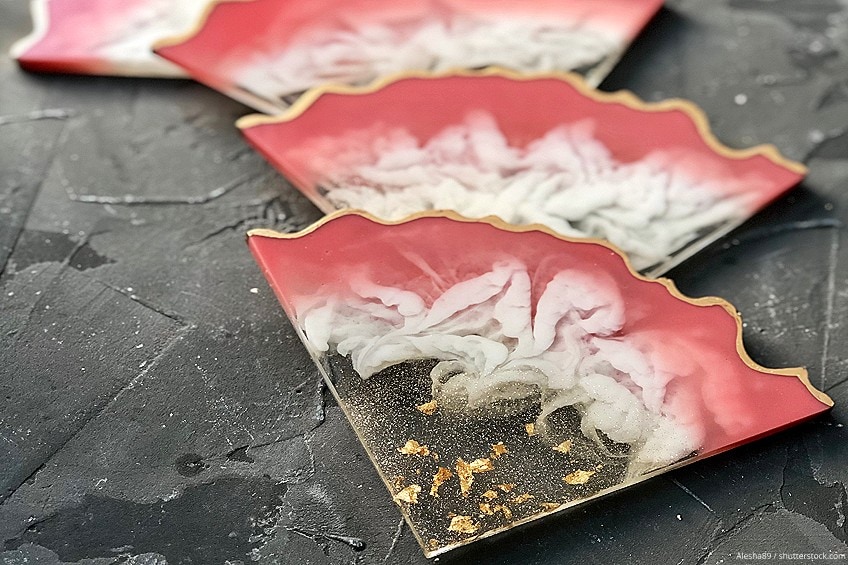
Ideas for DIY Resin Coasters
Now that you know how to make coasters, you have only to decide what kind of coaster you would like to create. There are a multitude of ideas for different DIY resin coasters, as you can embed any number of small objects as well as create unique color combinations and effects. Examples of that which can be embedded into your epoxy resin coasters include:
- Mica flakes, glitter, and confetti
- Beads, buttons, and tiny crystals
- Shells, sea glass, and tiny sea creatures (please ensure that any sea creatures are already dead or dried)
- Coins and pieces of metal
- Dried flowers, leaves, moss, and other plant material
- Photos, papers, and old tickets and receipts
- Mosaic pieces
- Precious stones, small rocks, or sand
You can create a wide variety of designs by using these ideas for embedded objects in your resin coasters. Try one of the following ideas or use them as inspiration for your own unique creations:
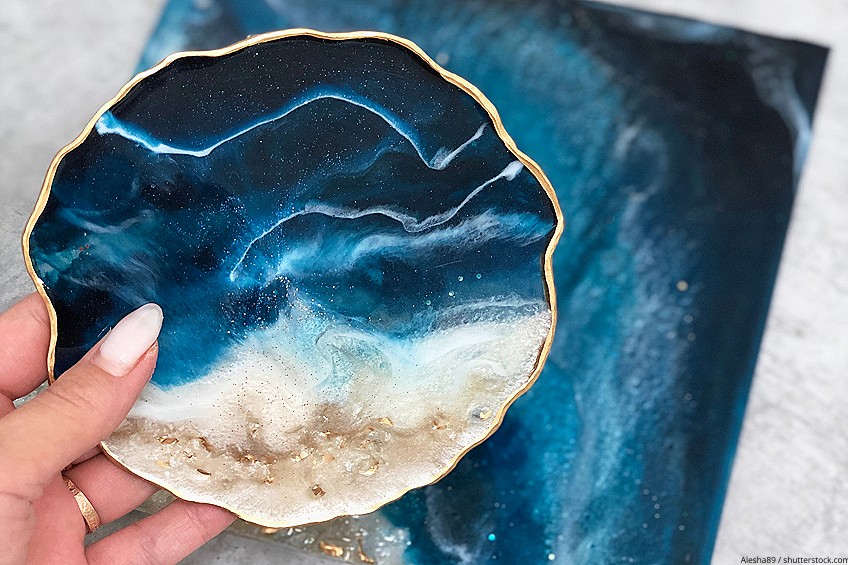
Beach-Themed Coasters
These resin coasters mimic a beach, and can be done with ease. Separate your resin coaster molds with a piece of plastic. In the first part, take blue- and turquoise-colored pigments to create a resin ocean, using a white pigment for the spray. You can create the spray-like effect by using an additive or going over the area with a hot air dryer.
In the second half of the mold, remove the plastic separator (as the first half of the resin will have hardened by now) and add sand, shells, and small stones to create a beach. You can then cover the embedded objects with a clear resin to reach the same level as that of the “ocean” half.
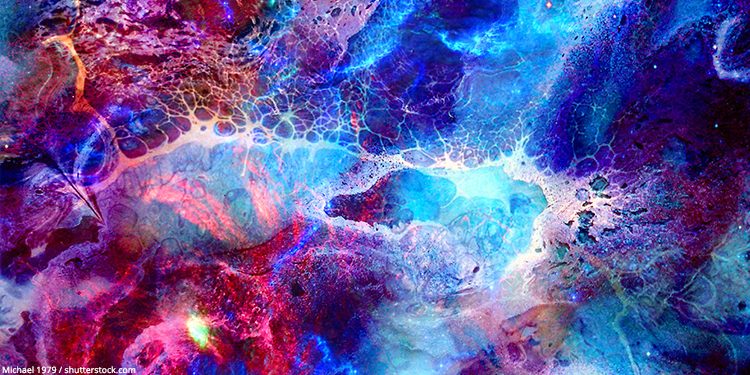
Galaxy-Themed Coasters
You can create dark, blue-violet shades in your resin and add glitter. Use a toothpick to create swirling galaxy-like patterns within the resin. This will result in a coaster that looks like a galaxy scattered with sparkling stars.
Petri Dish Coasters
You can create a petri dish resin coaster by adding an alcohol-based ink to your resin mixture. When you use a dropper, you can achieve some beautiful and unique effects as a result of the chemical reaction.
Tip: Use an opaque white alcohol ink for an effect of depth, as this color is heavier than others.
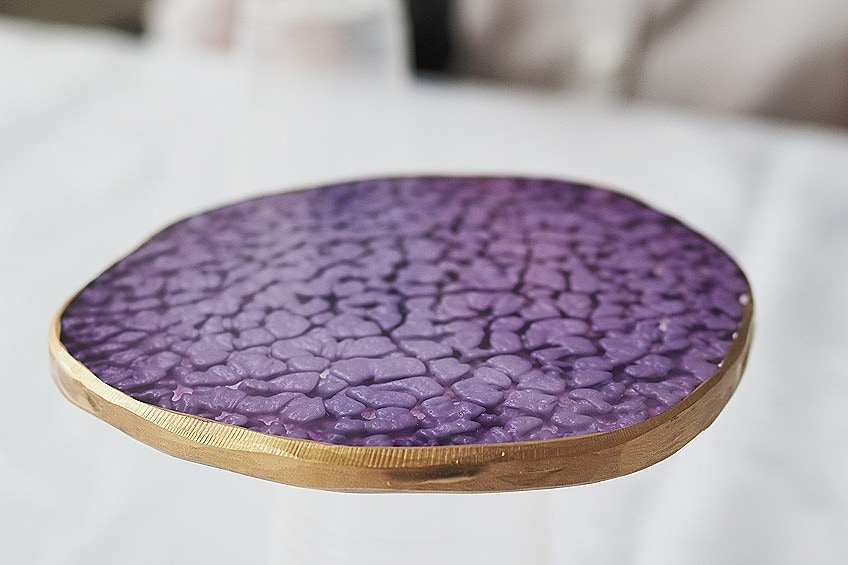
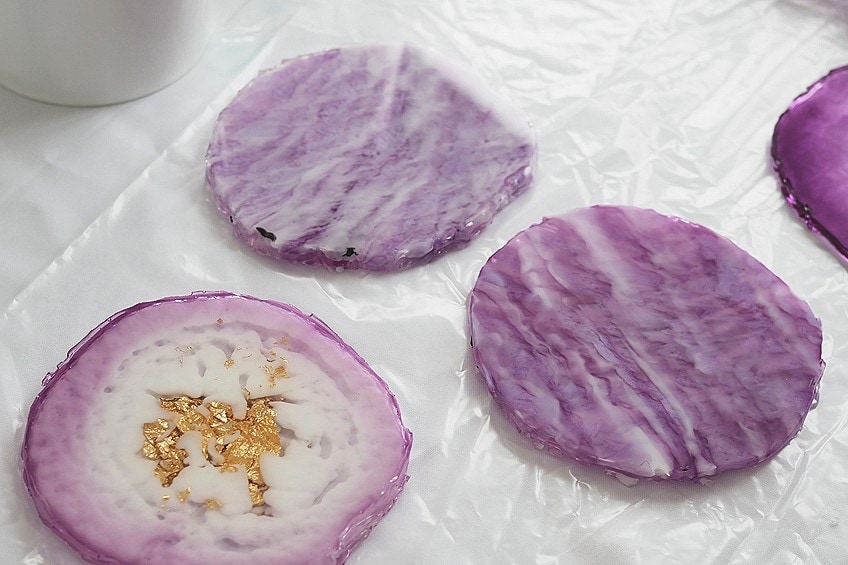
Geode Coasters
These coasters are a visual masterpiece, replicating the beauty of a geode crystal. You can attempt any number of designs by using various colors, stones, glitter, and pieces of glass and gold. You could even add in real crystals for a particularly stunning effect.
It is best to use silicone molds that have been shaped to look like geode crystals, a wide variety of which you can find online with relative ease.
River Coasters
You can create your own small-scale version of the trendy epoxy river table by applying the same effect to your resin coaster. This is quite a difficult project to achieve, however, and will require a certain level of expertise.
Plant-Based Coasters
You can use any plant-based materials in your coasters, although any pieces that are used need to be dried sufficiently first. You will need a lot of care and precision when embedding dried flowers and plants, as these are sensitive and can break easily.
As you can see, there is no limit to your imagination when creating resin coasters. Anything is possible with a little practice and patience, so begin experimenting!
Frequently Asked Questions
Can I Use My Resin Coaster for Hot Drinks?
Most epoxies can withstand temperatures of up to 148 degrees Fahrenheit (65.5 degrees Celsius) before they begin to distort from the heat. Thus, for epoxy coasters meant for hot beverages, you will need to use a heat-resistant resin. Keep in mind that most hot drinks will range from 130 to 160 degrees Fahrenheit (54 -71°C).
What Kind of Resin Should I Use?
As you will be using resin coaster molds, it is best to use a low- to medium-viscosity resin, as the fluid consistency will fill the mold well.
What are Resin Coasters Used For?
Using resin to make coasters is a fun and stylish means of protecting your tabletops and counters from stains and rings caused by cups and glasses.

Larissa Meyer is a 32-year-old mother from Michigan and creative spirit since childhood. Her passion for painting and drawing has led her to an education as an illustrator and a career as a freelance graphic designer. She has a Bachelor of Fine Arts in Illustration and a degree in Graphic Design. Larissa is a talented artist who is able to master a wide range of styles and techniques to bring her artistic vision to life. Her greatest passion is currently fluid painting and epoxy resin art. Larissa’s love for art and her knowledge and experience in illustration make her the perfect Creative Director for our fluid-painting.com team. She is the creative head of our team and shares her passion and knowledge with our community through articles and tutorials.
As a mother of a 2-year-old daughter, Larissa also understands the importance of fostering creativity in early childhood. She uses her experience and knowledge to help other parents inspire their children and develop their artistic skills as well.
Learn more about Larissa Meyer and about us.
![Resin Color and Dye – How to Color Resin [Guide]](https://fluid-painting.com/wp-content/uploads/2020/04/resin-color.jpg)