Resin Dice – A Comprehensive Guide on How to Make Your Own Dice
This post may contain affiliate links. We may earn a commission from purchases made through them, at no additional cost to you.
One of the most popular ways to pass the time can be found in playing boardgames. No matter what boardgame you are playing, from family-friendly to roleplaying, you will likely require some dice. This article will guide you on how to make dice so that you never have to worry about missing pieces again. Many people that play roleplaying games such as Dungeons and Dragons require as many as seven individual dice pieces. Read this article to learn how to create your own resin dice, where the only limit is your creativity!
What Different Kinds of Dice Do You Get?
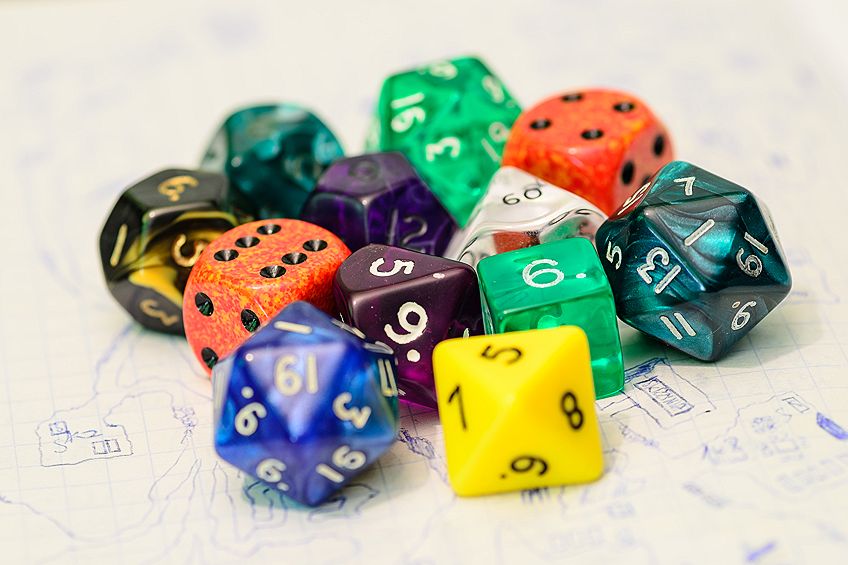
There are several different types of dice that you can get when dice casting, each of which may be better suited for use with a particular game or character. Dice differs in terms of color, the number of sides, and what inscriptions or images are used to decorate each side. Different dice include:
- Standard dice, where each face has a different digit or number of dots.
- Colorful dice, where each face is a different color.
- Poker dice, where the faces have images of card character, such as a Queen, King, Jack, and so on.
- Some dice have both positive and negative number digits on each of the faces.
- Dice may also have various pictures on each side.
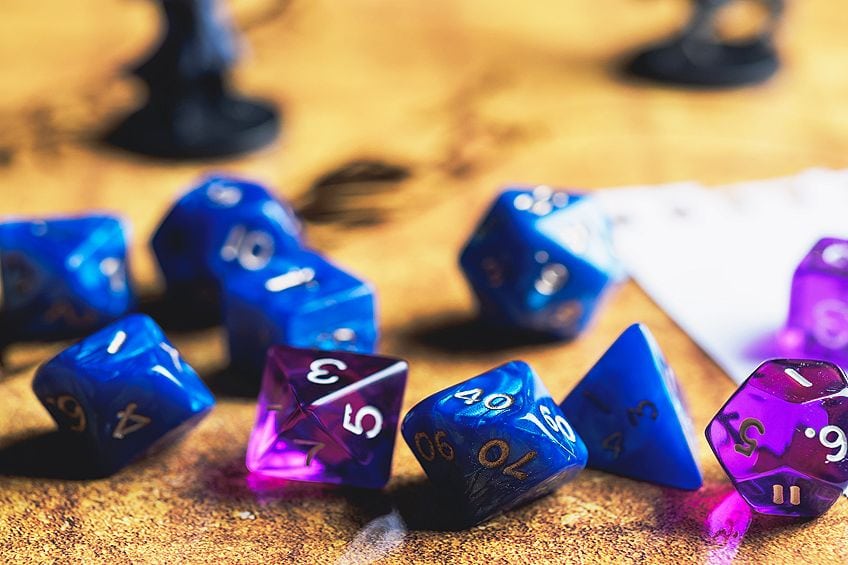
Resin Dice Mold Types
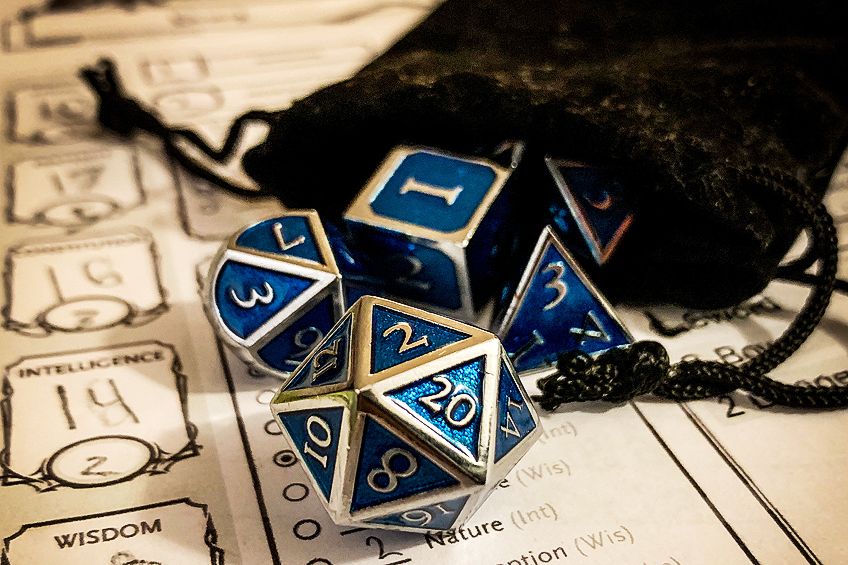
When dice casting, you will notice that there are up to seven variations in terms of the molds you can use for standard resin dice. These molds will allow you to create polyhedral dice, meaning that the shape has several flat faces, straight edges, and sharp corners.
All seven types of dice make up a set, and are commonly used in the popular roleplaying game Dungeons and Dragons. In general, you would use dice types D4 to D12 for measuring your weapon damage, attack, spell, and healing values. You would use D20 to see if the action you are performing is successful.
D4: Tetrahedron Dice
These dice have four sides and form the shape of a pyramid. The numbers 1 to 4 are displaced on the faces, where each face or surface has three numbers. The numbers are arranged at each point of the triangle face, and the number at the same point or apex of the pyramid will be the same on all faces.
When rolling this die, the number that remains upright on all faces (this will be the top-most corner number) will be the result you use. This is not the easiest type of die to roll, and is instead thrown up into the air.
In Dungeons and Dragons, this die, also known as the caltrop, is frequently used to determine the damage caused by small weapons, as well as for healing spells.
D6: Cube Dice
This six-sided die is that with which we are most familiar, being the type of die used in most boardgames. Forming the shape of a cube, this dice contains the numbers 1 to 6, where each face is assigned a different number. The numbers on opposite faces will always add up to seven. This die is used to assign attributes to characters in Dungeons and Dragons.
D8: Octahedron Dice
This is an eight-sided die, where each face is shaped like a triangle. The entire die looks like two pyramids have been attached to each other at the base. Each individual face will possess a number from 1 to 8, where the opposite sides sum up to the value of nine. When playing Dungeons and Dragons, this type of die tends to be used to determine the damaged caused by large weapons.
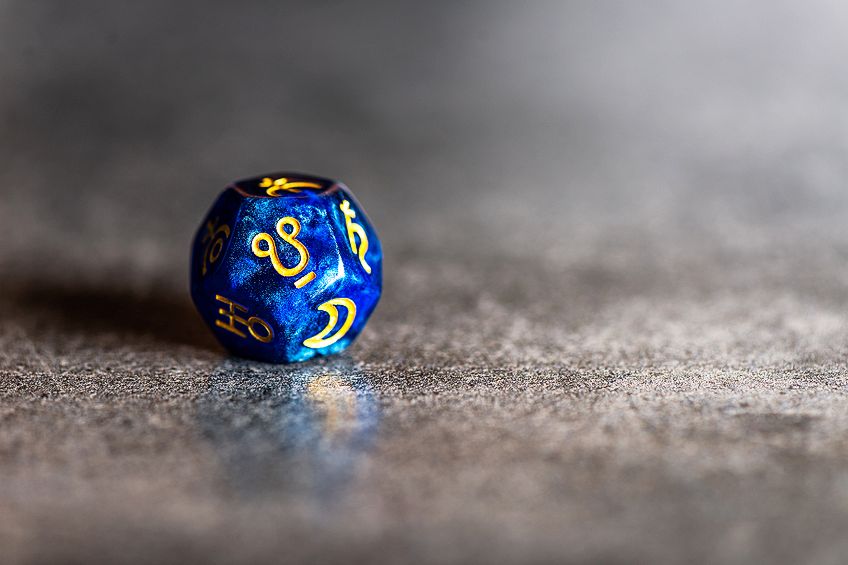
D10: Pentagonal Trapezohedron Dice
This type of die tends to go hand-in-hand with the D00, or percentile die. This piece has 10 sides and forms the shape of a kite, where the two end corners of the die are the points at which the top and bottom corners of the kite meet. This particular type of die is numbered from 0 to 9, where the opposite faces sum up to nine. When combined with the percentile die, you would roll both together in order to get a “percentage”.
D00: Percentile Dice
This die is the other half of the two separate 10-sided dice that go together. This particular die is referred to as being the percentile dice, the result of which will end up being a percentage of 100.
This die has 10 sides, each face of which has the values 00 to 90, going up in tens. You can differentiate between this and the other 10-sided die as both come in different colors. To roll a percentile, you would roll both dice together and then add the two values. If you roll a double zero, however, the value is 100.
D12: Dodecahedron Dice
This is a die with 12 sides, each face of which is in the shape of a pentagon. Adding the values of opposite faces will result in 13. When used in Dungeons and Dragons, this die tends to be used to measure the damage caused by large weapons.
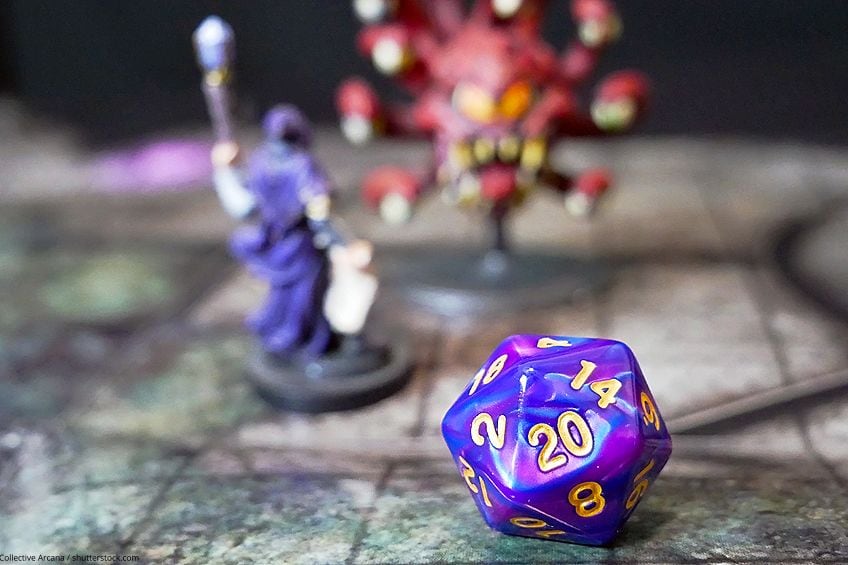
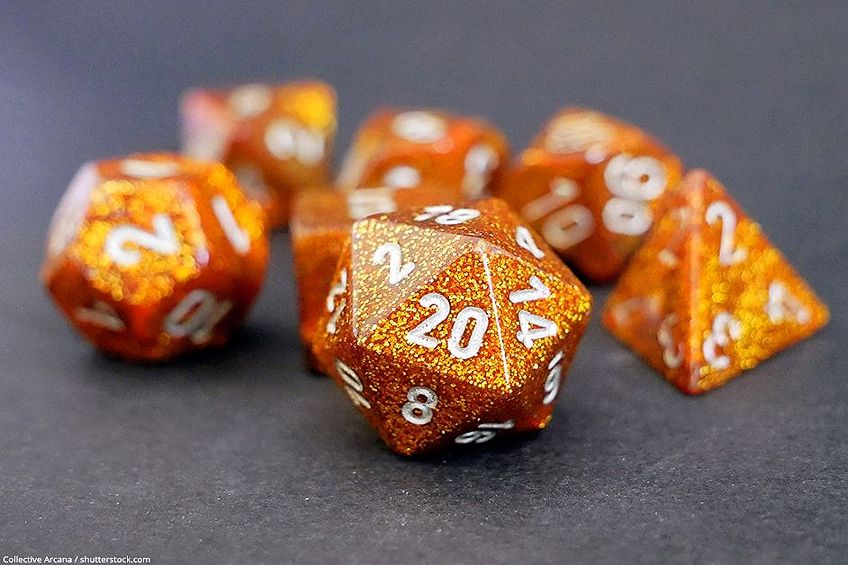
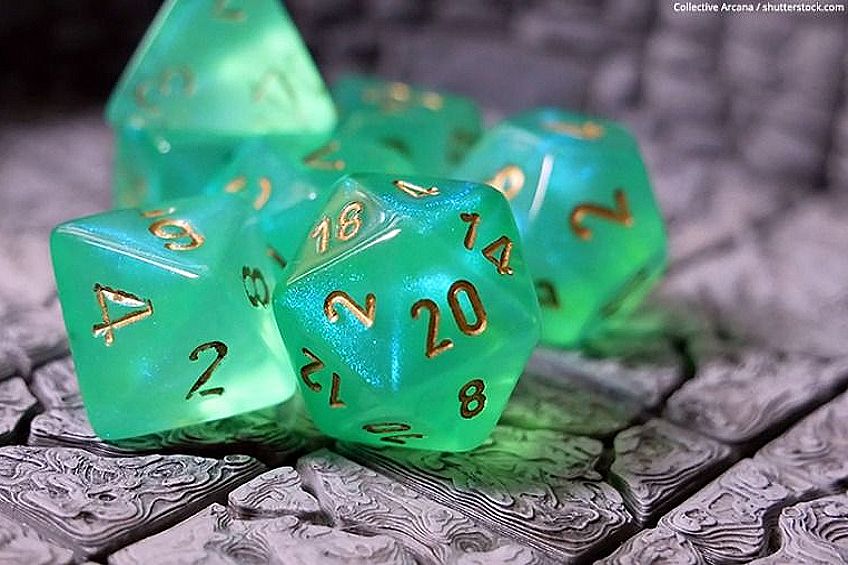
D20: Icosahedron Dice
This is the most popular and well-recognized type of die in Dungeons and Dragons, with a whopping 20 faces and larger stature than its lesser-sided counterparts. Each of the 20 faces forms the shape of an equilateral triangle, where numbers are either from 1 to 20, or 0 to 9 twice. The sum of two opposite sides should equal 21.
This is the most spherical die, meaning that it can roll much further. In Dungeons and Dragons, you would use this die any time you want to know if an action succeeds or fails. Actions may include attacks, checking your skills or abilities, and so on. Each individual value on the die has a 5% chance of succeeding.
Once you have rolled the D20 to attack, for instance, you would then roll another die to see how much damage you caused. The other die you choose to roll will depend on the size of your weapon.
D100: Zocchihedron Dice
This type of die does not fit into a standard seven-piece set, and is more popularly used as a novelty die. This die has 100 faces and is the size of a golf ball, invented by Lou Zocchi in the mid-1980s. This type of die, when used in role-playing games, is ideal for percentile rolls.
Materials Needed for Dice Casting
In order to learn how to make your own dice out of resin, you will require certain tools and materials. In addition to a good-quality casting resin and a suitable silicone dice mold, you will require the following:
- Three disposable measuring and mixing cups
- Wooden or plastic sticks for mixing
- Toothpicks for both removing bubbles from the resin and also poking a hole into the mold
- Alcohol inks, mica powders, or other suitable resin colorants
- Your choice of decorations and items to embed
- A clean, plastic work surface
Best Resin for Dice Casting: INCREDIBLE SOLUTIONS Pourable Plastic Clear Casting Resin
You will require a good-quality casting resin to make your resin dice. This deep pour resin by Incredible Solutions is the ideal choice for casting resin into molds, as its thin consistency will allow it to capture any fine details on the mold. It has a simple and easy-to-use mixing ratio of 2:1 by volume, and will provide excellent results as long as the instructions are followed correctly.

- Thick pours, low viscosity, and long working time
- Clear results and compatible with pigments and dyes
- 2:1 mixing ratio by volume
This resin will work well with additional mica pigment powders, or you can leave it to cure to its original crystal-clear color. It produces a low level of heat, allowing for a longer working time and minimal shrinkage during the curing process. However, this also means that you will have to wait longer for it to cure.
The resin is also resistant to yellowing as a result of the sun’s harmful UV rays as well as to water and blemishes. You will be able to work with this resin without any issues, as it produces very little odor and has a count of zero when it comes to volatile organic compounds (VOCs).
Pros
- Low viscosity and easy to pour
- Mixes well with mica powders
- Low exothermic production
- Long working time
- Not a lot of shrinkage
- UV- and water-resistant
- VOC-free
- Low odor
Cons
- Long curing time
Best Resin Dice Molds: LET’S RESIN Polyhedral Dice Molds
If you would like to know how to make polyhedral dice resin, which are dice with straight edges, flat faces, and sharp apexes, you will need some good-quality silicone molds. If you are still a beginner, it is much easier to purchase a set of pre-made molds as opposed to making them yourself. This 19-piece set of polyhedral dice molds is ideal for those just beginning their journey of making their own resin dice.

- Polished silicone two-part dice molds
- 19 different dice styles
- Flexible and easy to use
These polished silicone molds will leave your cured resin items looking shiny and smooth. The faces of the dice molds are engraved either with numbers, letters, or punctuation marks. These molds are flexible and easy to clean. Should you require any assistance when using these molds, you can have a look at the product’s video tutorial for some guidance.
Keep in mind that these are two-part resin molds, meaning that they will leave a seam or line where the two pieces joined together. You can remove this by sanding and polishing the edges. Another benefit of these molds is that they are made out of clear silicone, the transparency of which will allow you to see exactly what you are doing every step of the way.
Pros
- Clear, polished silicone
- Easy to clean
- Flexible and durable
- Good selection of shapes
Cons
- Can be difficult to use
How to Make Resin Dice with a Premade Mold
The process of how to make dice from resin differs slightly depending on whether you are using a premade mold or not. This set of instructions will focus on how to go about creating your own resin dice by using a premade silicone mold.
Preparation
Before you can learn how to make your own dice, you will have to do some preparation beforehand. Firstly, you will need to ensure that your workspace is clean and clear, as resin can be quite messy to work with. You should also make sure that your chosen molds are clean and dry. Have all of the tools and materials you need ready and within reach, as once you begin to work with the resin, you will be working within a short space of time before it begins to set.
Mixing and Pouring the Resin
The next step in how to make resin dice is that of measuring and mixing the resin. It is important that you closely follow the product manufacturer’s instructions on quantities and mixing times, as resin requires precise amounts in order to cure properly.
- Check the recommended mixing ratio of your resin and hardener, and measure out the amounts by volume into two separate containers.
- Pour the two separate quantities into a third measuring cup, ensuring that you pour the liquids as evenly as possible.
- Use a plastic or wooden stick to stir the two liquids together thoroughly, being sure to scrape the sides and bottom of the container. Mix for 3 to 5 minutes, or for the duration suggested by the product manufacturer.
- If you want your resin to have color, now is the time to add a small amount of mica powder or alcohol inks. Do not add too much, as this will affect the overall mixing ratio of your resin solution.
- Use a toothpick to adjust the size of the hole in your dice mold. You can then pour the resin into the mold, using the toothpick to help guide the liquid into the mold’s opening.
Try to pour the resin in such a way that no air gets trapped in any corners or depressions of the mold, as this will cause bubbles.
Adding Decorations and Embedding Items
Now that you understand the first steps of how to make your own dice, you can decide whether or not you want your dice to remain clear, or if you would like to add colors and other decorative items. Remember that these next steps should take place before pouring the resin into the mold, as they will need to be mixed in properly.
- You can use a powdered mica pigment or an alcohol dye to add rich, vibrant colors to your dice. Mica powders are especially useful, as the colors can be plain, pearlescent, metallic, glittery, and more.
- You will only require a very small amount, as these powders and dyes are highly concentrated to provide a lot of pigment in small quantities, making them ideal for coloring resin. When using mica powders, too great an amount will result in your resin looking very opaque and shimmery.
- For clear dice, you could add glitter to the transparent resin or even some small confetti to fit a particular theme. You could even add a small figure or item to embed, depending on what you want the final outcome to be.
Many people like to create dice sets themed around particular characters in some roleplaying games.
Curing
You must now leave your resin dice to cure for a minimum of 24 hours before handling the silicone mold. You can allow a cursory tap to the exposed part of your resin to see if it has cured properly, where it should feel smooth, dry, and hard to the touch. If the resin is still tacky or wet, you will need to leave it to cure for longer.
Some resins cure slower than others, so expect a waiting period of anywhere between 24 and 72 hours, depending on the resin and surrounding temperatures. Your resin may also fail to cure properly as a result of incorrect mixing or measurements.
If your resin remains uncured, place the mold in the freezer overnight to allow it to solidify. Then, you can pop the resin out of its mold and throw it away, as it has reached the point where it can cure no more.
However, if your resin remains only slightly uncured, being just a bit sticky to the touch, then there is a chance to save your resin dice! Freeze the mold overnight, and then pop the resin dice out and place them in the oven on a low heat. This should activate the curing process.
Demolding
Once your resin dice casting has cured completely, you can begin the demolding process, whereby you will remove the dice from their silicone molds.
- Be careful when removing the molds, as if they tear, they will become unusable.
- You will notice when demolding your dice that there is some additional material along the edges and sides. This material is known as sprue and is extremely useful, as it makes up for any shrinkage that may occur during the curing process.
- Unless you used a polished mold, your resin dice will likely appear matte and cloudy. We will fix this in the next and final step.
Finishing Touches
You have almost finished learning how to make resin dice. All that remains is to provide the finishing touches.
- The first step is to remove the sprue, because as useful as it is during the curing process, it makes it very difficult to roll the die. You can use a small knife or sharp tool to remove the sprue.
- Once the sprue is gone, you will be left with a rough-looking area. You can smoothen the surface easily by using a fine-grit piece of sandpaper.
- To smooth and polish the rest of the die’s surface, begin with a piece of sandpaper of 150-grit, being careful not to remove too much resin in the sanding process.
- You will then continue to sand with a finer 180-grit piece, followed by a 220-grit. Keep increasing the fineness of the grit until you are satisfied with the smoothness of your die’s surface.
- You will likely have to increase your sandpaper grit up until one of 3000, which will result in the final finish. The surface should be clean and smooth, although it may still appear a bit cloudy.
We suggest using water between each sanding in order to keep the amount of dust produced to a minimum.
- Now, you will polish your die with resin polish, using a microfiber cloth. This will result in a smooth, glossy surface.
- It is a good idea to use acrylic paint to add fine details to your resin dice. You can paint the engraved numbers or add borders to the edges.
How to Make Dice Molds for Resin
Now that you have learnt the basics of how to make dice, you can try your hand at learning how to make dice molds yourself. When learning how to make polyhedral dice resin, it is often better to create your own molds out of silicone, as this way you can come up with as many designs and looks as your imagination allows!
Keep in mind the different kinds of molds that you can make: open-faced molds leave one side of the die open to allow for easy pouring, whereas squish molds are harder to use due to the fact that they are in two parts. Experiment with different designs and shapes and see what works best for you.
Materials
You will require the following materials to make your own silicone molds:
- An original or master die
- Silicone resin
- Container to hold the die
- Cups or containers to mix your silicone in
- Mixing spoon or tool
- Plasticine or clay
- Protective gloves and goggles
Best Silicone Rubber: LET’S RESIN Silicone Rubber Mold-Making Kit
Let’s Resin provides a premium-quality silicone for your mold-making needs. The silicone liquid is translucent and completely safe to use, as it is non-toxic and emits no odor. Once cured, the silicone will be soft, flexible, and transparent. You can also add mica powder pigments to the silicone mixture in order to create colorful molds.

- Premium translucent liquid mold-making silicone
- Easy 1:1 mixing and pouring with 5 minutes working time
- Bubble-free, non-toxic, and odorless
The silicone liquid is easy to mix, with a simple 1:1 mixing ratio by weight. Simply pour the two parts together and stir the mixture thoroughly for 5 minutes. You will then have an additional 5 minutes with which to work with the silicone mixture (at room temperature) before it starts to harden.
This silicone eliminates all bubbles within just a couple of hours, which means you will not require a degassing chamber. Most types of silicone will cure within 12 hours at room temperature, although this can vary according to the mold’s overall size and thickness. Once cured, the surface should not be sticky at all. This product is ideal for beginners just starting out with creating their own silicone molds.
Pros
- Premium quality
- Easy to use
- Easy to clean
- Non-toxic
- Odorless
- Translucent silicone that colors well with mica powder
- Bubble-free
Cons
- Only available in small quantities
Preparation
You will have to prepare your working area properly to ensure that nothing gets in the way when working with the silicone. You will also need to decide whether you are planning on creating a one- or two-part mold, as this will affect how you pour in the resin later. This article will focus on creating a one-part mold. These molds are sealed off completely except for one small opening, which is where you will pour in the resin. Ensure that you have an original die from which you will be making the mold.
Molding Material
Silicone rubber is the best material with which to make a resin dice mold. This is because silicone does not adhere to many materials such as resin, thus making it the ideal material to make a mold, as it will release the resin piece easily. Some advantages of silicone rubber include that:
- Silicone rubber is durable;
- Silicone molds are soft and pliable;
- Silicone acts as an effective release agent, allowing you to demold your items with ease;
- These molds are reusable;
- And silicone is non-toxic and safe to use.
Mixing and Pouring the Silicone
Before you can mix the silicone, you will need to prepare your original or master die. Take a pin and heat the tip, pushing the hot end into one of the corners of the original die. Next, take a small piece of plasticine and stick it to the bottom of a container. Place the tip of the pinned corner of the die gently into the clay, making sure that the die remains balanced and upright. Do not use too big a container for this, as otherwise you will end up wasting silicone.
- To mix the silicone, ensure that you follow the product’s packaging instructions, as not all silicones will have the same mixing ratio or curing times. Mix both silicone parts together thoroughly in your mixing cups.
- Pour the silicone into the container with the original die, being careful to completely cover the die without dislodging it. Keep pouring until the silicone mixture is approximately 5 mm above the top of the original die.
- Now, you will need to get rid of the air bubbles. You can release these bubbles by lightly tapping the sides of the container.
- Let the silicone cure for the stipulated amount of time. Most silicones take about 24 hours to dry completely.
If you are new to making your own resin dice mold, you may find it easier to create an open-faced silicone mold for your first attempt. To do this, you will use some of the plasticine clay to cover and mold just one face of the die, giving the clay piece enough height and thickness that it can stand on its own – a heigh of about half an inch should do the trick. You will then place this in the bottom of your container, pour in the silicone, and wait for it to cure.
If you are still uncertain about the silicone mold-making process, you can have a look at our more in-depth article on how to make silicone molds for resin.
Ideas for Future Dice Casting
There are an infinite number of ideas when it comes to resin dice casting. You can make resin dice for your family, friends, and fellow game fanatics. Some ideas for casting your own resin dice include:
- Creating themed dice based around a particular game or character;
- Embedding small objects into the dice for a personal touch;
- Making resin dice for special occasions such as birthdays, anniversaries, or weddings.
It can seem daunting to attempt the art of creating your own resin dice, but after following this guide carefully, you should be a master in no time! Impress your friends during sessions of Dungeons and Dragons or your favorite game with an impressive customized set of resin dice.
Frequently Asked Questions
Are Resin Dice Balanced?
A well-balanced die will land on a good variety of random numbers each time, whereas an unbalanced die will land on the same set of numbers. As resin dice float, you can test whether or not they are balanced by placing them in some water and spinning them around. If the same number shows on top consistently, they are not balanced. However, if different numbers show on top after each spin in the water, the die is balanced.
How Can I Get Bubbles Out of My Resin Dice Casting?
It can be difficult to remove bubbles from resin in a mold, as it is difficult to get to. You can prevent bubbles by warming the resin before use and by mixing the two components together slowly. Take care when pouring the resin into the mold, and use a toothpick to pop any bubbles directly on the surface. You can also use a lighter to heat the resin slightly, thus allowing the bubbles to rise to the surface and burst.
What is the Best Resin to Use for Making Dice?
It is best to use a casting resin for molds, as this type of resin has a low viscosity. This means that the liquid has a thin consistency, making it easier to pour into molds with tiny openings, while also capturing any fine details.

Larissa Meyer is a 32-year-old mother from Michigan and creative spirit since childhood. Her passion for painting and drawing has led her to an education as an illustrator and a career as a freelance graphic designer. She has a Bachelor of Fine Arts in Illustration and a degree in Graphic Design. Larissa is a talented artist who is able to master a wide range of styles and techniques to bring her artistic vision to life. Her greatest passion is currently fluid painting and epoxy resin art. As a mom of two kids, Larissa also understands the importance of fostering creativity in early childhood. She uses her experience and knowledge to help other parents inspire their children and develop their artistic skills as well.
Learn all about Larissa Meyer and Fluid Painting.