How to Make Resin Rings – Your Resin Ring DIY Guide
This post may contain affiliate links. We may earn a commission from purchases made through them, at no additional cost to you.
If you are looking to try your hand at something new, working with resin is the ideal option. Over the last few years, working with resin has become very popular, particularly as it offers several different projects you can try out. A great starting point if you are new to working with resin is to make resin rings.
Why are Resin Rings so Popular?
Resin rings are easy to make and are a great first-time project if you want to work with resin. There are so many techniques you can use to make a variety of different resin rings. Resin rings are perfect for your first attempt with resin, as anyone can do it. Your resin rings will last for a long time, provided you use the correct technique and products.
The products required for such a project are available online or from any reputable craft store. We suggest that, as this is a beginner’s project, you use an pre-made mold. However, as you become more experienced and confident, you could even attempt to create your own mold. If you choose to make your own mold, you then have more flexibility in terms of customizing your ring. You will find an assortment of tutorials and how-to videos available online, which will show you step-by-step instructions on making your own molds for resin rings. Alternatively, there are courses or workshops on how to make resin rings that you can sign up for.

Supplies Needed for Making a Resin Ring
When working with resin, you must have everything you need ready and at hand. Preparation is of the utmost importance. You will require the following:
- Something to cover your work (such as an empty container or box)
- Casting epoxy resin
- Latex gloves
- Some popsicle sticks and toothpicks
- The resin mold
- A quick-drying adhesive
- Resin pigments and coloring
- Hot air dryer
- Items that can be used as fillers (such as photos, beads, glitter, dried flowers, etc.)
- Resin work mat or wax paper
- At least three small measuring cups (you may require more if you use several colors)
- Squeeze condiment bottles (optional)
Best Airbrush for Painting Resin: MASTER AIRBRUSH Professional Airbrushing System Kit
This kit has everything you will ever need when it comes to airbrushing. This professional airbrushing system kit is equipped with three different airbrushes, a starting guide, an access card to the Airbrush Resource Center found online, a high-performing compressor, an airbrush holder, a set of water-based acrylic airbrush paints and a color mixing guide, and cleaning brushes.

- Multi-purpose airbrushing system
- Superior performance
- Includes 3 different master airbrush guns
This is the ideal product for beginners and professionals alike, and is a fantastic starting point due to the fact that it comes with some many necessary basics. You will find receive a range of opaque, primary acrylic paint colors as well as a mixing wheel to help you to create your own unique color combinations.
This product is easy to clean and comes with a set of brushes to help you clean all the different pieces. The compressor is optimized with two cooling fans to prevent it from overheating. The airbrush also works on an “air-on-demand” system, where the production of air will cease when not in use. This is the ideal kit for beginners that are wanting to start airbrushing their own creations.
Pros
- Comes with 3 user-friendly airbrushes and a set of water-based acrylic paints
- Great starter kit
- Versatile usage
- Optimized compressor that is resistant to overheating
- Air-on-demand system
- Maintenance- and oil-free
- Produces very little noise
Cons
- Very few instructions
Best Silicone Molds for Resin Rings
Beginners are advised to begin making their epoxy resin rings with pre-made silicone molds before attempting to make their own. The Szecl Ring Resin Molds Silicone for Jewelry provides crafters with a versatile tool for creating custom resin jewelry pieces. Featuring 17 cavities in a variety of round and rhombic cut shapes, this silicone mold is designed to accommodate the making of earrings, rings, necklaces, pendants, and keychains.

- This silicone mold offers 17 cavities with a mix of round and rhombic cut shapes, perfect for creating a variety of jewelry pieces such as earrings, rings, necklaces, pendants, and keychains
- Made from durable silicone material, the mold is flexible and easy to use, allowing for easy demolding of resin creations without stickiness
- Ideal for DIY enthusiasts and crafters, this mold facilitates the creation of custom resin jewelry with precise shapes and smooth finishes, suitable for personal use or gifting
Crafted from high-quality silicone, it offers flexibility and ease of use, ensuring smooth demolding of finished resin creations without residue or stickiness. Whether you’re a DIY enthusiast or a professional jeweler, this mold enables precise crafting of unique jewelry items with professional-looking results, perfect for personal use or as thoughtful handmade gifts.
Pros
- Versatile Design
- High-Quality Silicone
- DIY Crafting
Cons
- Careful Handling
- Cleaning
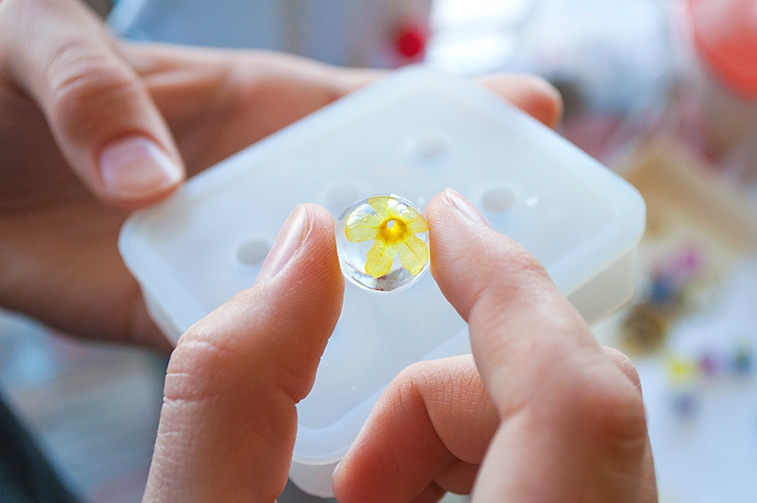
Tutorial: Making Resin Rings with a Pre-Made Mold
If you have decided to create your resin rings using a bought pre-made mold, you will need to follow these steps:
Preparation
It is important to ensure that you are adequately prepared before beginning with your resin rings project. Have all the items ready on your worktable, lay down your wax paper or resin mat, and ensure that you are working in a well-ventilated area. You will require the resin mat or wax paper to collect any resin that might drip onto the surface while you are working. Your surface should be a level table, as this will allow the resin to remain even while it is curing.
Set out all your supplies and fillers, and place your hardener and resin into some hot water. By warming them, you prevent any air bubbles from forming. Heating the components will also assist with the mixing process.
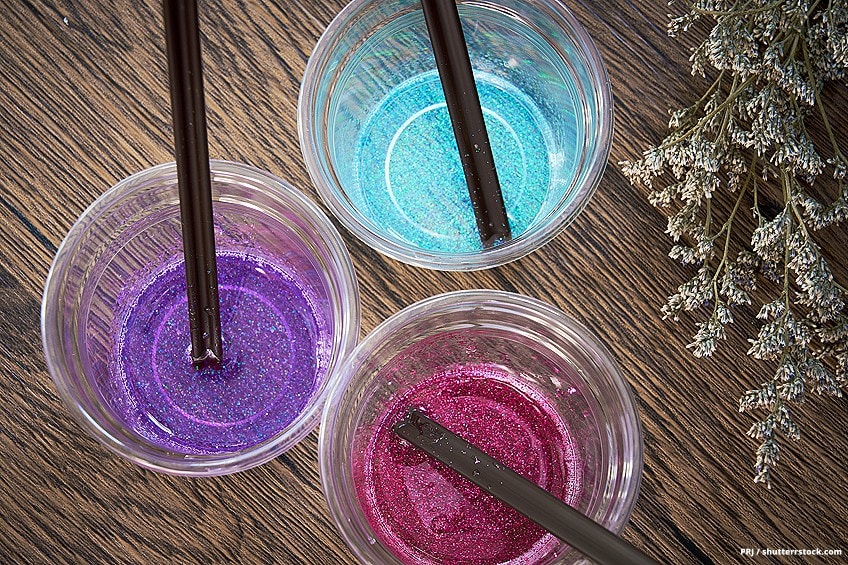
Resin Coloring and Mixing
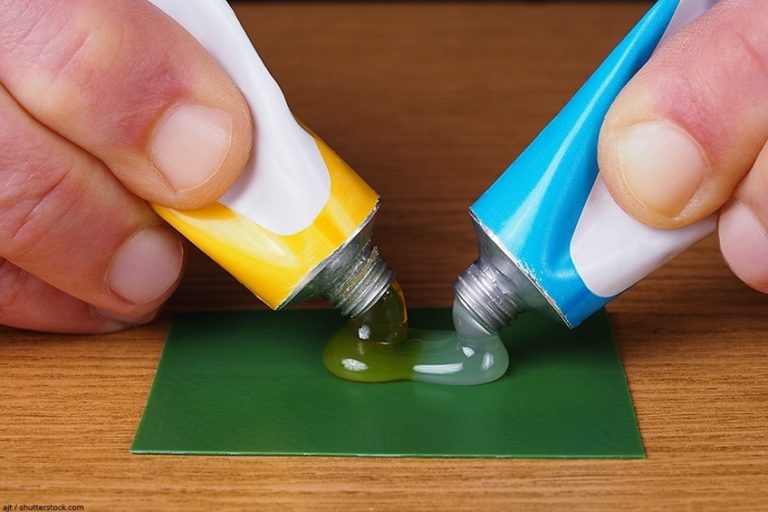
To begin working with your epoxy resin, you will need to mix equal parts (1:1 ratio) of hardener and resin. Always ensure that you follow the instructions on the label. Use two separate measuring cups, with the resin in one and the hardener in the other, ensuring that there is the same amount of each component. Using a third container, combine the two parts and mix thoroughly for 3-5 minutes, scraping the bottom and sides of the cup while mixing to ensure that they are adequately combined.
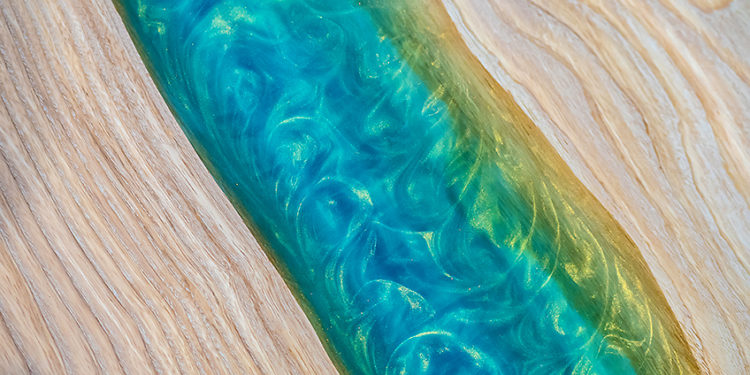
You will now be able to add your resin coloring to the mixture. Once added, mix thoroughly using a popsicle stick or your mixing tool. If you want to use glitter, this is the stage you will need to add it to the mixture. If you have decided to use more than one color, you will have to decant some of the mixture into a separate container first, after which you can begin adding color to each container and mixing.
The Casting Process
When you have completed the mixing process you can then pour the resin into the mold. If you wish to have more precise pouring, you can decant your mixture into a condiment bottle and use that to dispense it.
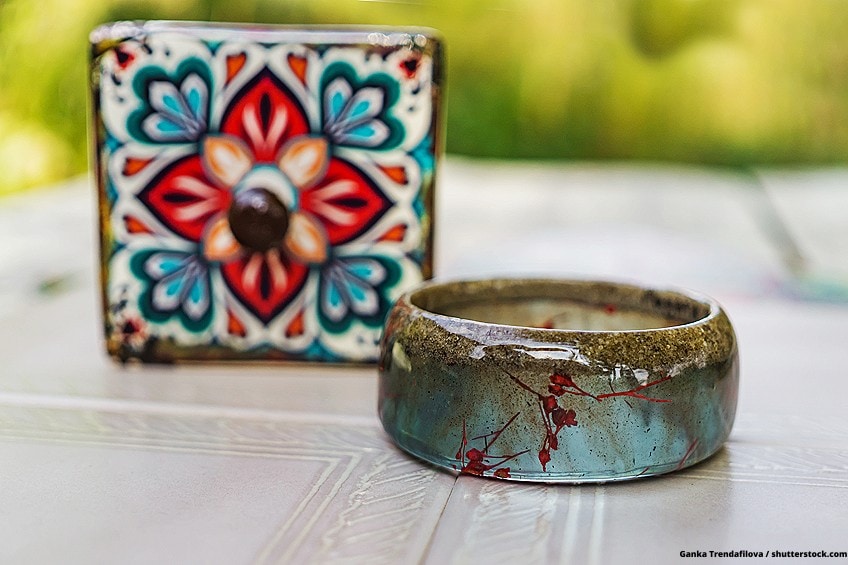
If you would like to add a filler or items to your resin, you will first need to pour a base layer of resin before placing the filler item into your mold. Once this initial coating has dried somewhat, place your filler items and then pour the second layer of resin over them, ensuring that you do not overfill the mold.
When you have finished pouring the resin, remove any bubbles using a toothpick. You can also use your hairdryer or a torch to remove the bubbles: Ensure that you are holding the hairdryer a fair distance from the resin and carefully bring it straight down. You don’t want to cause the resin to blow out of the mold, so move slowly and carefully. As it is such a small piece, however, you might not need the hairdryer at all; a toothpick should be sufficient.
If you have chosen to use a blank ring, you will then be pouring the resin straight into the beveling cup, you will only require a small amount of resin, but will then need to follow the above process.

Let it Cure
You will need to leave your resin item for 24 to 48 hours to allow it to cure sufficiently. Don’t forget to use a container or box to cover it, as this ensures that no dust will get into your resin during the curing time.
If you do not want to wait for the full curing time, you can opt to use UV resin. UV resin is a great option as it cures within minutes when it is exposed to UV light, and it does not require any mixing. UV resin is a useful option, particularly if you are making smaller items such as jewelry.
Demolding
When you are confident that your resin has completely cured, you can then remove the piece from your mold. The required curing time will be listed on the instructions that you received with the resin. Please note that sharp edges may form, so be careful when you are demolding the piece. You can also apply mold release spray to the mold before pouring in the resin. This will make it even easier to remove the piece from the mold.
Polishing and Finish
If you have any sharp edges on your piece, after demolding it you can use some fine-grit sandpaper to remove them. To achieve a shine, you can use some resin polishing paste on the item and apply it with a soft cloth. If you have chosen to use crystal clear resin, this will add to the clear, glossy finish.
There are molds that are available to purchase which have a particularly smooth surface, resulting in a smooth finish to your piece. We can recommend using a polished silicone mold if you are making a resin jewelry item. If you are using a round ring mold, this will result in a solid resin ring. Other options of jewelry molds will give you different designs and shapes that you can easily glue onto a ring base.
How to Make Molds for Resin Rings
You may need to try this process a few times before mastering it. Your go-to option to make your own mold is to purchase a silicone molding kit. These can be found either at your local craft store or online. You will also require a selection of rings that you hope to replicate. We suggest that you buy some cheap rings so as not to damage any of your personal rings.
All silicone mold kits come equipped with instructions that are easy to follow, but what follows are a few simple steps to guide you:
- The kit is made up of two sections: part A and part B.
- Using equal parts, mix the parts together thoroughly, ensuring that the color looks even.
- Next, you can shape the mixture into a ball shape.
- Taking the ball, press it down slightly and flatten it just a little.
- Pick which ring you wish to replicate and press it down into the mold.
- Leave the ring in the mold for roughly 25 minutes before you remove it.
- Leave the mold for about 48 hours, allowing it to form properly. Once it has formed, you will have a mold ready for you to pour in your resin.
Custom-Made Resin Ring Molds
You can use clear silicon to create a custom-design resin ring. The process is slightly more complicated than just using a silicone mold-making kit, but you will have a lot of fun doing it.
You will require the following items:
- Sugru, which is a moldable rubber putty made of silicon
- Tea-light candles
- A brush to remove any wax pieces (a small brush will do)
- A pin, a craft knife, and a carving tool
- Something with which to melt the wax
- A tool that matches the diameter of your ring finger, such as a piece of pipe

To begin, remove the tea-light candle from its metal covering and take out the wick. You can then place just the wax portion of the candle back in the metal holder. Now, melt the wax that is in the metal holder, and once completely melted, allow it to set or harden again. This step is necessary to give the wax an even consistency, which is required for the best results. If you fail to do this step, the wax will be uneven and not smooth, which will impact the finished resin ring. We suggest using an electric stove to heat the wax slowly.
Before the wax has completely reset, using your pipe or whichever tool you have selected, you can make a hole in the center. Once you have made the hole, put the wax in some cold water to allow it to set properly. Remove the centerpiece that has been cut and then remove the metal candle holder from the remainder of the wax.
To ensure you have a more even ring shape, you will have to sand down or cut at the hard wax. Once this is completed, you can use your tools to carve the design you want into the wax. You will then sand it down further to make sure that the surface is as even as possible. Be careful when working with the wax. Only make slight, shallow incisions, as you do not want to cause it to crack or to slice right through the wax.
Have some cold water handy and dip the wax into it every now and then, so as to ensure that the wax does not begin to melt as you work with it. You can then use the Sugru to make your actual mold. Sugru is made from silicone rubber and is a type of putty that can be easily shaped into whatever you desire. Sugru is a versatile product which is known for its uses in repairing items such as electronics and other devices. The product allows you 30 minutes to work with it and within just 24 hours it will set into a strong, flexible silicone rubber.
A homemade substitute for Sugru can be achieved by mixing simple cornstarch and silicone caulk, which when combined turns into a material known as Oogoo. Mix together the cornstarch and silicone caulk according to a 1:1 ratio. You can search online for Oogoo and you will get a number of how-to videos showing you how to make this material using basic household ingredients. Once you have finished creating your custom mold, you can use it to make one-of-a-kind resin rings.
Tips to Help Your Resin Rings Last Longer
- Store your rings in an airtight container in a cool and dark space.
- Laminating epoxy resins are the best option for such projects.
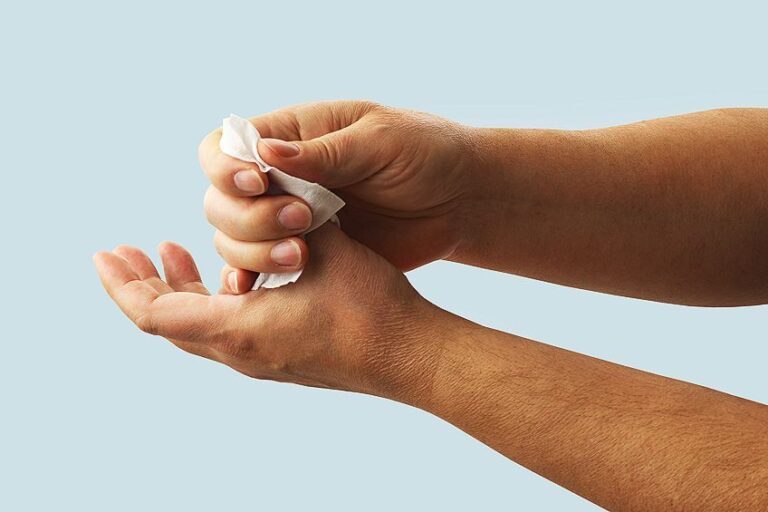
- Remember to remove your rings when using lotions, creams, nail polish remover, and perfumes. These all contain chemicals that can result in damage to the resin.
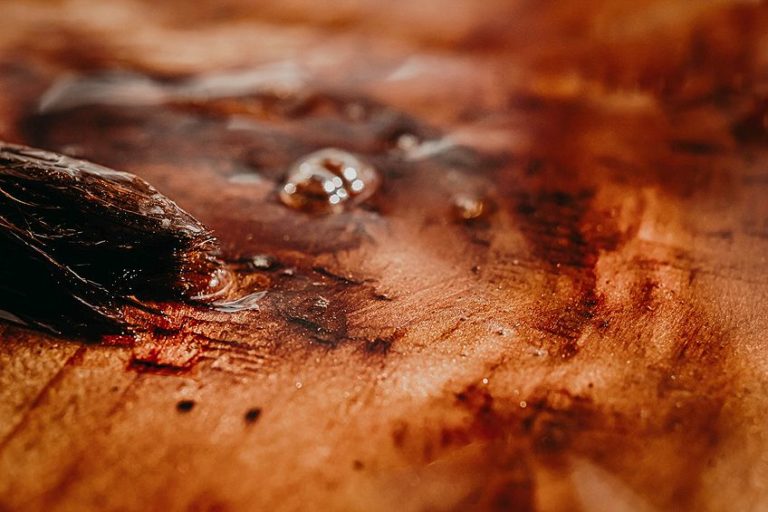
- Overtime, all resins will begin to yellow. The higher quality brands of resin will, however, last longer before they begin to yellow.
- If you have used mixed media to create your resin rings, such as resin and metal, make sure the other material (aside from the resin) is also of higher quality, as it will then last longer.
- Make sure to take off your resin rings when you are doing gardening or washing the dishes, as the resin can get scratched easily.
- You can wear your resin ring when you are outside, but try to avoid prolonged exposure to sunlight, as the sun’s UV rays can cause the resin to fade and yellow.
- Try to not leave your resin ring somewhere that there is direct heat, such as in the car, as this can damage the resin.
Frequently Asked Questions
How Long do Resin Rings Last?
How well you take care of your resin ring will dictate how long it will last. The quality of the resin used will also determine how long your ring lasts.
Are Resin Rings Safe?
Epoxy resin is completely safe once it has cured, and can be worn by anybody without fear of an allergic reaction. Most resins are food-safe once cured as well, although you may prefer to opt for an FDA-approved resin that has been certified as food-safe.
Can My Resin Ring Get Wet?
Resin may be highly resistant to water once it has cured, but this does not mean that it is waterproof. We suggest removing your resin ring before getting into the shower or swimming to lengthen the life of your jewelry piece. You should especially avoid water if your ring contains any metal clasps or add-ons, as exposure to moisture will cause the metal surface to become tarnished or rusted.

Larissa Meyer is a 32-year-old mother from Michigan and creative spirit since childhood. Her passion for painting and drawing has led her to an education as an illustrator and a career as a freelance graphic designer. She has a Bachelor of Fine Arts in Illustration and a degree in Graphic Design. Larissa is a talented artist who is able to master a wide range of styles and techniques to bring her artistic vision to life. Her greatest passion is currently fluid painting and epoxy resin art. As a mom of two kids, Larissa also understands the importance of fostering creativity in early childhood. She uses her experience and knowledge to help other parents inspire their children and develop their artistic skills as well.
Learn all about Larissa Meyer and Fluid Painting.