Silicone Mold Making – Guide on How to Make Silicone Molds
This post may contain affiliate links. We may earn a small commission from purchases made through them, at no additional cost to you.
In order to produce castings and small works of art from epoxy resin, you need some skill, the appropriate sense of proportion and also a certain creativity. But you also need negative molds suitable for this purpose. There are already many molds for casting with epoxy resin available, but some molds are unfinished. So what can you do if you don’t have the casting mold in the shape you want? In this text, we will explain the most important tips and techniques for making your own silicone molds relatively quickly and easily.
Table of Contents
- 1 Basics About Epoxy Resin
- 2 What Types of Silicone Molds are Available?
- 3 The Hardness of Silicone Rubber
- 4 Make Negative Molds WITH the Original Object
- 5 Making Negative Molds WITHOUT the Original Object
- 6 The Right Preparation is Important
- 7 High Quality Duplicating Silicone for your Projects
- 8 Materials Required for DIY Silicone molds
- 9 How to Make a Silicone Mold: Step by Step Instruction
- 10 Make a Two-part Silicone Mold
- 11 Procedure for Blanks with Undercut
- 12 Tips and Tricks for Perfect Silicone molds
- 13 Inspiration for Exciting Projects
Basics About Epoxy Resin
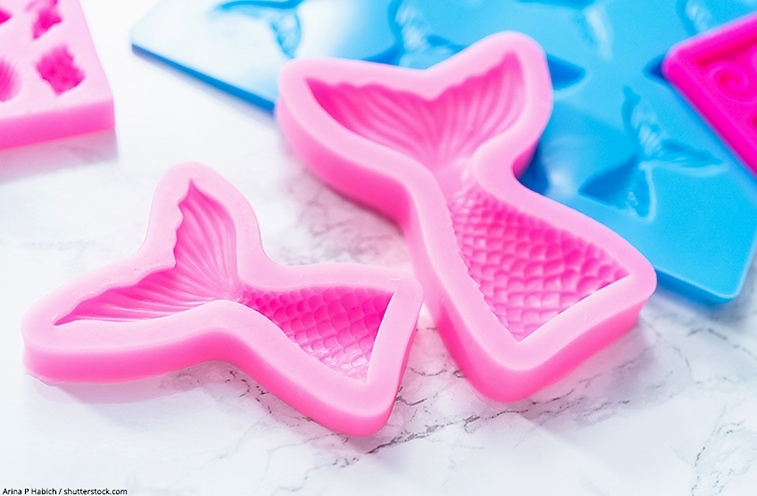
If you want to achieve epoxy resin projects yourself, you first need the resin available in liquid form, and a suitable hardener. Then, depending on the nature of your project, you may choose to add other materials such as paints (for example, Alcohol Inks). Or maybe you need silicone molds for casting certain shapes. For example, the popular Petri dishes that are often used for petrified rainbows, where you need round silicone molds.
But of course you are free to let your creativity and imagination run wild: from square to round shapes, flowers, stars and special shapes such as archways for nativity scenes and model making, there is a huge variety of countless, three-dimensional shapes that can be produced in one mold. With some skill and the necessary materials you can make silicone molds yourself, which you can then fill with epoxy resin or other casting materials.
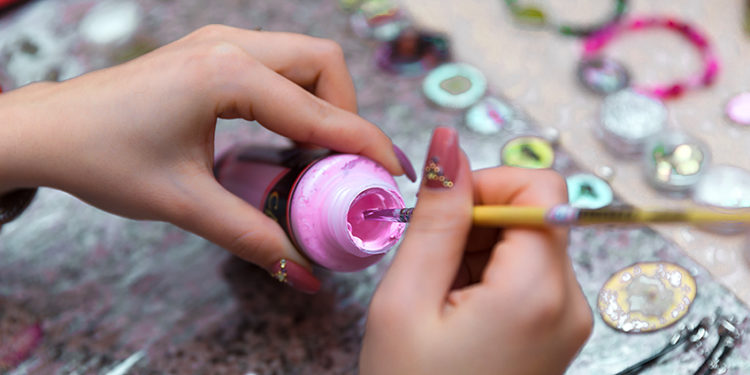
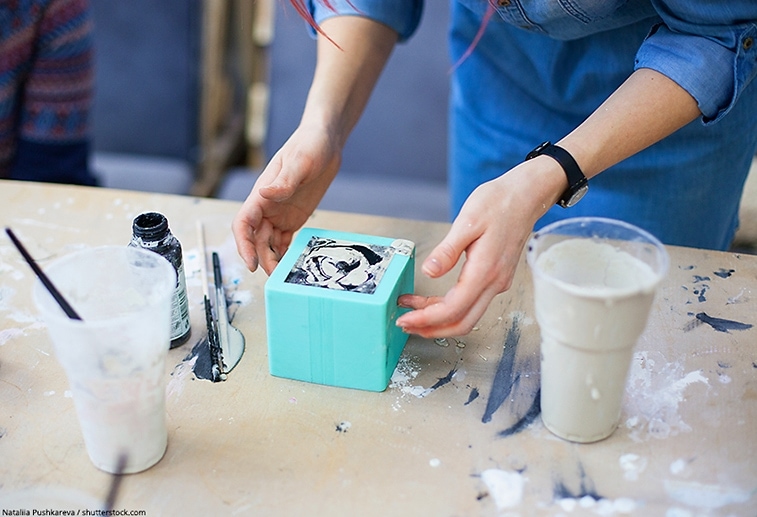
To do this, you pour the epoxy resin, which has been mixed with resin and hardener, into the already prepared casting mold. You can also experiment on your own with suitable colors and color the resin in different shades before filling. Often small objects, such as collected shells from the beach or especially beautiful flowers, are poured into transparent epoxy resin and thus preserved “for eternity”. This variant of fashioning the resin is also called resin casting. The finished casting is then released from the silicone mold after the curing time, which depends on the product, has elapsed and can then be polished or otherwise reworked. So, you can create your own works of art or particularly original gifts with this exciting hobby.
What Types of Silicone Molds are Available?
Due to its specific material properties, silicone is perfectly suited if you want to make a mold. Silicone not only acts as a natural release agent, but is itself extremely flexible. The cured resin can be removed from a silicone mold very easily, as it can be shaped without damage.
Another reason why silicone is so popular is that hardly anyone is allergic to this material. It is non-toxic and therefore comparatively gentle on the environment. This is one of the reasons why silicone is often used to make things like bakeware or pacifiers for small children.
You can find a huge selection of finished molds in stores, because theoretically you could also use silicone baking molds as casts for resin art. This way, for example, beginners can get started quickly without having to make their own negative mold first. But you should not be surprised if you find that these molds wear out quickly. It is quite possible that the surface of the silicone will become dull quickly, and that at some point you will only be able to remove the cured epoxy resin from the mold with great difficulty.
This is because many molds (especially baking molds) are made of very soft silicone. Furthermore, with the molds available on the market you are of course somewhat limited in your creativity, as only certain molds are available. If, on the other hand, you want to let off steam artistically without restrictions, then you should simply make your own silicone molds and thus let your ideas flow even more freely.
If you would like to buy ready-to-use and high-quality silicone molds for the beginner in molding, here are our recommendations:


The Hardness of Silicone Rubber
To make a silicone mold, you first need silicone rubber as a material. This soft and fast curing basic material can be purchased without any problems from the appropriate specialist dealer. Even after curing, silicone is still relatively elastic. However, the brittleness of the material depends on the hardness of the silicone you use. Silicone can also crack at some point when overstretched, or may at least get smaller breaks in the material.
When buying silicone rubber, you are therefore first confronted with the choice between different degrees of hardness. The degree of hardness of silicone rubber is indicated by the value indicated under the name “Shore”. The counting method works in such a way that a high value indicates low elasticity and vice versa – a low Shore value indicates high elasticity:
- Silicone rubber with high flexibility has a shore value between 0 and 20 and is characterized by a soft and rather unstable material quality.
- With Shore values between 20 and 40 one speaks of silicone rubber with medium elasticity. The extensive flexibility of this material is complemented by a relatively good dimensional stability.
- Shore values between 40 and 80 refer to product variants that are more hard than elastic. For example, molds made of this silicone rubber can withstand higher loads, but they are also more prone to brittleness.
Now, it usually depends entirely on your planned project what degree of hardness you should consider when choosing silicone rubber for casting silicone. In practice, it can also be very helpful to try out different products yourself if possible and thus to experiment and gain some experience. Basically, castings made of epoxy resin are easier to remove from a mold if the material is relatively soft. However, the high elasticity and very low brittleness are also accompanied by increased instability of the mold.
Correspondingly, the opposite is true for a mold made of very strong material: With such a mold, you have to be careful not to break the mold, as it is hardly stretchable. In addition, it is also relatively difficult to remove the parts from a solid mold. One advantage of silicone molds made of products with a high Shore value is, of course, that they are easier to handle and align, as they are also less likely to deform unintentionally due to the reduced mobility.
If you want to make a silicone mold yourself, however, the hardness of the silicone rubber is not the only decisive factor when choosing it. After all, this basic material for the mold production is also available in different viscosities. It will depend on the planned project and purpose whether you prefer a thinner or a thicker silicone.
If you don’t want to use epoxy resin with the molds you make, but bake or make chocolate yourself, you must also ensure that the material you choose is food safe and heat resistant. In this case, the silicone you choose for molds should be able to withstand a temperature of at least 200 degrees Celsius.
Depending on the type of project you are planning, there is another criterion that also plays a role. Only if the material you choose for silicone casting is sufficiently resistant to chemicals, can you use it for working with concrete, epoxy resin or other common casting materials. These questions can usually be answered very easily by studying the technical data sheet of a product in detail, or by simply asking someone competent in this specialized trade.
In order to be able to produce a negative mold on the basis of an original mold, you need a suitably dimensioned frame in addition to the silicone rubber and, of course, the blank that you want to reproduce in its form. However, if you decide to make a negative mold without the original mold, you don’t need a frame but only the blank. The following sections will explain the differences between the contrasting ways of making silicone molds.
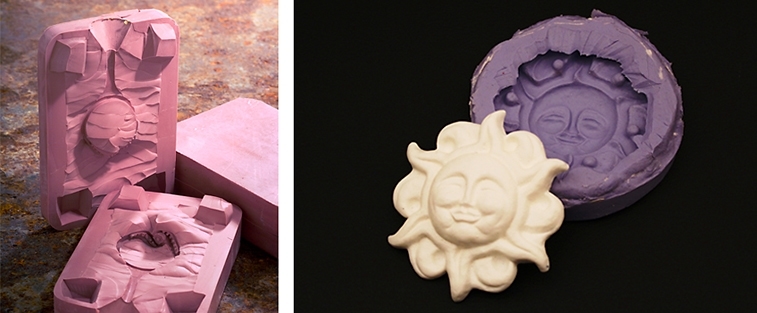
Make Negative Molds WITH the Original Object
To make an exact duplicate of an existing object, you can use silicone to make a negative mold with a master mold. However, you will need a frame of the right size for the mold. This serves as a limit so that the silicone cannot simply flow off unchecked in all directions. It is up to you whether you build such a frame yourself from individual parts or whether you use existing materials. Often, for example, the plastic molded packaging of various items or food can be converted accordingly. But if you decide on a self-built frame, you should ideally keep yourself as close as possible to the dimensions of the object you want to mold. In this way, you ensure that no silicone is wasted on an over-sized mold. After all, most types of silicone rubber are usually quite expensive, so you should be economical with the materials you use. For this reason, your frame should be as tight as possible so that no silicone rubber is wasted. As soon as no more silicone can escape through cracks or edges, you put the selected blank into your frame (with a suitable underlay).
Once you have prepared your silicone according to the manufacturer’s instructions, you can fill it into the frame. Make sure that the silicone is distributed as evenly as possible within the frame. Then you should wait for the silicone to harden completely before you can remove it from the frame as a finished silicone mold.
Making Negative Molds WITHOUT the Original Object
With this procedure you can make your silicone molds without the original mold. To make a silicone mold yourself, you put the silicone you want to use in a bowl or similar container into which you have previously put a mixture of water and detergent. In this way the silicone becomes a mass that can be molded with your hands and is then shaped around the blank. However, you should not use the silicone too sparingly. Otherwise, you might accidentally create a mold that is too brittle and unstable afterwards.
When molding the silicone into a mold, you should also think about the later use. This means that you should immediately determine a place where you can cut the mold after it has hardened, in order to remove the object you have formed and later the casting from the mold.
The Right Preparation is Important
Even before you start working on your project, you should think about how it can be implemented in the best possible way and how you can make the most suitable silicone molds yourself. First of all, take a close look at the blank you have chosen and only then choose the best fitting silicone mass. After all, it depends very much on your blank as to how you should make your mold.
- Does the surface of your object have a rather smooth structure or is it full of indentations such as ornaments? Does your blank have many edges or fine grooves? For a detailed structure you need a rather soft silicone, because this is the only way to get the cured epoxy resin out of the flexible mold. If, on the other hand, the surface form is very smooth and simple, you can choose a material with a higher degree of hardness as silicone for molds.
- What is the size and weight of the object you want to make a mold with? Is the blank rather small and has a low weight? Apart from the answers to these questions, you should probably already know what kind of material you want to use to make duplicates later on. After all, very soft silicone is sometimes not dimensionally stable enough for heavy materials in large quantities. To avoid problems or the need for expensive support measures, you should choose a sufficiently hard silicone if you want to make a silicone mold yourself.
Tip: The professional silicone for high-quality silicone casting is not exactly cheap to get. Therefore, for your first attempts with this hobby, you might want to start with much cheaper bathroom silicone. This is definitely a viable substitute for your first experiments. However, you should not expect perfect results if you want to make a very detailed silicone mold. For first exercises and gaining experience with silicone casting of simple molds, bathroom silicone is quite suitable.
High Quality Duplicating Silicone for your Projects
Various silicone products are advertised on the different trade platforms as silicone for molds. However, there are sometimes serious differences in quality between these products. Basically, factors such as the required stability in relation to the elasticity of the material are particularly decisive for the selection.
Our recommendations on high quality and proven duplicating silicone:
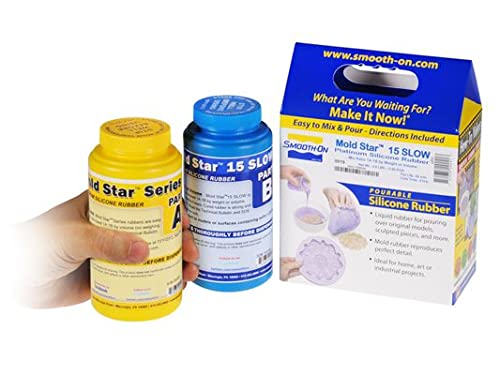
- high-quality silicone rubber from Smooth-On
- Heat resistant up to 450° Fahrenheit
- Slow curing time of 4 hours, more working time
Our favourite: The SmoothOn Silicone mold Making Kit
We prefer to work with SmoothOn Silicone rubber for our projects in this area. This high-quality material offers outstanding elasticity and, with a hardness of Shore A 20, is perfectly suited for molding filigree surfaces and shapes. For particularly easy handling, the two components are available in different colors and only need to be mixed by you in a simple mixing ratio of 1:1 before processing. The silicone rubber kit satisfies with a good balance of quality and price.
Materials Required for DIY Silicone molds
Of course, it depends primarily on the scope and specifications of your project which materials you ultimately need. At this point, however, we will assume that you want to make silicone molds with a wooden frame (i.e. with an original mold). To make such a reusable mold out of silicone, you need the materials listed below:
Preparation of shape and object


Additional materials
- The item to be duplicated
- Standard cotton swabs (“Q-Tips”) and toothpicks
With the modelling clay, as well as the toothpicks and cotton buds, you can quickly and easily seal any gaps and cracks in the frame you have created for the mold. In this way you can ensure that no silicone – or very little silicone – leaks.
How to Make a Silicone Mold: Step by Step Instruction
For newcomers in this field, it may sound very challenging at first to make their own molds from silicone. Even as a beginner you can make your first self-made negative mold step by step in a relatively short time with our easy to understand instructions.

Make Molds: Frame Construction
- As a first step, you should focus all your attention on building a suitable frame for the silicone casting. In doing so, it is important to find exactly the right dimensions: of course, the frame you create must be large enough to completely enclose the object to be molded. But it should also not be too large, so that you do not have to use too much silicone to make your mold. To prevent silicone from leaking, you also need a smooth plate as a base. But don’t use a glass plate for this, because the silicone rubber can be very difficult to remove from such a plate. Base plates made of smooth wood have proven to be very useful for this purpose.
- You enclose the base plate, which has been brought to the right size, with four equally smooth side walls. For these side walls you can also use inexpensive boards made of the wood reproduction MDF or smooth planed solid wood. Make sure that the side walls are at least 10 cm higher than the object to be molded. The joints of your wooden frame should be sealed after screwing or other form of fastening. Modelling clay has proved to be a good choice for this purpose. You can smooth the joints of the modelling clay with a cotton swab or toothpick.
- Now place the object to be molded into the frame so that the side to be molded is facing upwards. In order to keep the object in place when pouring the silicone mass, it should be fixed to the base plate with double-sided adhesive tape or with some hot glue. As soon as the object can no longer slip, the next step is to stir the silicone mass.
Mix the Silicone Mass
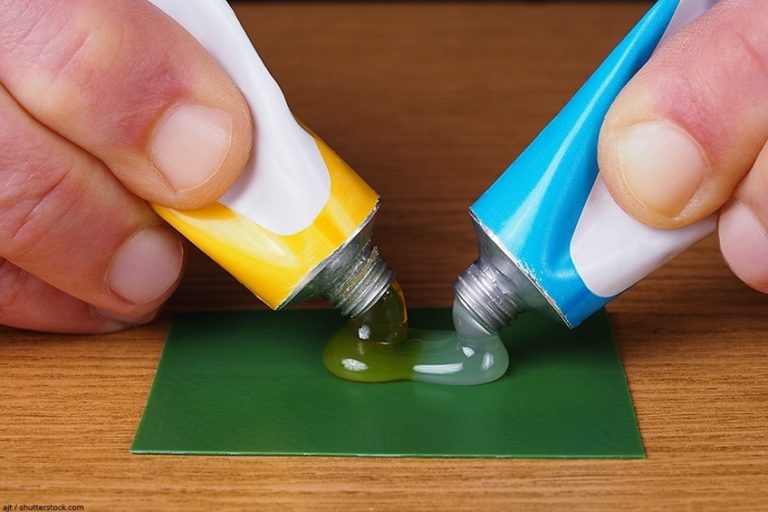
- To mix the required silicone, first weigh the necessary amount of each of the two components and mix them together in a ratio of 1:1. This can be done quite well with a fairly sturdy wooden stick in a plastic cup. You can determine the exact requirement for your project with a measuring stick or by calculating the volume in advance. This way you can make sure that as little silicone as possible is wasted.
- Instead of mixing a large amount, it is better to mix several smaller portions. The latter is much easier to mix together without any annoying clumping. In addition, due to the toughness of this material, stirring large quantities of silicone quickly requires a considerable amount of effort. It is therefore better to save yourself the unnecessary effort and simply provide several containers for mixing the divided silicone quantities.
- When you have finished mixing a partial quantity in a cup, you should gently tap the bottom of the cup a few times against a table top or similar hard surface. In this way you can release air bubbles and help them to rise to the surface of the mixture. To give this process the necessary time, you should wait a few minutes before filling the silicone into your prepared frame.
Pour Silicone into the Frame
- If you have built your frame for silicone casting from wood, you should first apply a little oil or spray it with a professional release agent. Please note the manufacturer’s instructions for your silicone, because not all types of oil are suitable for silicone and can be used as a release agent. There are also oil types which can attack the surface of silicone.
- After brushing or spraying the frame with oil or another release agent, you can pour the prepared silicone mass over your object into the frame.
- For the duplication of a blank with relatively large and smooth structures and surfaces, the procedure of pouring the material is quite simple and without any pitfalls. In such a case, the liquid mass of the prepared silicone should simply be poured over the object to be molded from a relatively high height. You should make sure that the whole blank is completely surrounded by the silicone.
- If it is an object with a detailed structure (many corners, furrows and cracks), these indentations should first be poured specifically with the liquid silicone mass and only later the rest should be added to the frame. In this way you can be sure that every detail of your blank will be molded exactly.
- Pour the silicone mass into the mold until its filling level exceeds the object to be molded by at least 5 mm.
After pouring the viscous silicone, you should gently tap the frame with your fingers a few times. Do this on each side for a few seconds. With this small but important intermediate step you can cause air bubbles in the silicone to rise. Once this is done, you can wait for your homemade silicone mold to harden completely.

Removal of the Hardened Casting Mold
- The exact time span for the curing of the silicone mold depends on the size of the mold on the one hand, and on the product being processed on the other. While some silicone molds can be removed from the frame after only one hour of curing, others require up to 24 hours of rest after casting. However, it is relatively easy to check whether your silicone mold is already fully cured. To do this, simply press gently with your finger into the mold after the time specified by the manufacturer. If it detaches easily from the frame, which has been thoroughly greased, it is sufficiently hardened. If you wish, you can now also carefully straighten the edge at this point with scissors, a scalpel or a carpet or cutter knife.
- For the longest possible durability and reusability, a silicone mold used for epoxy resin should be rubbed with talcum powder after production and later after each use. In this way you can keep your silicone mold supple for a long time.
Make a Two-part Silicone Mold
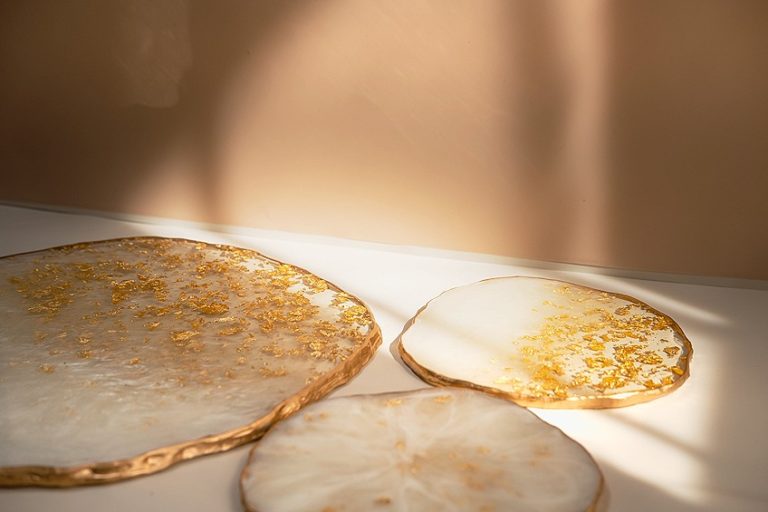
Especially in the field of model making, it can be of interest to produce two-part molds for casting three-dimensional objects from silicone itself. With these you can not only create small works of art from resin, but also cast different sized components for nativity scenes or model railway dioramas from different materials. Plaster or concrete is often used as casting material for this purpose. But the whole thing also works with transparent or colored epoxy resin. With appropriate molds made of silicone, you can cast your own house facades or bridge pillars in concrete or plaster and after hardening, you can color them to give them a realistic look. With two-part molds you can create impressive objects out of resin, in which embedded objects such as flowers or shells can permanently display their full natural beauty.
To create a two-piece form, you need malleable clay in addition to the materials listed above. You press these into your prepared frame in such a way that the frame is filled to about half of its height. It is important that the corners are also well lined and that the surface is smoothed well.
Now you take your blank and press it into the prepared plasticine up to half of its volume. Then fill the mold with freshly mixed silicone rubber. After curing, first remove the silicone mold and then also the modelling clay. Then the finished half of the mold is placed back in the frame for further work.
Now you place your blank exactly in the recess. It is important to rub the mold well with Vaseline, so that you can remove the two halves of the mold from each other again later with little effort and without damage. Finally, pour silicone rubber into your frame again and let the second part of the mold cure sufficiently long.
Procedure for Blanks with Undercut
Things become a little more complicated with silicone molds of the brand Eigenbau when it comes to the production of molds with so-called undercut. This is when a blank has exposed edges or corners that protrude over the blank and therefore get stuck to the material of the mold when the blank or a duplicate is removed from the silicone mold. If you want to make a casting mold out of silicone, smaller undercuts are usually no problem if the silicone product is reasonably elastic. In such cases, you should therefore use soft silicone with a Shore value between 0 and 20. With larger undercuts, however, it can be problematic.
Even when working with silicone molds, large undercuts can only be made with two-part or multi-part molds. Here too, you should use soft silicone rubber if possible and be as patient and careful as possible when removing the blank from the cured mold so that the silicone does not overstretch at any point.
Tip: Sometimes it does not want to work at all when the blank is removed from the hardened silicone mold. If necessary, you can then cut open the mold with a sharp cutter knife at the problematic point to remove the blank. The crack in the mold is then closed again by fixing it with several tightly fitting rubber bands. In this way you can also easily remove the finished work-piece from the mold later.
Tips and Tricks for Perfect Silicone molds
- Don’t have the time or motivation to make a suitable frame for silicone casting yourself? Maybe you still have a box of old Lego bricks lying around somewhere in the house. These are well suited to build a perfectly fitting frame for your planned silicone mold in combination with a base plate made of smooth planed wood. Finally, you can position the Lego bricks exactly according to your actual needs and use them just like a wooden frame.
- During the time needed for the hardening, the frame with the silicone mass should be kept at the proper temperature. If the room temperature is significantly below 18 degrees Celsius, the curing process can take a long time. However, too high temperatures can cause the material to clump together or the mold to dry too quickly. Ideally, the room temperature should be between 18 and 20 degrees Celsius.
- Now we would like to give you a practical tip for determining the amount of silicone you need: as soon as you have built your frame according to the above instructions, fixed the side walls to the base plate and your blank inside the frame, fill the frame with uncooked rice. The rice should be at least 1 cm higher than the object to be molded. Then carefully turn the frame around to pour the rice into a bowl and weigh it. The weight of the rice quantity determined in this way should correspond closely to the required amount of silicone.
- For your first projects in this exciting, creative area you should not try to do too much at once: Otherwise, difficult projects can quickly spoil the fun. It’s better to gain experience with simpler forms first and give yourself enough time for practical experiments. This way you can gain the necessary experience for more difficult projects yourself.
Inspiration for Exciting Projects
After a certain amount of work on the subject of epoxy resin, professionals can approach the project to make a chess set from epoxy resin themselves. This involves a lot of work, but it is a great gift idea for ardent chess fans.
Jewelry made of epoxy resin looks elegant and modern at the same time. It is not uncommon for children to want to wear their parents’ jewelry, but the risk of loss or damage is simply too great. With a homemade silicone mold, a high-quality piece of jewelry can be duplicated relatively cheaply. Things get even more exciting for children if you stir small decorative stars or suitable glitter dust into the resin.
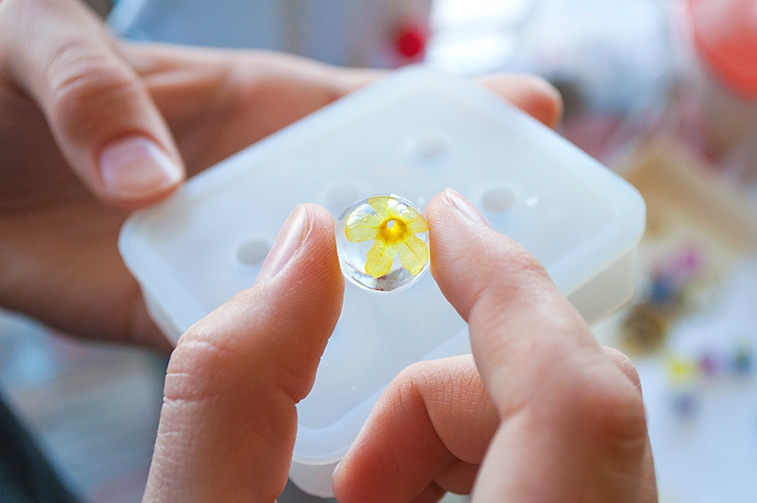
Epoxy resin is also perfect for preserving impressive flowers permanently in their natural beauty. With a self-made silicone mold you can make decorative pendants out of resin and let your creativity run wild.
In the shops you will usually find a variety of simple silicone molds in the usual basic shapes. However, if you really want to be creative, you will probably want to make your own silicone molds. But if you follow the simple steps of our instructions, you should have no more problems. Just try it out yourself – we wish you a lot of fun!

Larissa Meyer is a 32-year-old mother from Michigan and creative spirit since childhood. Her passion for painting and drawing has led her to an education as an illustrator and a career as a freelance graphic designer. She has a Bachelor of Fine Arts in Illustration and a degree in Graphic Design. Larissa is a talented artist who is able to master a wide range of styles and techniques to bring her artistic vision to life. Her greatest passion is currently fluid painting and epoxy resin art. Larissa’s love for art and her knowledge and experience in illustration make her the perfect Creative Director for our fluid-painting.com team. She is the creative head of our team and shares her passion and knowledge with our community through articles and tutorials.
As a mother of a 2-year-old daughter, Larissa also understands the importance of fostering creativity in early childhood. She uses her experience and knowledge to help other parents inspire their children and develop their artistic skills as well.
Learn more about Larissa Meyer and about us.