3D Epoxy Flooring – How to Make 3D Floor Art With Epoxy Resin
This post may contain affiliate links. We may earn a small commission from purchases made through them, at no additional cost to you.
Looking for a unique flooring solution that looks great? Why not consider a 3D epoxy floor? If you want to add a special effect to your home while still keeping the flooring durable and practical, then a 3D floor made out of epoxy is a brilliant idea. Let’s explore exactly what 3D epoxy flooring is, and how to apply one of these floors yourself.
Table of Contents
What are 3D Floors?
As the name suggests, 3D flooring uses a three-dimensional image on the floor which is coated with a type of resin. These images need to have a very high resolution in order to look as realistic as possible. If the image is of good quality and the floor has been put in place correctly, 3D graphics flooring should create a photorealistic effect.
Any design can be chosen for the underlying image on the floor. This just depends on personal preference. What is important, however, is that the angles and resolution are correct in order to achieve the 3D effect. If you are doing the project yourself, you can use whichever image you want. If using a company to apply the 3D epoxy flooring, they may limit the images that you can use.
Pros and Cons of Epoxy Floors
Adding a 3D graphics flooring effect creates a one-of-a-kind ambiance in the home. There are a number of unique benefits that this kind of flooring style can bring to your home. Let us take a look at some of the advantages and disadvantages of utilizing 3D flooring. Clearly, the advantages of 3D floors outweigh the drawbacks. This type of flooring is truly impressive, and it offers a special kind of artwork to be enjoyed in your home. While the installation is not easy and it can be a time-consuming project, the results will be well worth it.
Pros
- This flooring provides a unique kind of artwork that will make your home stand out.
- There is a massive variety of images that can be used.
- You can also create your own flooring design with photographs or graphic design programs.
- 3D wallpaper and flooring can be combined for a unique effect in the home.
- Once coated with resin, the floor and design is incredibly durable and resistant to abrasion, mechanical impact, and chemical loads.
- These floors are easy to maintain and keep clean.
- Epoxy 3D flooring is slip-proof and safe.
- You can choose between a matte or a glossy finish.
- 3D flooring is smooth and seamless, making it a hygienic option for the home.
Cons
- Installing a 3D floor is not easy and should only be done by experienced craftsmen.
- It is a time-consuming process to put in place.
- Installing a 3D floor can be quite expensive.
- Once installed, it is very difficult to remove.
- The floor finish is not very warm or comfortable when compared to traditional floors like wood.
Laying down 3D floors is not such a difficult task for experienced craftsmen and DIYers. If you are unsure about this though, you can always use a ready-prepared printed image in the form of a 3D floor sticker. This is a simplified and more affordable approach.
Required 3D Flooring Materials
Want to know how to make 3D floor art? If you are interested in laying down your own DIY epoxy floors in this style, then you will need the following equipment and 3D flooring materials.
- The right cleaning equipment for dirt and dust,
- A primer that is self-leveling,
- The 3D image that will be applied,
- A suitable 2K synthetic resin,
- A roller for the resin, and
- A squeegee to smooth out the image.
Not included in this list is the processing program for the image. You will need this to make sure that the image is perfectly suited to the space you will be applying it. We will explore this point further later on.
How to Use 3D Flooring Designs
When making 3D epoxy flooring, there are a number of techniques that can be used for getting the right artwork. We will explore a few possibilities below.
Option 1: Digital Printing
Digitally printing the desired picture for your 3D floor is one option. When doing this, you will need to make sure that the resolution is a minimum of 300 dpi. For a true 3D effect, you will need a high-quality image, so you cannot print at a poor resolution. A low resolution will make the flooring look blurred and worn out.
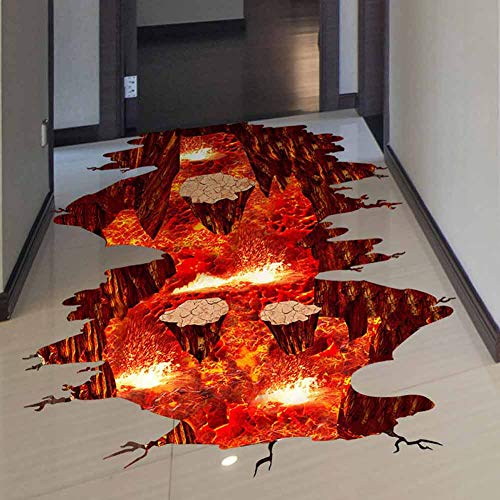
Option 2: Use Already-Finished 3D Floor Stickers
For an easier solution, you can also buy ready-printed 3D floor stickers. This may limit your design options slightly, but it makes getting a quality end-result much easier to do. One such is option is to use AJ Wallpaper’s ocean-themed floor wallpaper, which can be stuck on or peeled off with ease. This brand offers a variety of 3D wallpapers for floors, walls, staircases, and more. This vinyl wallpaper is completely natural and environmentally friendly. It is waterproof and can be coated with a layer of epoxy for added durability and long-lasting protection.

- Extra-large 3D wallpaper photo floor mural
- Easy to peel off and stick on
- Can remove without any damage
Resin to Seal 3D Floors
Once you have laid down the image, you will need to seal the 3D floor. This can be done either with polyurethane resin or epoxy resin. Both of these products are highly durable and offer a smooth, clear, and glossy look. Both products come as two-part resins which require mixing together. Both epoxy and polyurethane can also be mixed with additional substances such as color pigments or inhibitors for a longer working time.
Polyurethane resin is often preferred, as it is UV-resistant and can withstand direct sunlight. Epoxy resin is not always a good choice for outdoor use as it can yellow over time. Polyurethane resin allows you to get a better lasting clear surface for the 3D image to shine through.
Best Coat for 3D Flooring: Rain Guard Water Sealers Professional Sealer and Finish Coat
Rain Guard Water Sealers Professional Sealer and Finish Coat is a top-tier solution for protecting surfaces against water damage and wear. Designed for professional use, it offers a robust sealer and finish coat that enhances durability and longevity. Ideal for a variety of surfaces including concrete, masonry, brick, and natural stone, this product provides comprehensive protection for both indoor and outdoor applications.
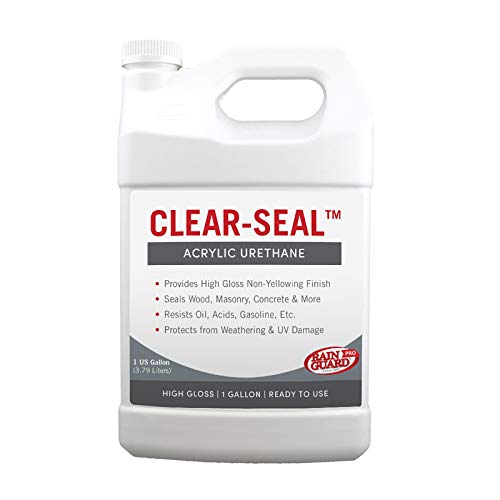
- This product provides a professional-grade sealer and finish coat, designed to protect surfaces from water damage and wear
- Suitable for various surfaces such as concrete, masonry, brick, and natural stone, offering robust protection for both indoor and outdoor applications
- Formulated to enhance durability and resistance to weathering, UV rays, and stains, ensuring long-lasting protection and aesthetic appeal
Formulated to resist weathering, UV rays, and stains, it not only safeguards surfaces but also preserves their aesthetic appeal over time. Whether applied to driveways, patios, or interior floors, Rain Guard Water Sealers Professional Sealer and Finish Coat ensures reliable performance and peace of mind.
Pros
- Professional Grade Protection
- Versatile Use
- Enhanced Durability
Cons
- Odor
- Surface Preparation
Metallic 3D Flooring
3D epoxy flooring offers a unique look through its realistic imagery. However, this can still be taken to the next level with a metallic 3D floor. This allows you to achieve super smooth, shiny, mirror-like finishes. Metallic flooring offers a modern look for your home. This type of flooring is also very durable, impact-resistant, and easy to clean.
How to Make 3D Floor Art – A Step-by-Step Guide
Laying down your own 3D flooring designs is a rewarding process. It will, however, require the right set of tools and a fair bit of patience. Our step-by-step tutorial on 3D epoxy flooring below should cover everything you need to know for implementing this flooring yourself.

- (* = affiliate link / image source: Amazon partner program)
Choose the Image
The image that you use for the 3D flooring is possibly the most essential thing to consider. This is what gives your flooring its unique character and special effect. However, if done incorrectly this can be the downfall to your 3D flooring. As mentioned earlier, make sure that the image has a high enough resolution. You will also need to consider how the chosen image will work with the room it is in. Consider the color scheme and furniture.
Get the Right Perspective of the Floor Image
When laying down the 3D image, it is essential to get the image at the right perspective for the room. Take a photo of the room where you want the image to be. Upload this photo to an editing program and lay your 3D flooring image over it. This allows you to adjust the size and shape of the image to make sure that it is the perfect fit for your room.
Doing this will allow you to make sure that the chosen image works with your room and will come out as you were hoping for. As it is so difficult to remove 3D epoxy flooring, it is important that you make sure that the image is a perfect choice. Be sure to choose an image that will stand the test of time and remain relevant after a few years.
Printing the Image
When printing the 3D flooring image, you will need to take it to a professional print shop that can handle large-scale prints. They will be able to help you achieve the right perspective, and can help with a few sample prints. When printing the final image, make sure to use only high-quality UV-resistant inks. If you do not want to print the 3D floor image, then you can also opt for a floor sticker. This comes ready to go.
Getting the Surface Ready
First of all, make sure that the floor surface is completely clean. There needs to be absolutely no dirt or dust present, as this will end up getting trapped beneath the resin. This will also affect the adhesion of the resin and the 3D image.
Also, make sure that the surface is entirely flat. Otherwise, the 3D image will not come through properly. Any cracks need to be filled in, and there must be no unevenness at all. Make sure that any edges are properly sealed and waterproofed. Edge insulation strips can work well here. Once cleaned, make sure that the surface is completely dry. The surface may also require some roughing up for better adhesion of the primer. This depends on the type of flooring. Then add a self-leveling epoxy primer to make sure that the surface is level and ready to coat.
Set the 3D Image in Place
Once the surface is ready, it is time to apply the image to the floor. This can simply be stuck down with a powerful glue or an epoxy resin adhesive. Use a toothed spatula to apply the adhesive before placing it on the 3D print. Using a rubber pressure roller is also very helpful when applying the image. Once the 3D image has been applied, it is important to take out any wrinkles or bubbles for an even image. This can be done with a plastic squeegee, using even strokes beginning from the center towards the outer edges.

- (* = affiliate link / image source: Amazon partner program)
Sealing the 3D Flooring
Once the surface is ready and the image is set in place, you can seal the floor off with resin. First, mix the resin and hardener into a container, making sure to get the right ratio. Ensure that the resin is properly mixed according to the manufacturer’s instructions. As soon as the resin is mixed, you will need to be cautious of the pot life. This is the amount of time that you have to work with the resin before it hardens, which is usually around 30 minutes. So, you will need to make sure that you get all the work finished within this time frame.
Use a roller to apply the resin to the floor and make sure that it is spread out evenly. Then roll over the resin a few times to avoid bubbles from forming.
Now, it is time to leave the resin to cure. This process can take between 24 and 72 hours, depending on the environmental circumstances. If possible, try to avoid any dust or dirt blowing into the room, as this can settle into the resin. Once the resin has cured, add another layer for enhanced durability and leave this to cure again. When the second layer of resin has cured, you can still add a final layer of sealant. This will increase the durability and scratch-resistance of the floor. In total, the curing time might take about a week until the floor is fully hardened and ready to use.
Safety
Always keep your safety in mind when working with resin. While it is still in its liquid form, it can be toxic and cause skin irritations. Always wear gloves and try to work in a well-ventilated space when using 3D epoxy flooring. It is best to wear a respirator mask when working with liquid resin to avoid potentially harmful fumes.
3D Epoxy Flooring Maintenance
One of the major benefits of 3D flooring is that it is so easy to maintain. The floors can simply be wiped clean from any daily dirt. Special polyurethane cleaner and care products are also available for more intensive maintenance, helping to get rid of tough marks and dirt. Although resin finishes are very durable, they may require occasional resealing. This can be done with polyurethane resin to help cover up scratches or marks.
Making your own 3D epoxy flooring is not the easiest job, but when done properly, it can be extremely rewarding. 3D floors can add the perfect one-of-a-kind element to any room, and they will be sure to provide something completely unique. We hope that this guide on how to make 3D floor art has inspired you to attempt your own project.
Frequently Asked Questions
How Deep are 3D Floors?
3D flooring should be at least 1.5 mm deep. The thickness of the 3D image as well as that of the resin coating create this deepness.
How Long-Lasting is 3D Epoxy Flooring?
3D epoxy flooring is incredibly durable and long-lasting. As long as it is maintained (which is easy), it should last for around 10 to 15 years. Of course, this depends on how busy the room is and the type of resin used.
How Much Does a 3D Floor Cost?
Installing 3D epoxy flooring can be done yourself as a cheaper alternative to getting it done professionally. If done professionally, it can cost up to $100 per square foot. This varies depending on the various circumstances, such as the type of resin, the 3D design, and how difficult the project may be.
Where Do You Get 3D Floor Images?
There are many different solutions to finding the right 3D images. Of course, one way is to take them yourself if you are a photographer. Otherwise, you can search for images online. There are a number of photography providers online that offer 3D images for flooring. It is important to pay attention to the copyrights. If using an image, you will likely have to pay for it. Some image banks require a subscription. Another option is to get a 3D image for flooring from a business that creates these especially. This is an easier option for anyone worried about not getting the image printed perfectly.

Larissa Meyer is a 32-year-old mother from Michigan and creative spirit since childhood. Her passion for painting and drawing has led her to an education as an illustrator and a career as a freelance graphic designer. She has a Bachelor of Fine Arts in Illustration and a degree in Graphic Design. Larissa is a talented artist who is able to master a wide range of styles and techniques to bring her artistic vision to life. Her greatest passion is currently fluid painting and epoxy resin art. Larissa’s love for art and her knowledge and experience in illustration make her the perfect Creative Director for our fluid-painting.com team. She is the creative head of our team and shares her passion and knowledge with our community through articles and tutorials.
As a mother of a 2-year-old daughter, Larissa also understands the importance of fostering creativity in early childhood. She uses her experience and knowledge to help other parents inspire their children and develop their artistic skills as well.
Learn more about Larissa Meyer and about us.