How to Paint Wood Furniture – Selecting and Using the Best Wood Paint
This post may contain affiliate links. We may earn a small commission from purchases made through them, at no additional cost to you.
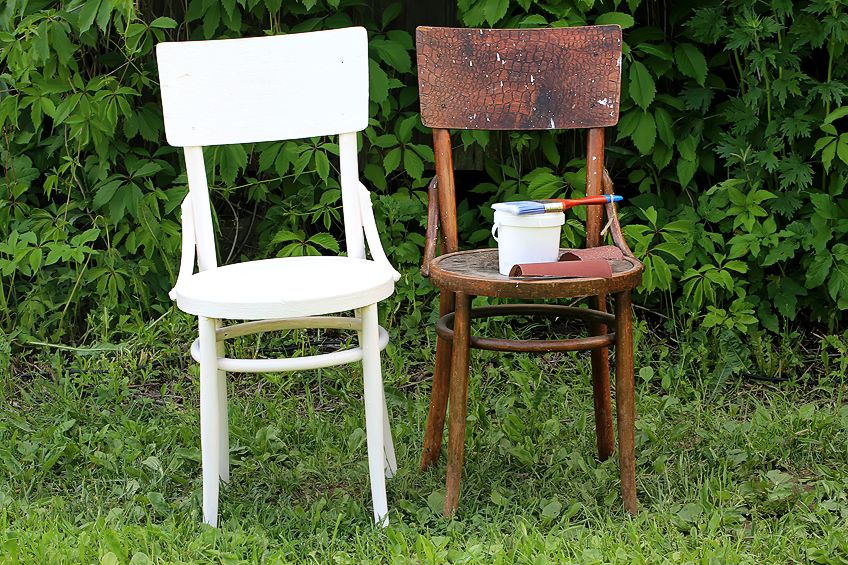
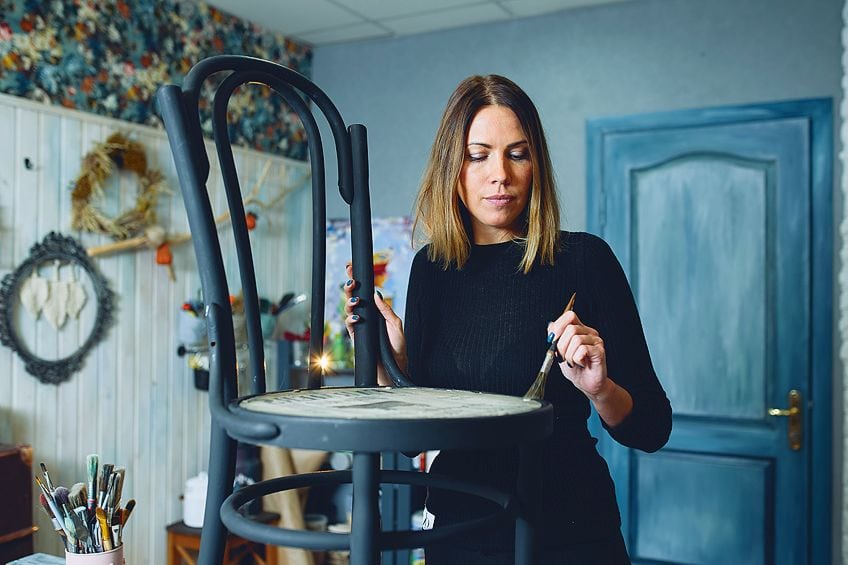
Paint can really change the way you see something and at the same time, reflects your personality. In this article, we will share all the knowledge you need on how to paint wood furniture – you deserve to have beautiful things! There is no need to break out any machinery, as wood painting can be done by hand. Keep reading to improve your DIY know-how, specifically, how to paint on wood, as well as the best type of paint to use on wood furniture. A rewarding experience awaits you!
Table of Contents
Everything You Need for Wood Painting
Primarily, you need to start with a primer. Therefore, your question should never be simply about the type of paint for wood, but also what primer will work best. With every different type of surface, there comes a different method. There are different kinds of paints best suited for a specific task, so it is advisable to understand which one to use. If you avoid this, your project will weather before its time, and nobody wants that.
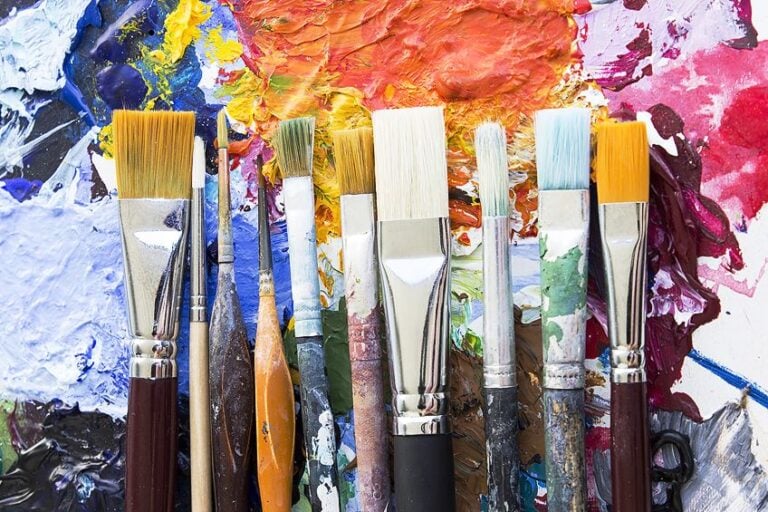
What Are The Right Rollers and Brushes for Wood Painting?
You may not have considered this before, but it is quite important which type of brush or roller you use because it has an effect on the end result. For your benefit, we have listed and described each one so you know which one you will need for the job.
Rollers
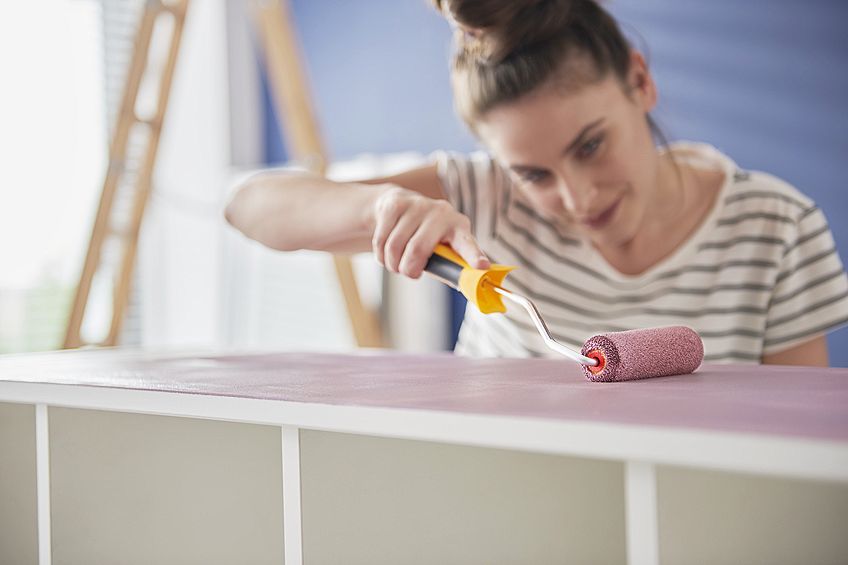
If the surface area you wish to paint is large, you will benefit from using a roller. It works best with paint that is water-based and offers an even and smooth finish, leaving out any visible brush strokes. You will, however, need to get into the corners with a small brush because the roller will not reach.
Natural Paint Brushes
When you are working with oil-based paints, a natural-bristle brush is recommended for you to use. Interestingly, the bristles on a natural brush are typically made from the hair of a hog. If you are looking for a high-end brush, make sure that the bristles are compressed together. Bristles with split-ends are not the end of the world, however, in fact, they help to even out the coverage as you paint.
Synthetic Paint Brushes
These brushes come in both low- and high-quality options and are typically much more affordable than the natural brushes, being synthetically made. If you are working with water-based paints, synthetic brushes are recommended first and foremost. On top of being so affordable, they last much longer because the bristles are not as fragile. As with natural brushes, high-end synthetic brushes have compressed bristles.
Brush Sizes
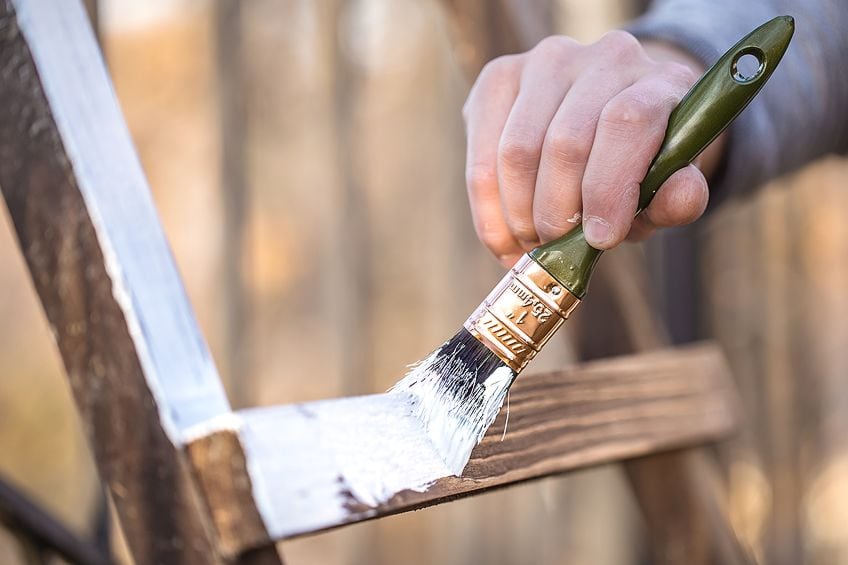
The size of the surface you need to paint will determine the brush size. Luckily, brushes get sold in sets. If you are working on painting the edges of a table or the legs of a chair, a brush that is two or three inches is required. For the smaller, hard-to-reach spaces, a brush that is half an inch to a whole inch in size should work.
Extra Equipment
In terms of equipment, brushes and rollers are only 50% of the tools and materials you need for the job. Make sure that you read this next section before you start so you do not have to make an emergency mission to the hardware store halfway through the job.
Respirator
Often, the paints we work with are filled with dizzying odors that are harmful to your health. Not only that, but if you are sanding down your surface area, you might breathe in wood particles during the process. An R95 respirator mask will prevent any harmful substances, particles, and fumes from entering your lungs.
Sandpaper
Some surfaces are too smooth for the paint to stick to it, and often need a light sanding down to give it a rougher texture. Keeping sandpaper with a grit variety of 10 to 220 will ensure that you have the right one for the job.
Masking Tape
If you are trying to paint a straight line, or avoid getting paint on a certain edge whilst painting in the corners, masking tape (also known as painter’s tape) will be your savior.
Wood Primer
In most cases, priming the surface of the wood is essential to get the best adhesion of the paint to your wooden surface. Remember, the kind of paint you use on the wooden surface will also determine what kind of primer you need.
Cloth
When you are cleaning up the surface prior to painting, a cloth with a slightly tacky feel to it will help to pick up all the particles left behind by the sanding process. A lint-free cloth will also work.
Basic Tools
Sometimes you will need a few of the basic tools you find in most toolboxes – even the most basic DIY toolbox. Screwdrivers might help remove any doors from hinges, or even to open up a paint can with dried paint on the lid.
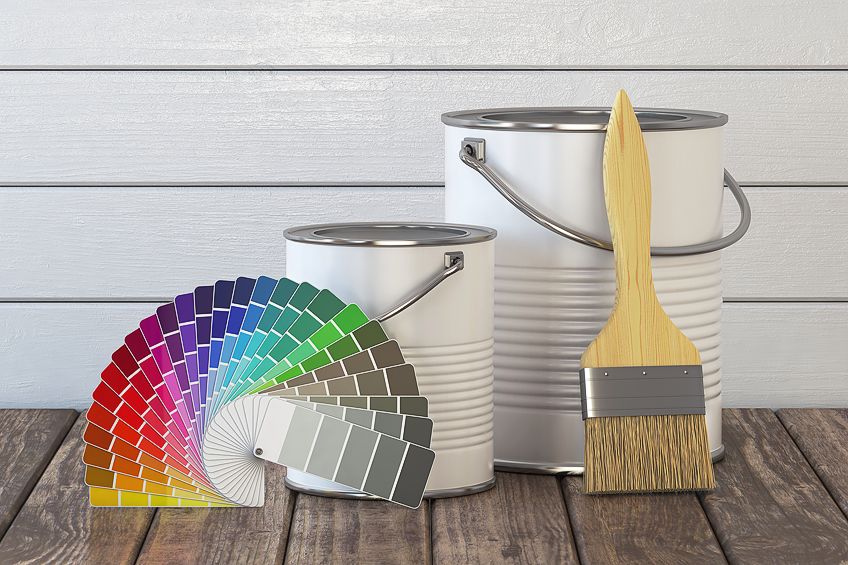
The Right Wood Paint
No matter what your taste is, from Barbie pink to a neutral beige, there will be an option to suit your preference of paint for wood. To save you some time, we have compiled a list of our favorite types of paint products available at most paint supply shops. Do not forget, the primer is a crucial part of this job.
Latex Paint
If you are looking for multi-purpose wood paint that comes in a wide variety of colors as well as different finishes like flat, high, and semi-gloss, this is the best pick for you. Take note that while this paint can work with different kinds of surfaces, we recommend the gloss or semi-gloss finish for painting wood. There are latex primers designed to best suit this paint.
Latex paint’s versatility allows it to be used for almost any project, except perhaps a desk surface or a table where people eat from. This is because it remains soft to the touch even after it has cured.
Best Latex Paint: RUST-OLEUM Painter’s Touch Latex Paint
This brand is highly trusted amongst paint workers, especially in terms of what kind of paint to use on furniture made out of wood. A little bit of this paint goes very far – just a single quart will have a surface area of 120 square feet covered easily. Not only is it perfect for interior or exterior use, but it is also chip-resistant, quick-drying, long-lasting, and boasts a brilliant hide. Rust-Oleum’s Painter’s touch latex paint is water-based, which means no overly offensive smells will have to be endured.

- Water-based formula is low odor, resist chips, and dries quickly
- Use on a variety of indoor and outdoor surfaces for lasting protection
- Gloss finish goes on smoothly and provides excellent hide
PROS
- Cleans up easily
- Less smell
- Dries fast
- Resists chipping and flaking
- Variety of color choices
- Flame retardant
- Can be used both indoors and outdoors
CONS
- Week-long curing time
- Not as durable as oil-based paints
Acrylic Paint
Acrylic paints are among the most used paints in the DIY industry, which might be because of the small quantities they come in. These paints boast some brilliantly bright colors and finish beautifully. Acrylic paint is water-based, which means no unbearable odors and a very easy clean-up when you are done. Acrylic paint also has the added benefit of self-leveling, giving a smooth finish result that dries fast. As always, it is important to use a primer as your base coat to increase the durability of your project.

Best Acrylic Paint for Wood: ARTEZA Acrylic Paint
Arteza’s acrylic paint is a versatile paint suited for most types of artistic projects and hobbies. It only comes in a small amount which makes it perfect if you are looking for what kind of paint to use on wood furniture that is small or detailed, like adding some zest to an old chest of drawers, a decorative mantelpiece, or maybe even a jewelry box, this is your best option.

- Vivid and highly pigmented colors produce true, consistent shades
- Acrylic paint goes on smoothly and will not fade over time
- Certified safe and non-toxic paint can be used by everyone
PROS
- Colors are bright and will not fade
- Less smell
- Simple to use
- Large range of colors to choose
- Quick and easy clean-up
CONS
- Long curing time
- Only comes in small amounts
Oil-Based Paint
If you are looking to paint the surface of a work-station, a kitchen or dining table, or maybe an office desk, you should use alkyd paint or paint with an oil base. Seeing as it sticks so well to most surfaces, it can even be used to cover up a botched paint job from before. Oil-based paints are a lot more durable and long-lasting than many other types of paint for wood.
Being an oil-based paint, here are additional odors and fumes for you to be concerned about. Make sure that your windows are open and you have sufficient airflow – a respiratory mask will not hurt either. There are two downsides to oil-based paints, one being that you will have to wait 24 hours to add the next layer of paint, and the second being that it is quite costly.
Need a suggestion for a primer? Rust-Oleum has a great option from its Zinsser Bull’s Eye 1-2-3 series.
Best Oil-Based Paint for Wood: RUST-OLEUM Stops Rust Protective Enamel Paint
The Stops Rust protective enamel paint by Rust-Oleum does exactly what its name suggests – it is a great defense against rust caused by abrasive environments. This paint is highly durable and resilient against any chips, fading colors, scratches, and corrosion. All of these traits make it the perfect type of paint for wood furniture both inside and outside.

- Weather- and rust-resistant coating protects indoor/outdoor surfaces
- Oil-based formula provides a durable protective coating
- Excellent resistance to abrasion, fading, and chipping
PROS
- Suitable for interior and exterior use
- Resistant to chipping, fading, flaking, and scratching
- Long-lasting and hardy
- Levels by itself
- Resistant to rust
CONS
- Nasty odor
- Fewer color choices
- Slow-drying
- Thinners needed for clean-up
Chalk Paint
If you are a lover of all things rustic, you might have appreciated furniture painted with chalk paint in the past without realizing what it was. This paint dries particularly fast and leaves vivid brushstrokes, which is helpful because it gives it that oh-so-rustic feel. Chalk paint comes with a matte finish – no other options there. On the plus side, however, a primer is not necessary if you are going for that distressed, rustic feel. Of course, if not, there is a primer that is best suited for the task – Country Chic’s primer that dries clear.
Best Chalk Paint: HEMWAY Chalk-Based Furniture Paint
If preserving our environment is a passion of yours, Hemway’s chalk paint is a trusted and favored option. This is because it is water-based and releases no odors or nasty chemicals. You have the choice of many beautiful colors, vibrant or pastel – your choice. If you are looking for what kind of paint to use of wood for a rustic vibe, this is a great option. Hemway’s chalk paint is also handy because it can be applied without any initial sanding or priming, saving a lot of time.

- Chalk paint offers exceptional coverage with just one coat
- No prior sanding or priming necessary and has virtually no odor
- Dries quickly and provides an attractive rustic-looking matte finish
PROS
- Cleans up easily
- Good variety of colors
- Environmentally conscious
- Non-toxic with fewer chemical smells
- Sanding and priming not required
CONS
- Costly
- Less hardy than oil-based paint
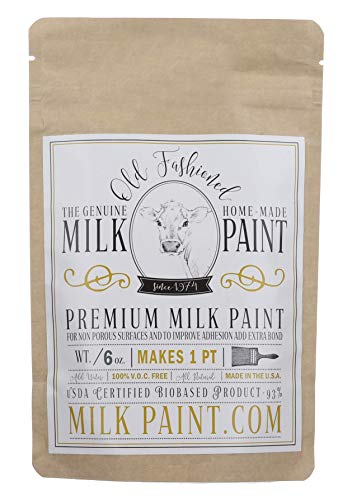
Milk Paint
Milk paint is another great option for those rustic or antique fanatics, which can execute the distressed or worn-out look by running steel wool or a piece of sandpaper around the edges of your piece of furniture. Promising a smooth and silky finish once dried, you also have the option to change up the color by adding tints till you find your favorite hue. If you are an adamant primer, a stain blocker will do the job nicely – General Finishes has a great option that you can find here. Otherwise, a primer is not completely necessary because milk paint is designed to adhere to most surfaces, making it one of the best types of paint for wood furniture.
Best Milk Paint: OLD FASHIONED Powdered Milk Paint
If vintage is your aim, this paint should be your game. Old Fashioned’s milk paint comes in a powdered form, but do not be deceived by its small amount – the 170g packet makes up to two cups of paint. This milk paint is safe to be used on children’s toys and furniture because it is non-toxic and eco-friendly.
- Made in small batches using earth pigments that will not fade
- Perfect for achieving an “old” or “country" look on wooden furniture
- Environmentally safe and non-toxic when dry
PROS
- Eco-conscious
- Non-poisonous
- Mixing is easy
- Resistant to fading
CONS
- Lesss durable than oil-based paint
- Minimal finish options
- Must be mixed before use
Instructions for Painting Wooden Furniture
Now that we have covered what kind of paint to use on wood furniture, we can get to the fun part – how to paint on wood. In this next section, we will be covering all the do’s and don’ts of painting, offering some helpful suggestions to make the process easy for you. Follow these instructions and you will be a professional in no time!
Disassembly
This is the part where your basic tools can shine. Any doors from cupboards and chests of drawers must be removed before you begin painting to ensure that they still close properly when you are done. Basically, if a piece can be removed or disassembled, do so.
Cleaning
If you are not aware of TSP soap yet, it is a trisodium phosphate soap which, along with sugar soap, is highly effective in eradicating all dirt and grease from the old piece of wooden furniture you are wanting to paint. This ensures sufficient adhesion of the paint to the wood. If the surface you are painting is raw, untreated wood, this is an unnecessary step.
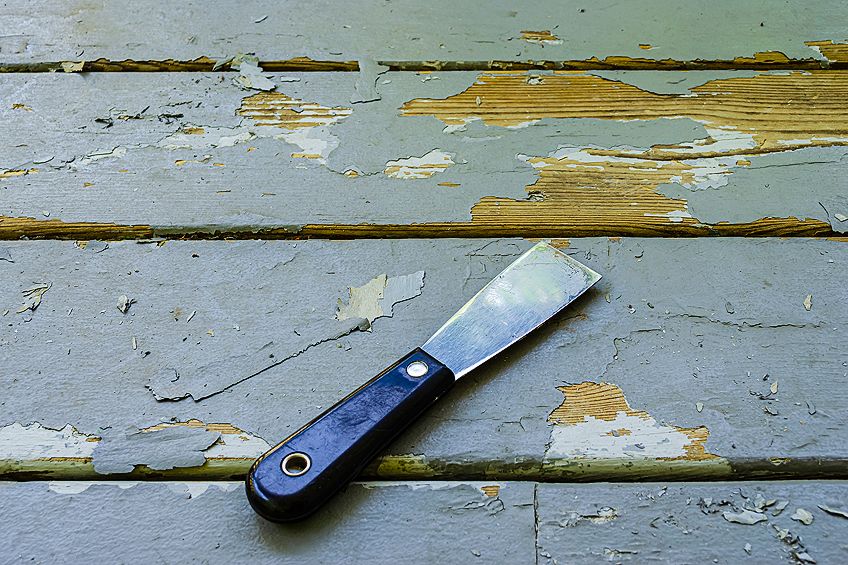
Stripping
In many cases, the wooden surface you are painting may already be covered in paint that is flaked or chipped. In this case, you will need to get rid of the initial layer before you can paint, which you can with a paint stripper or a paint scraper (or both). Make sure that you have all windows open to promote enough airflow, as well as wearing your R95 respirator mask.
Sanding
Most of us get so excited with the project at hand that we often overlook the importance of sanding down the surface before we begin painting. This puts your paint at risk of not sticking to the surface. Sanding down the surface can also remove any unwanted and unaesthetic scratches, dents, and even stains from the surface to make it smooth and even-toned again. In the case where there are deep gouges on the surface, some wood filler will smooth them out in no time.
If your choice of sanding is machine-based and you are using an orbital sander, make sure that you work carefully – try not to damage the surface by sanding too vigorously. If you prefer to sand by hand, circular motions are advisable for a smooth and even look.
Please be advised that sanding down lead-based paint is quite toxic, so make sure that you are working outside with ample airflow and that you are wearing your respiratory mask.
To start off, use a piece of sandpaper that has a grit of 80 and you can work your way up to a grit of 220. When you start sanding, bear in mind that you do not need to sand so much that you are left with a bare wood surface. The surface you are painting simply needs a slightly rougher texture to make sure the paint sticks. In some cases, only a very light sanding is required. Sandpaper with a grit of 220 will help to remove any visible sanding strokes.
Masking
When you apply your favorite masking tape or painter’s tape, make sure that you sand down the surface first. This tape prevents the paint from getting to any areas you do not wish to paint, like the edges or the hinges of doors. Be sure to press the tape down so that it lies firmly on the surface, thus preventing any paint from leaking underneath.
Priming
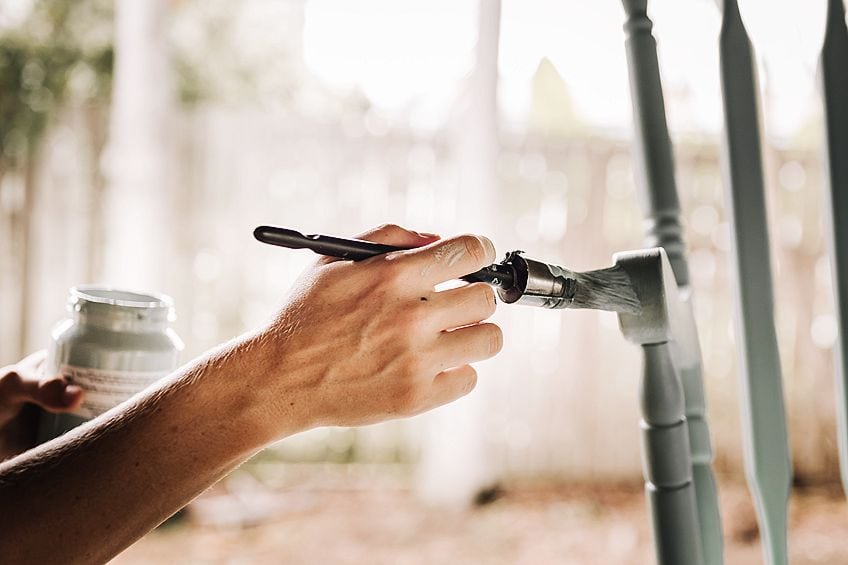
If you are working with a paint that is light or pale in color, this step is extremely important. It strengthens the paint job’s durability and ensures optimal adhesion. Use a smaller brush for the edges and corners, and a larger brush for the bigger areas. A roller is optional if you are painting a massive space.
If you are working with a paint that is water-based, a water-based primer should be used. The same concept applies when it comes to oil-based paints and latex paints – there is a respective primer.
Light Sanding
After the initial sanding and priming, there is an additional round of sanding down. This is to give the primer a rougher texture to allow the paint to stick to it. If there are any drip marks from the primer, now is your chance to remove them. A 220-grit sandpaper should be sufficient.
Painting the First Layer
Once all of the above steps have been completed, you can start with your first layer of paint. Now is the time for you to see the true progress of your work, where you will feel all of the appreciation.
When painting, use the technique known as “cutting in”, which entails starting with the smaller, harder-to-reach areas like the corners. You can then spread out to the larger spaces where you might need to use a roller instead.
Once you have finished with the first layer, read the instructions on the paint can label and make sure that you leave it to dry for the right amount of time. Open the windows to increase the airflow for this process to be quicker – oil-based paint tends to have a 24-hour drying time, so be prepared to wait.
Sand Again
Sanding, sanding, and more sanding! It might seem quite tedious, but all of this effort will pay off in the end. Using sandpaper with a grit of 220, rub down the first layer of paint you have added to roughen it up a bit. Use a lint-free cloth to wipe away any residual particles.
Painting the Second Layer
Once you have cleaned up all the wooden particles from your last sanding, another layer of paint is your next step. This is important because it makes sure that there are no gaps and that the end result is smooth and one-toned. If you find that after the second layer you still need more, follow the same process in terms of letting it dry, sanding it down, cleaning, and then applying the next layer. You will be glad for your efforts in the end.
Re-assemble the Furniture
All of the painting has been completed and every piece that you took apart to paint has dried – you must be itching to be put it back together! Making sure that everything has dried appropriately is of the utmost importance. If you have time on your hands, a few days of grace before you use the furniture is always suggested – the curing time for the paint can take up to a few days.
Suggestions for Successful Wood Painting
- Use long, steady, and deliberate strokes when painting on wooden surfaces. This helps to achieve a smooth and even-toned result when you are finished.
- Get out some heavy paper – heavier than your average paper. Use this to wrap up and store your brushes so that the bristles do not get damaged.
- Make sure that your strokes go in the same direction of the wood grain.
- Do not have a heavy hand when dipping your brush into the paint to reload it. This helps to prevent any drip marks, which will need to be sanded off to be removed. Make sure that the brush is only dipped in a quarter of the way up the bristles.
- If you wish to make the drying time a slower process, there is always the option of adding Floetrol or penetrol into the paint.
An aluminum-based primer for wood is your best option if the wooden surface you are painting is an oily or resin-filled hardwood. It offers the ultimate layer of protection for this type of wood.
- When working indoors or in a place where you need to protect the floor, use a tarp, refuse bags, and newspaper all taped down to the floor so that no breeze lifts it up.
- Sometimes you might not notice that your masking tape has not been stuck down properly and the paint has managed to seep through, messing up your perfect straight line. To avoid this, run a bank card or a paint scraper along with the tape you have placed down as a way of making sure it is pressed down properly.
- Looking after your brushes appropriately will ensure that you will not need to buy new brushes every time you wish to paint. This means that when you clean them after each job, you must use the right method. For oil-based paints, you must use mineral spirits to clean the paint and for water-based paints, you only need soap and water. No matter the method, the importance is still there.
Frequently Asked Questions
Can I Paint Directly onto Wood?
Wooden surfaces always need to be prepared before you can just start painting right off the bat. You will first need to clean it, sand it, clean it again, wait for it to dry, prime it, let it dry, sand it once again, and finally, you can paint. This makes your paint job far more durable.
Is It Possible to Achieve an Ultra Smooth Finish?
Some people like a rustic feel, whereas others like a smoother and more even finish. If this is your desired result, you can use a compressor and spray the paint on. This promises an ultra-smooth end result. If you do not have the machinery, you must use a roller, which is the closest equivalent.
Does All Paint Need to Be Removed From My Piece Before I Repaint?
If the paint job that is already there seems to be in a decent condition, you can probably get away with painting over it. If you notice any flaking pieces coming off the existing paint job, you will have to sand it down to remove the layer of paint before you can apply a new coat.
Can Shellac Be Painted Over?
Yes, oil-based paints like shellac can be painted over, although there are a few specific methods you have to follow to make this possible. The preparation in this is of paramount importance. As we have mentioned before, sanding it down first is the primary step, after which is cleaning it up. A primer is most necessary when painting over shellac because, without it, paint tends not to stick.
How Much Paint Will I Need?
What kind of paint to use on wood furniture is not the only question, but also how much paint to use when painting wood furniture. We do not need a gallon of paint just to cover 350 square feet, and just one quart of paint should be the right amount to paint a set of dining room chairs.

Larissa Meyer is a 32-year-old mother from Michigan and creative spirit since childhood. Her passion for painting and drawing has led her to an education as an illustrator and a career as a freelance graphic designer. She has a Bachelor of Fine Arts in Illustration and a degree in Graphic Design. Larissa is a talented artist who is able to master a wide range of styles and techniques to bring her artistic vision to life. Her greatest passion is currently fluid painting and epoxy resin art. Larissa’s love for art and her knowledge and experience in illustration make her the perfect Creative Director for our fluid-painting.com team. She is the creative head of our team and shares her passion and knowledge with our community through articles and tutorials.
As a mother of a 2-year-old daughter, Larissa also understands the importance of fostering creativity in early childhood. She uses her experience and knowledge to help other parents inspire their children and develop their artistic skills as well.
Learn more about Larissa Meyer and about us.