How to Use Watercolor Pencils – Aquarelle Pencil Techniques
This post may contain affiliate links. We may earn a small commission from purchases made through them, at no additional cost to you.
What are watercolor pencils? A watercolor pencil is a water-soluble pencil, which simply means that the pencil’s pigment will react when activated by water. A watercolor pencil is a stunning medium that falls between drawing and watercolor painting. The majority of watercolor pencil art that you have seen will have been created using a variety of techniques. There is a range of possibilities available when working with watercolor pencils. This article will advise how to paint with watercolor pencils while also providing insight into a variety of techniques.
Before We Start
Before we go into detail on how to use watercolor pencils, we would like to define what are watercolor pencils. They are water-soluble, colored pencils. It is helpful to know this, as the way the water responds to the pencil can be quite unpredictable. One of the great things about watercolor pencils is that by adding just a small amount of water you can reactivate your marks if you feel the need to make any small changes. You need to use a relaxed approach when working with watercolor pencils, so you want to ensure you are working in a comfortable environment and have adequate time available when working through this article.
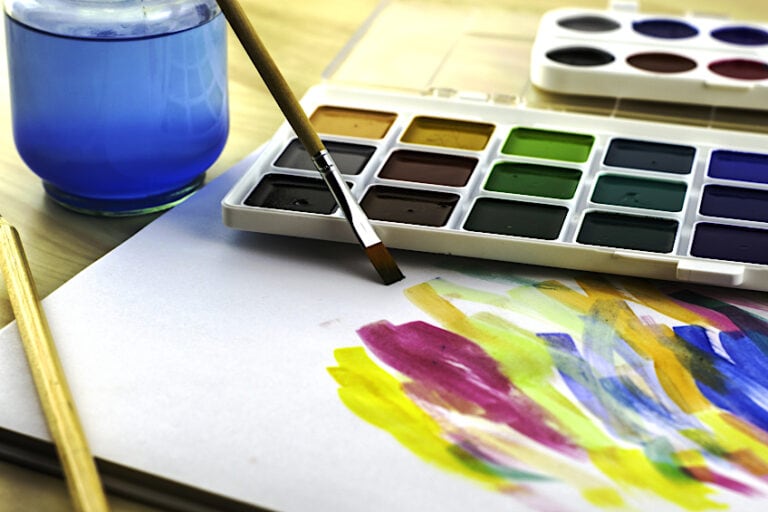
The Necessary Materials
To begin with, you will want to ensure that you have good-quality paper to work with. Any A3 watercolor paper is perfect and can be purchased from your local art shop, however, you want to ensure the grammage of the paper is higher than 300 GSM. If you have chosen to use watercolor paper as the medium uses water that will cause the paper to warp if you do not use good quality paper. Secondly, you will require a good-quality set of watercolor pencils. Where you are based in the world will dictate the availability of items in your local art store, but we have put together a list of useful, suggested supplies. Thirdly, you want to ensure you have some good-quality watercolor brushes. As a beginner, we recommend using acrylic paintbrushes as they will do the job. Finally, we will be doing some cutting, however, there is no need for us to recommend any specialized scissors, as any old, sharp, pair of scissors will do.
- Arteza Watercolor pencils
- Sharpener
- Paintbrushes
- HB pencil
- 300 GSM paper (or higher)
- Masking/Scotch tape
- Ruler
Preparation
When learning how to use watercolor pencils to paint, we want to begin by looking at the technique of using watercolor pencils drawings. Take some watercolor paper and cut out cards of 5cm by 10cm. you will then create small watercolor pencils drawings that you can use to assist you in navigating a variety of techniques that will assist you when addressing the problem of how to paint with watercolor pencils. In this watercolor pencils tutorial, we will guide you through seven techniques, so you will need to cut out at least seven small cards from your watercolor paper.
Techniques for Creating Watercolor Pencil Art
Many watercolor pencils tutorials explain many techniques within a singular drawing. However, while those tutorials prove to be useful, this particular tutorial will simplistically dissect each technique. By addressing various techniques individually, we can define them in ways that can then be applied for use in watercolor pencil art. Watercolor pencil drawing is one option to use watercolor pencils, but another way is to paint with them. We hope to be able to teach you how to paint with watercolor pencils.
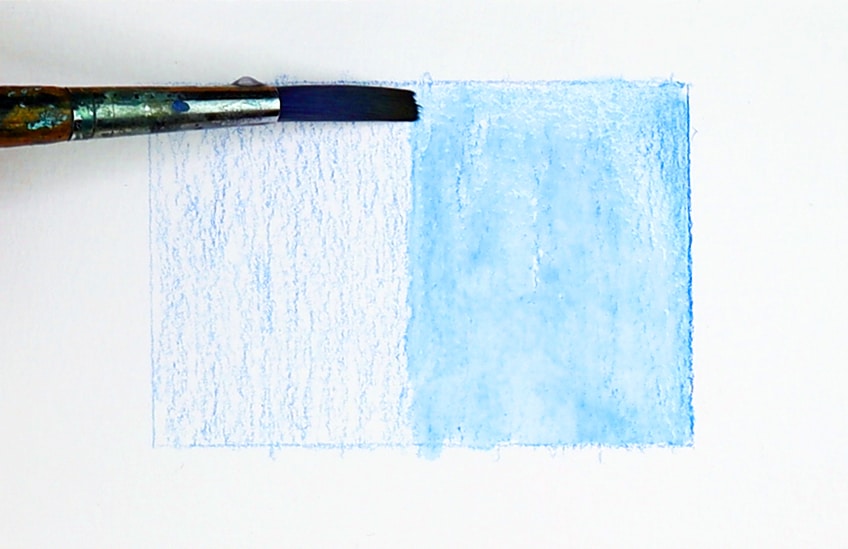
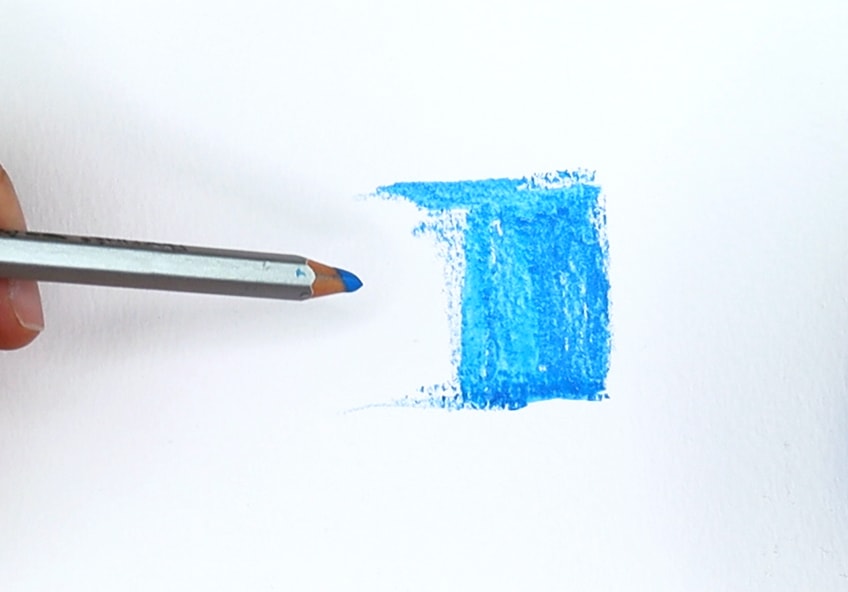
Method 1: Water on Pencil Technique
This is the most common option when it comes to watercolor pencil drawing/painting techniques. It is a must-have for your watercolor pencil repertoire. This technique is about applying a watercolor pencil mark directly to the paper. You can then take a watered paintbrush to stroke water onto the pencil mark.
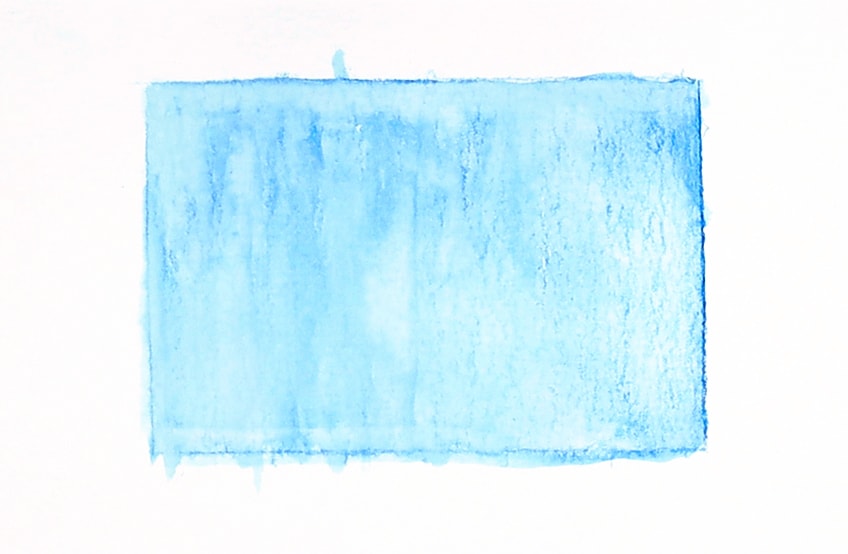
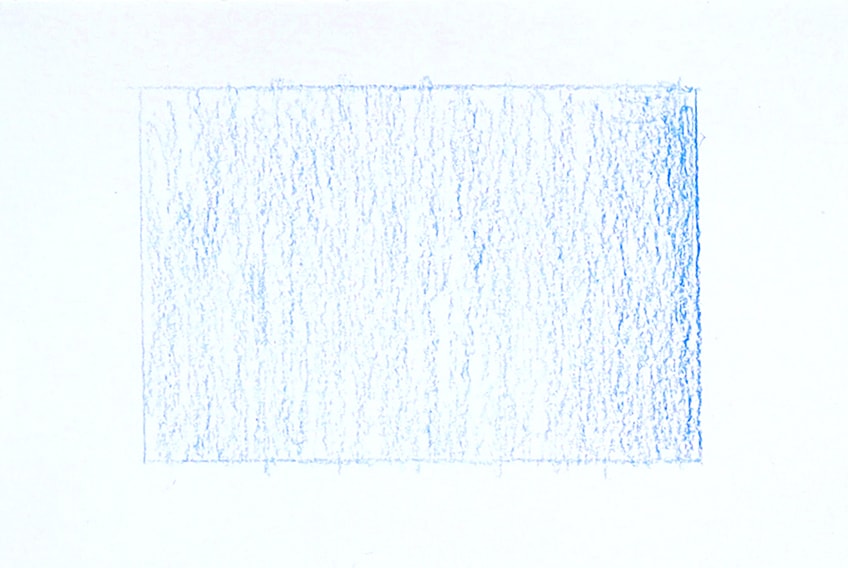
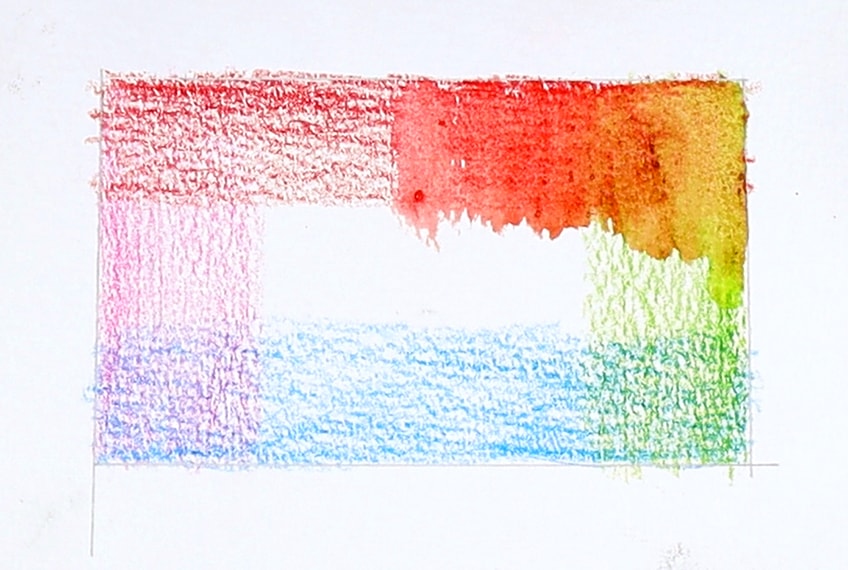
To begin with, take your HB pencil and create a small square to paint/draw in. By demarcating a space to work within you will be able to work on refining your precision when you apply the watercolor pencil to the paper. Next, you can color on the right side of the square and carefully lighten the color as you move along the small demarcated area towards the left. Thanks to the pencil being water-soluble, once water is applied you can move the color with ease.
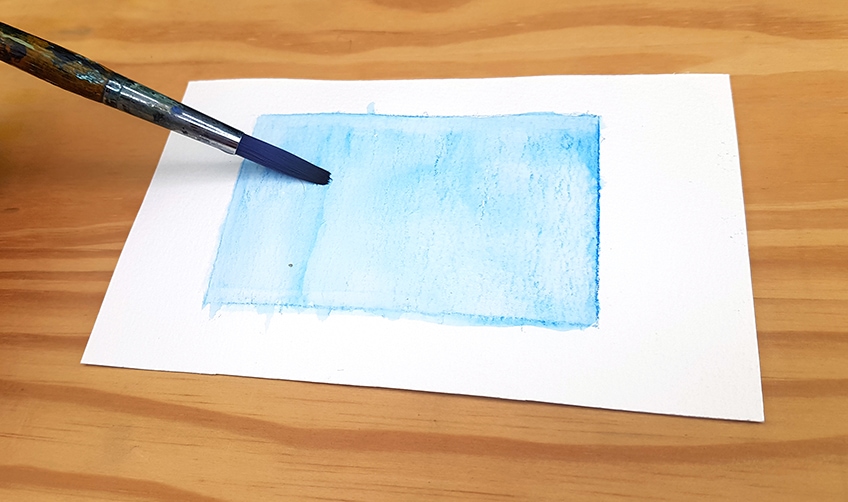
Load your brush up with water and begin painting on the darker-colored area. You need to ensure you are moving the paintbrush with a steady motion and try to fill the entire square with the blue pigment, using the paintbrush to move the color from one side to the other. Our blue square should end up filled and the whole square should have a similar tonal variety. We should notice a subtle variation in the tone but we are aiming to ensure that the paint is consistently moved throughout the entire square.
The result is a blue square that is marginally lighter thanks to the water’s impact on the pigment. The more pencil marks made or pigment applied, the more vivid the color will be. However, be careful to work cautiously and slowly by layering your marks steadily and slowly.
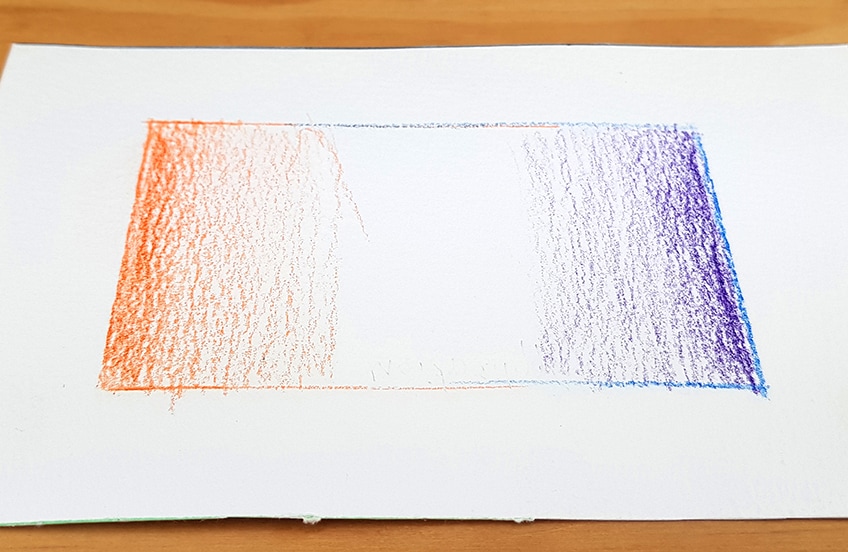
Method 2: Fading Colors Technique
This technique can create unique color combinations that look special in watercolor pencil drawings of nature and varied surface textures. When working with watercolor pencil drawings, it is useful to have this technique at hand as it can create a stunning and interesting range in your final image.
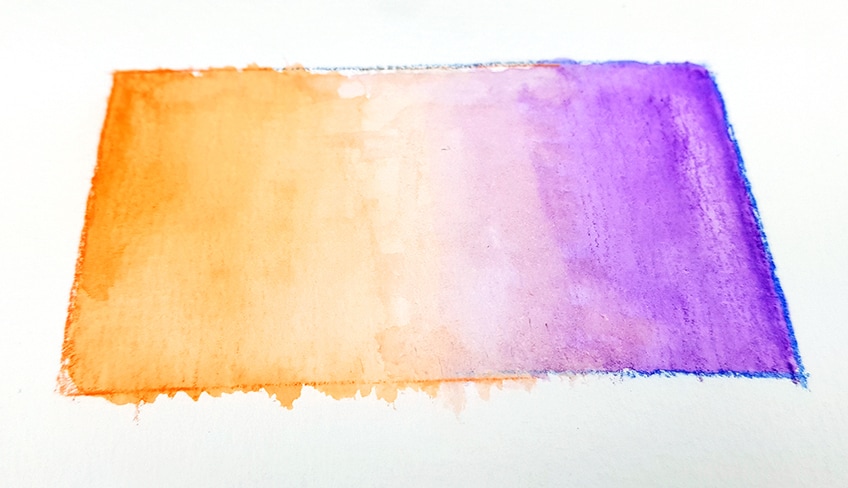
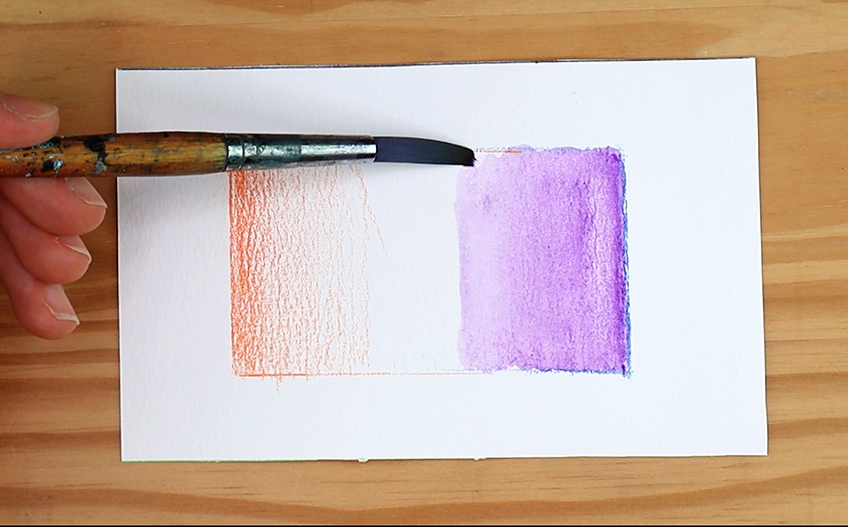
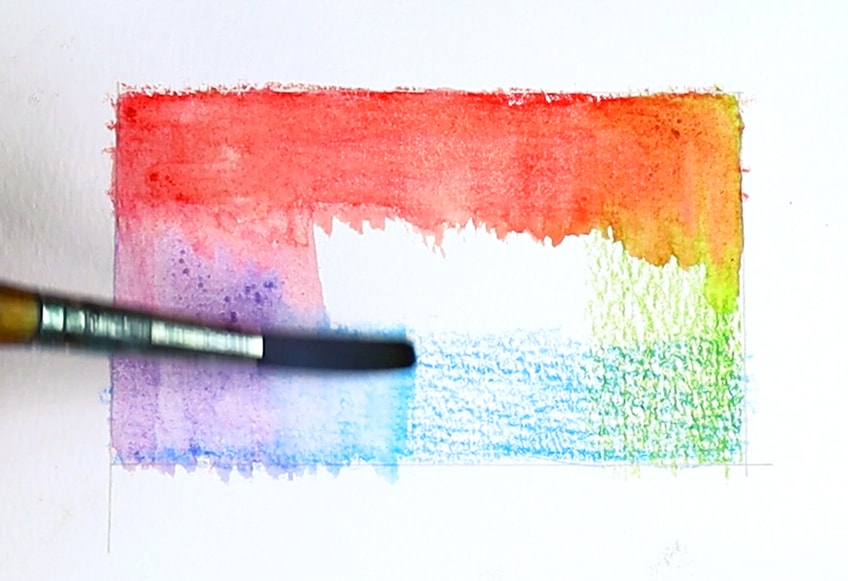
Begin by drawing another small square. Though this time we will use the colors purple and orange. Color each side of the square, gently fading the color inward towards the other color. You can then dip your paintbrush in some water and start to make strokes from one side first beginning with the purple. You want to work with steady, and swift, up-down strokes. This will cause the purple color to move inwards towards the middle of the square.
While the purple area is still wet, dip your brush in the water again and start the same action on the orange pigment side of the square. You want to ensure you continue with the same swift up-down strokes and move the color towards the center of the square.
As the colors are moved to the center, you want to ensure that you allow the touch of your brush on the paper to carefully lighten as you gently begin to merge the colors by creating light strokes. You can apply your strokes in either a circular or side-to-side motion and in doing so merge the colors until the colors merge seamlessly.
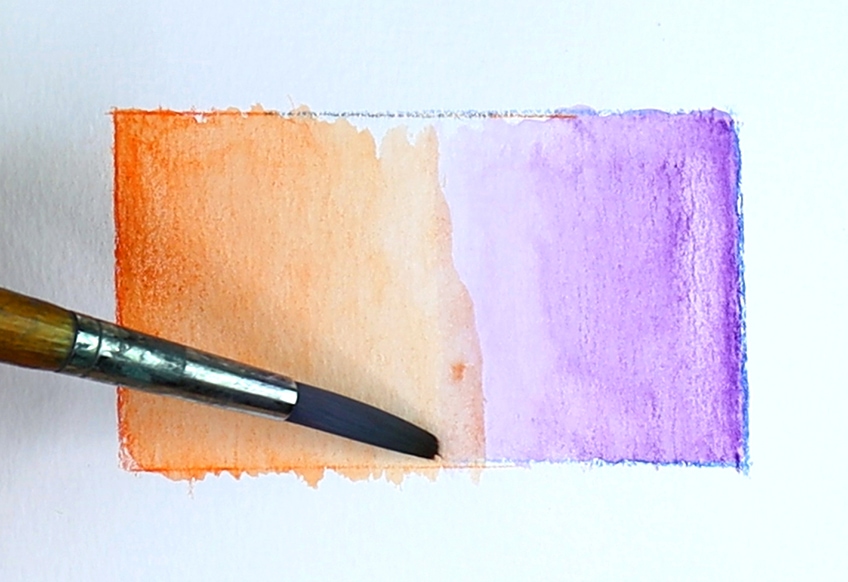
Once the colors have been merged, allow them time to dry completely. You are looking for a seamless fade, once the artwork has dried. Do not worry if there are some lines left by the pencils, once the piece has dried, as it is a unique quality of the medium and provides an interesting aspect to any image.

Method 3: Mixing Colors Techniques
This technique is another option you can use to create a seamless fade of color that can form a new color that exists as a result of mixing the colors available to you. This is a stunning watercolor pencil technique that will assist in broadening the color variations in your painting/drawing.
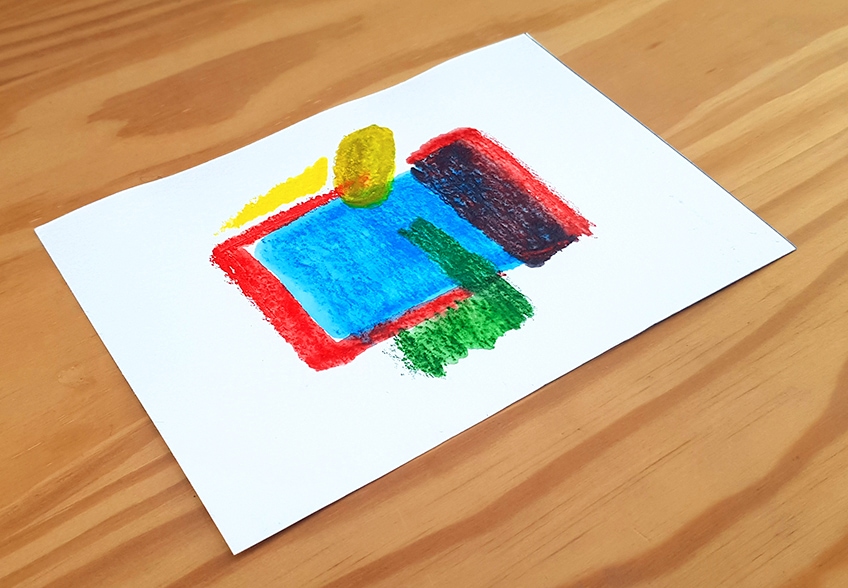
You will start by drawing another small square on a new piece of cut-out paper. This time each side of the square needs to be colored with a different color, maybe blue, yellow, red, or green. The colors are allowed to overlap in the corners. You can then take your paintbrush and dip it in some water and start to slowly paint over the colors. Begin at one side and work your way all around the square. If necessary, you can reload your paintbrush with water, in-between colors.
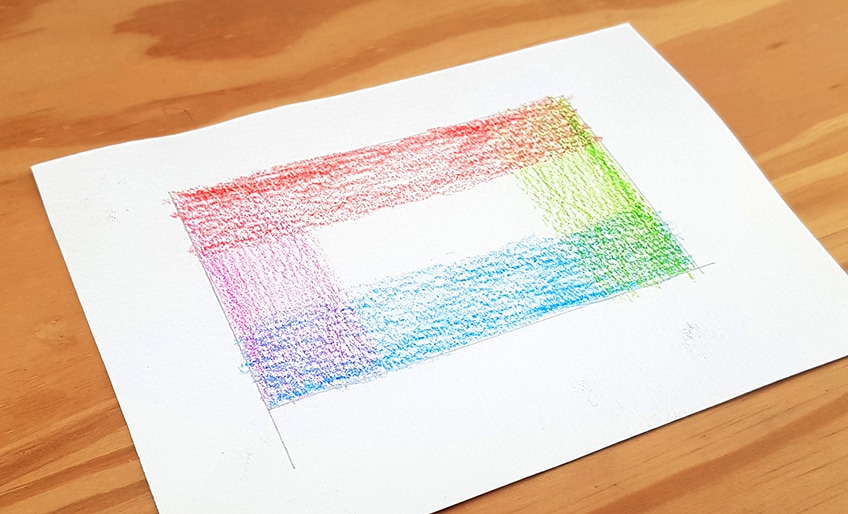
You should work around the square using your watered paintbrush, and create wet strokes on the individual colors. You will also need to apply wet brush strokes in the corners where the colors overlap. The goal here is to mix and merge the colors and allow yourself to work freely.
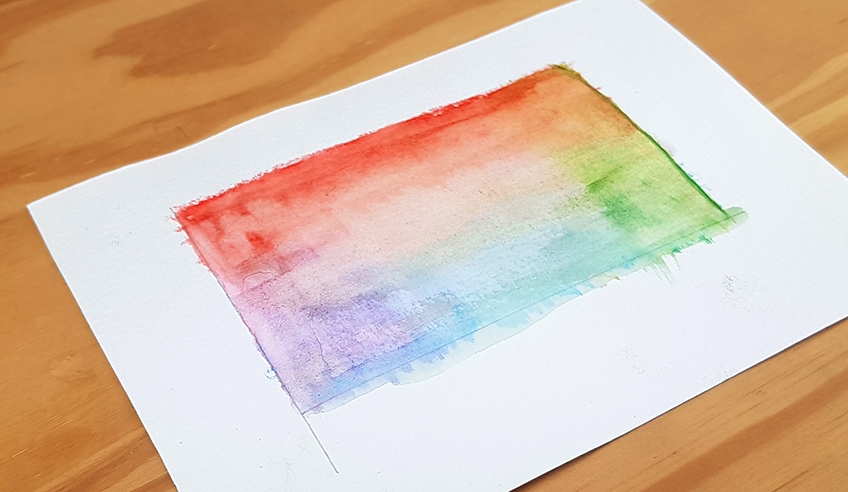
When you have finished going through all the colors around the square you will need to start making various movements as you aim to merge the colors. It is fun to use an assortment of colors when attempting this technique so that you can see a broad spectrum of colors.
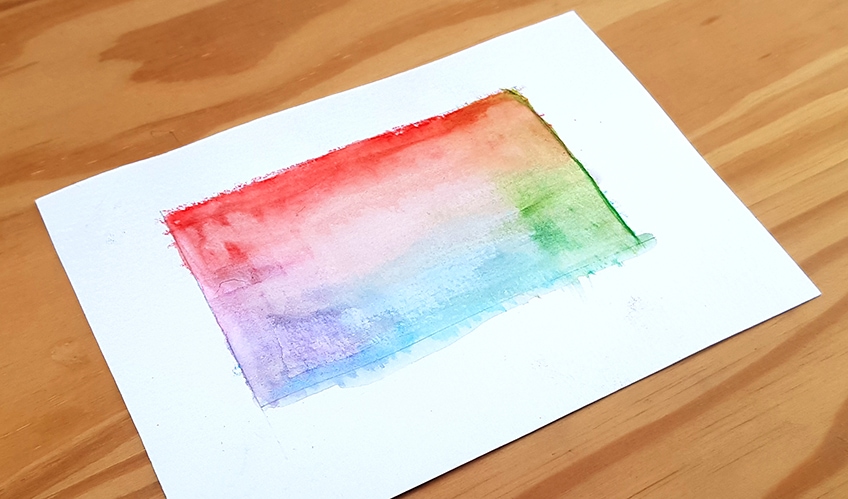
Once the colors have been mixed, allow time for the image to dry completely and you will then be able to see the final results of this particular technique. You are looking to achieve dashes of individual color, while also the new colors showing through. You will create a mix of the colors that we have available to us. This technique creates gorgeous color variations.
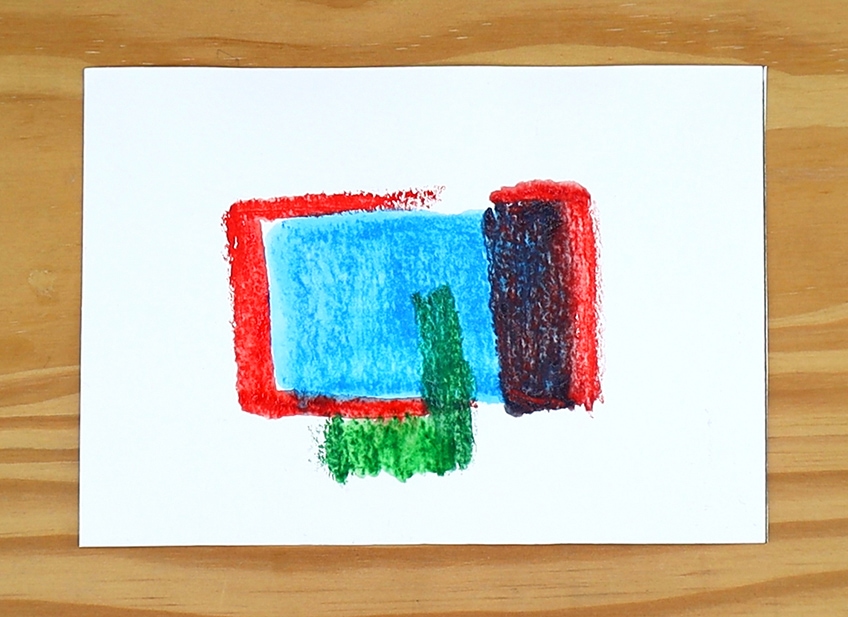
Method 4: Palette Painting Technique
This particular technique is more of a painting technique than a drawing technique. You will need to take a spare piece of watercolor paper and create a palette of a variety of colors and using your wet brush, activate them. You can then load the paint onto your paintbrush which you can then use as paint on a brush.
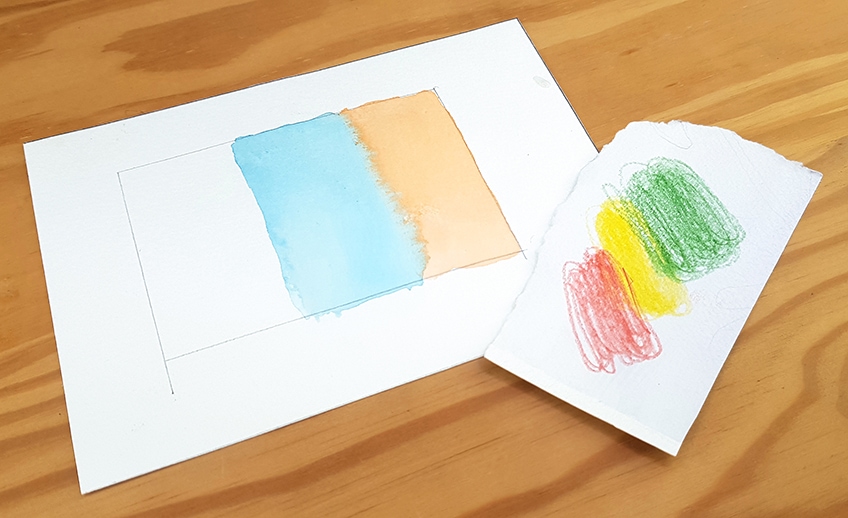
You can start by drawing another small demarcated square on a new piece of cut-out paper. You can then take another piece of cut-off paper and start to do a few scribbles using one or two of your colors. We suggest using blue and orange for this one and creating a small scribble palette on your piece of paper.
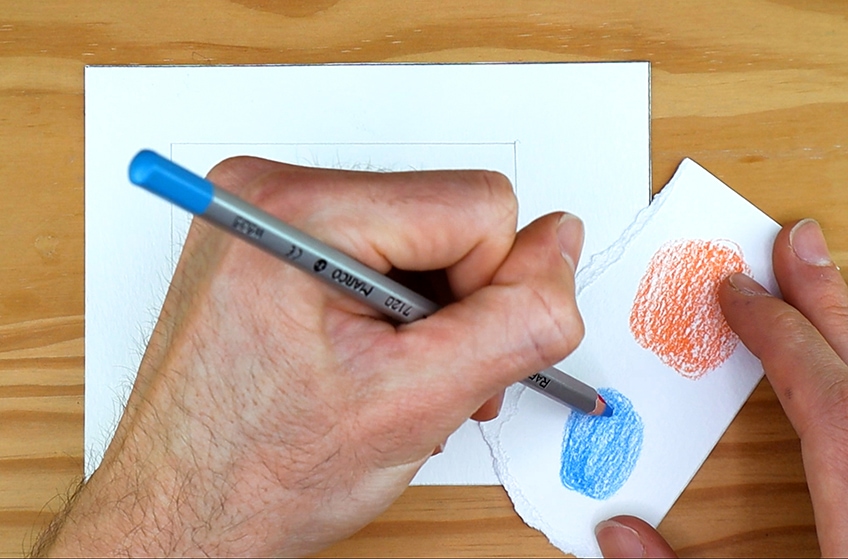
You can then dip your brush in some water and you can use the paintbrush to activate the colors on your paper palette using the water. You can then make three small sections of colors within your square in a painterly fashion.
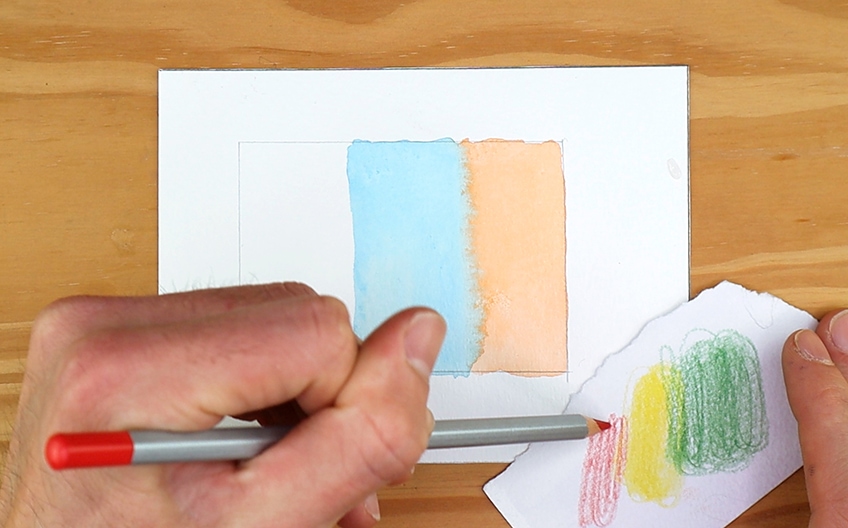
Next, you can take another piece of cut-off paper and create a color mix. Perhaps mixing green, red, and yellow. Using pencil pigment as the paint is an exciting way to mix and create new colors. As you combine the colors using the water-loaded paintbrush you will see a new color forming. This is a wonderful way to increase the variety of colors in your painting if you only have access to a few pencils.

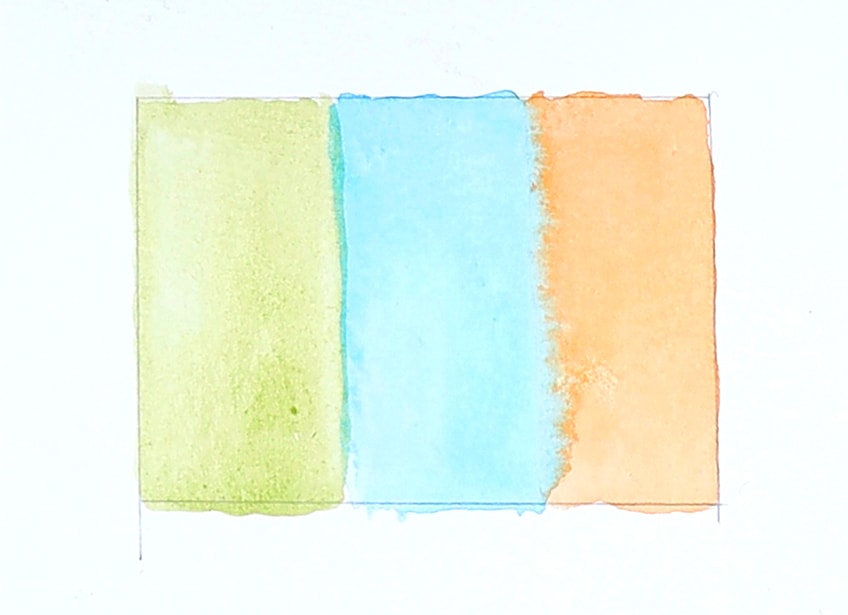
You can then begin to apply the newly created color next to our other two colors within the demarcated square. In applying watercolor pencil pigment in this way, you can diversify your mark-making style, creating a unique image composition using a variety of marks.
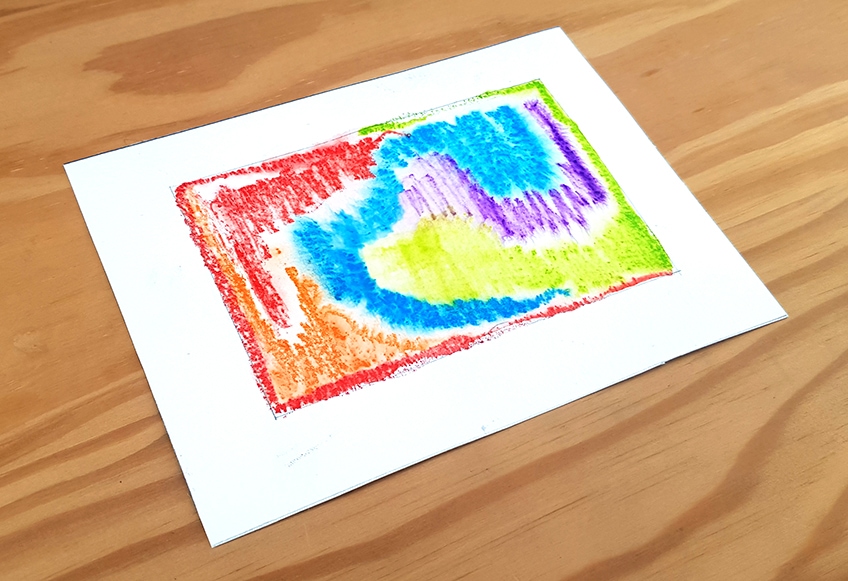
Method 5: Drawing on Wet Technique
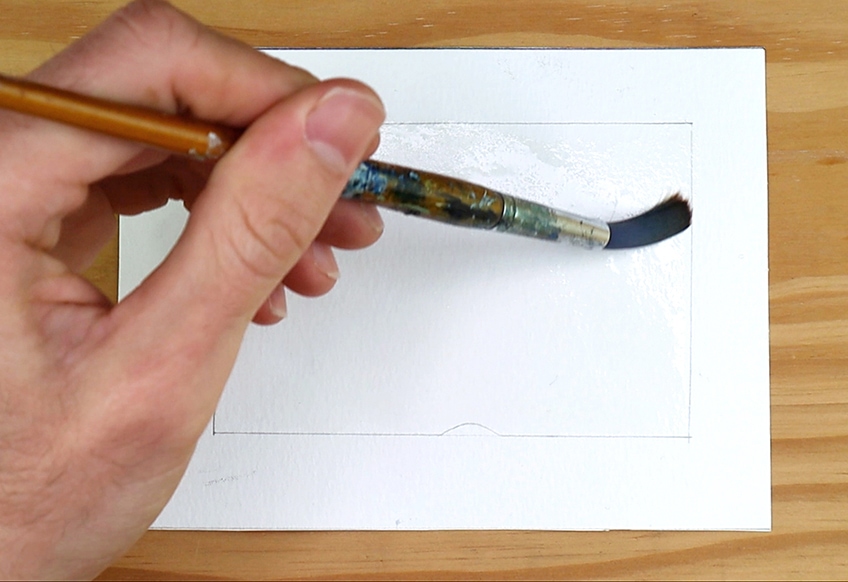
This is an interesting technique that is a wonderful way to create some highly saturated and contrasted marks in an image. This technique allows you to draw directly onto a wet surface. The results are stunning and form vivid and interesting marks. You want to start by drawing another small square, using your HB pencil, and then applying a clean coat of water to the surface of the paper, within the square. You want to ensure that you have applied an even volume of water, whilst not applying too much.
While the paper is still wet you can apply an assortment of colors and allow yourself to have fun in the way you apply the marks. Go ahead and make zig-zags, scribbles, and whatever else your heart desires.
Fill your square with an assortment of colors. You will see that the water-soluble pigment moves slowly towards the wet areas, this will result in a dispersion of the colors. This is a wonderful technique to use when doing abstract work, or if you are just creating exciting shapes in an image.
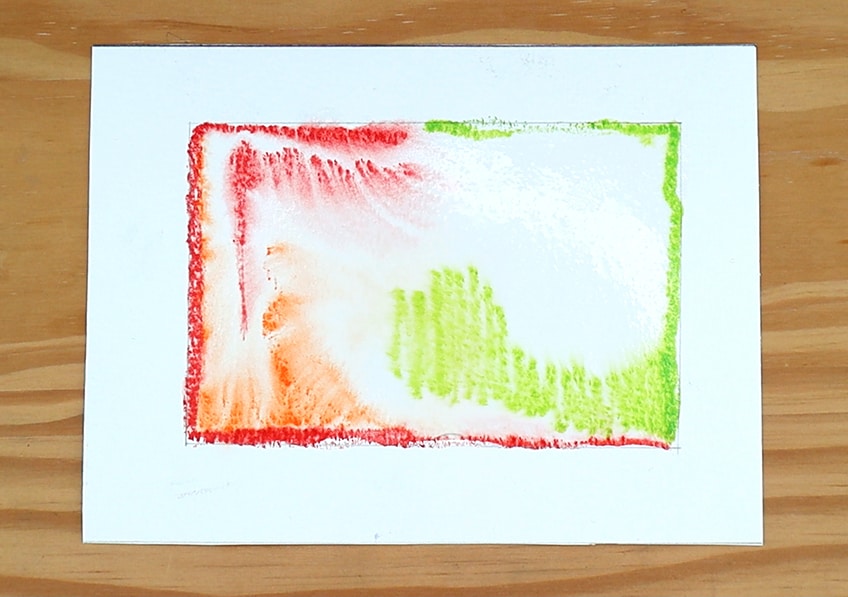
As you apply an assortment of colors within your square, you will notice how the scratchiness created by the pencil marks is preserved slightly. This is a gorgeous mark-making technique that can be used to create a more seamless look of watercolor marks.
Once done allow time for your image to completely dry and you will be left with a stunning combination of textural and tonal variation. You want to approach mark-making, when working with watercolor pencils, creatively.
Method 6: Pencil as Paintbrush
This particular technique is quite similar to the previously mentioned method, which uses a more direct water pencil application. However, in this case, instead of drawing directly onto a wet surface, you will need to dip each pencil into the water and then use the wet pencil tip to make marks on the paper. This is another great technique to form exciting mixes, colors, and an assortment of textures within an image.
You do not need to make a demarcated square this time. You can simply dip your watercolor pencil in some water and star to apply strokes to the paper. Have fun experimenting with colors and different marks.
We suggest trying this technique and mixing some yellow into the blue to form a new color combination or effect. You can also draw with colors around our initial applied color. Before making any marks, always remember to dip your pencil into some water.
You can also choose to add some red into the mix to create a variety of colors within this technique. It is great to see a variety of colors that are both dark and light to achieve the full effect. This is a very expressive way to go about applying marks.
Method 7: Drawing Over the Watercolor
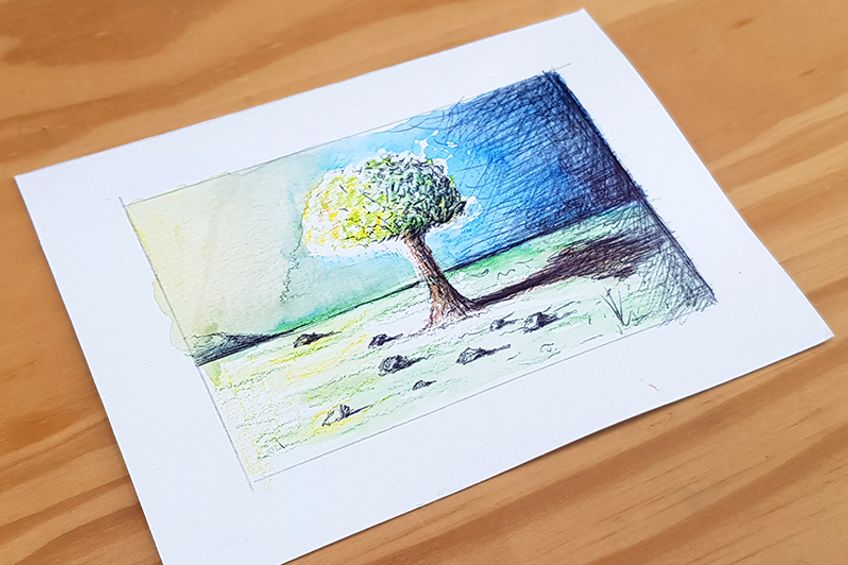
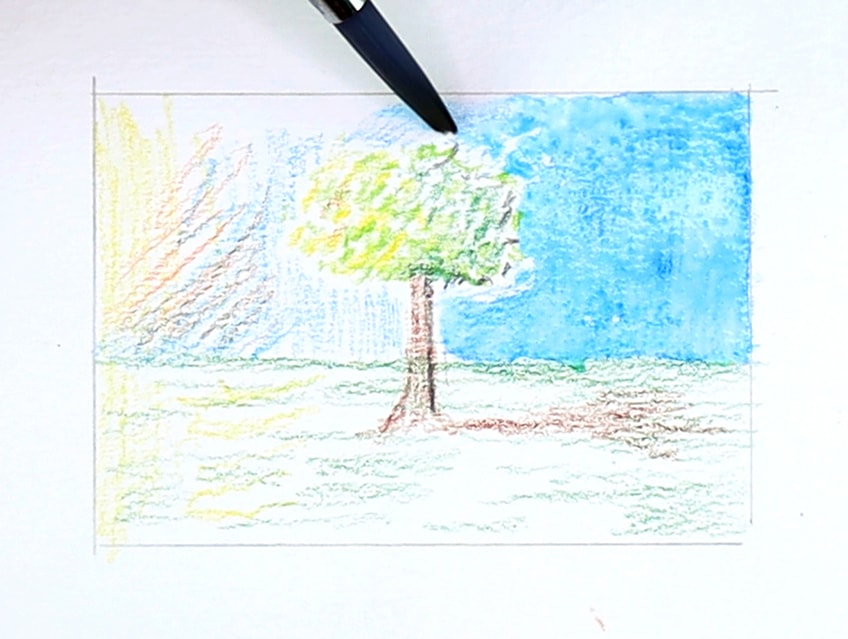
Certain watercolor techniques can be used for mediums other than watercolor pencils as well. In this technique, you will create a small landscape to demonstrate how you can enhance the image using pen parks. You are simply using a pen to draw over your watercolor pencil painting. Use an assortment of colors to form a small tree in a landscape. Begin by forming a horizontal line, using green to create the grass-colored ground. In the center of the page continue to draw a simple tree.
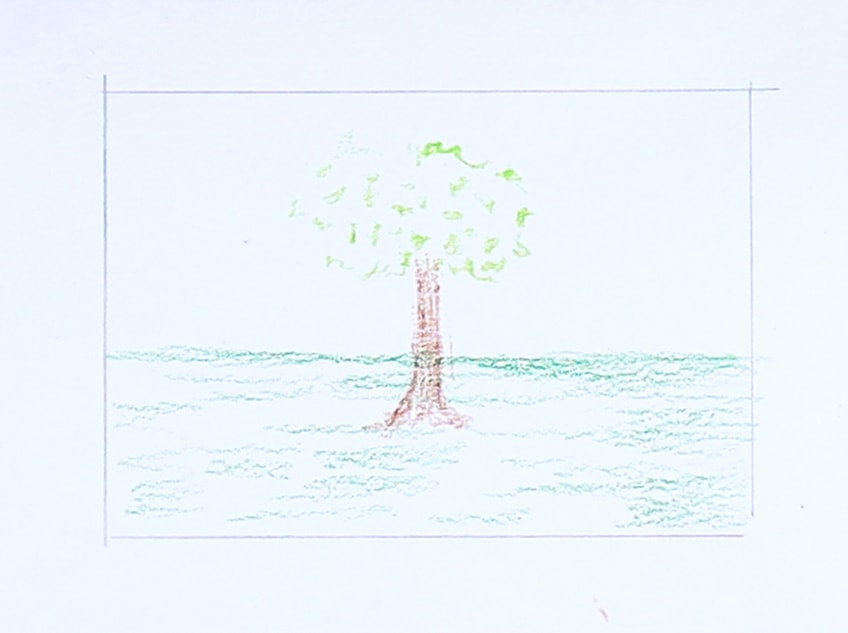
Next, you can add a sky using blue on the horizon behind the tree. This is the standard method of adding color, using watercolor pencils that later will be activated through the use of water. However, this technique focuses on demonstrating how you can add drawing details to a painting.
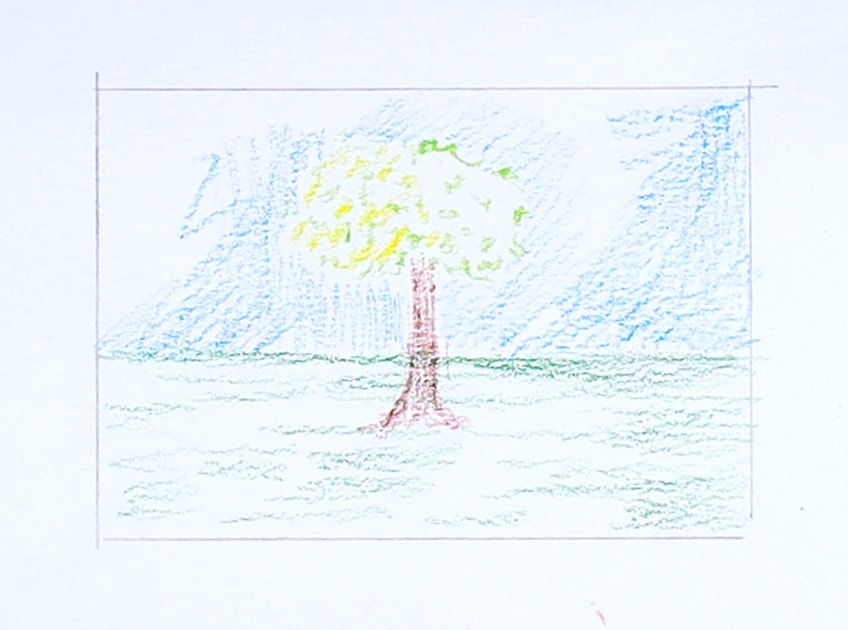
You can then add a small brown horizontal shadow to the right of the tree to indicate the direction of the light’s source. You can also darken the tree on the right side if you wish using a darker green while lightening it on the left side using some yellow.
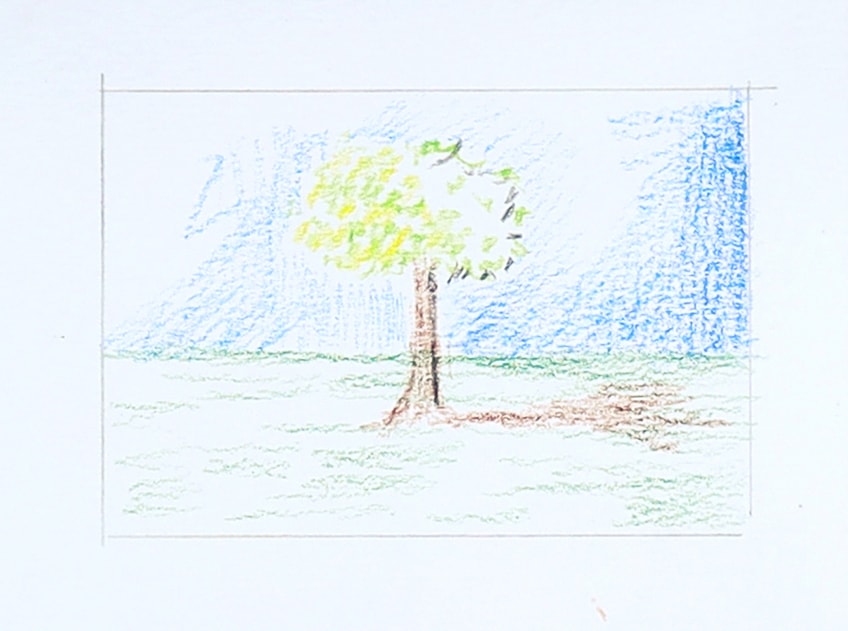
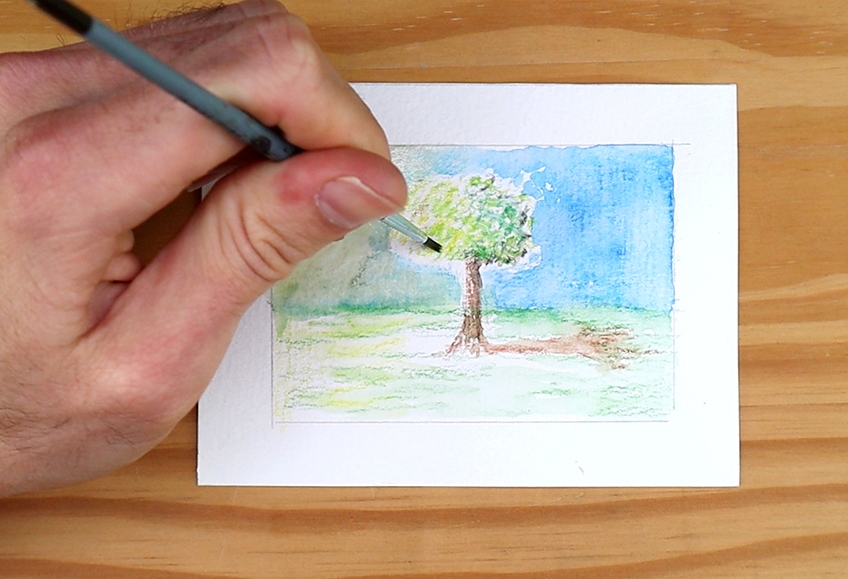
Next, you can activate the watercolor pencil marks by adding water. Dip your paintbrush in some water and then start making steady and soft painterly strokes to the blue sky. You can mix up you apply the strokes in your image, such as using a dabbing effect to creating a bushy feel in the tree. You can also enhance your work by changing the way you physically move your hands when applying the brush strokes.
Work slowly and carefully when activating the color in the image with your wet paintbrush. Once you are done, allow sufficient time for the image to completely dry. The results will be a stunning little painted landscape.
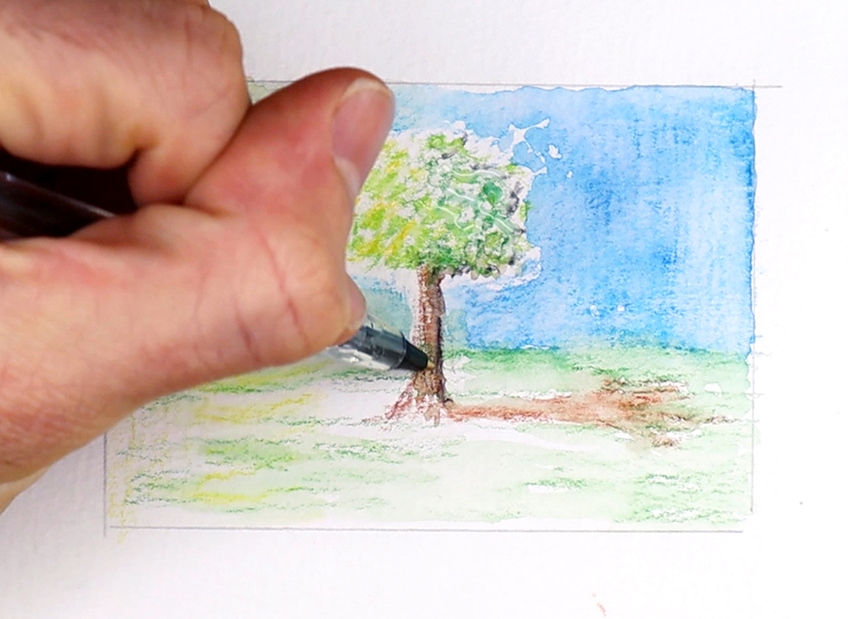
The following stage is to apply some interesting marks to your watercolor pencil painting using a black pen. For this particular technique, it is important that you use a pen. You can proceed to sketch over the dried watercolor painting, perhaps begin with the branch.

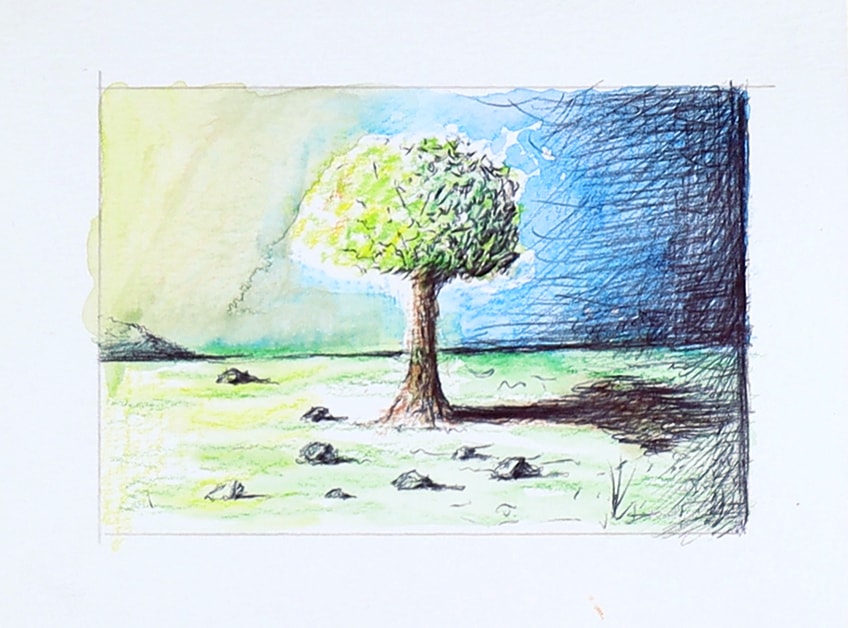
You are aiming to create new marks over the watercolor painting to either create new features completely or enhance already existing features, such as the shadow parts of the leaves. Ensure your marks remain loose and do not worry about being perfect. Your marks need to be sketch-like as this works well with the free aspect of watercolor pencils. You want your drawn lines to be scratchy.
Remember, a perfect image does not exist, so do not waste your time trying to create perfect marks with the pen. Allow yourself to work freely, and you will achieve stunning results – there is no wrong or right outcome.
Tips to Remember
As we have shown there are a variety of different techniques you can apply when working with watercolor pencils. We have put together a list of tips and tricks to assist you in having fun with this wonderful medium.
- In this tutorial for watercolor pencils, we recommend you work freely when using this particular medium, experiment as you work, and have fun!
- Sometimes you use more than just watercolor pencils when doing watercolor pencil art. You can use pens to draw on top of your watercolor pencil art to enhance the overall work.
- When working with a watercolor pencil, remember to now and then refill with clean water.
- You will inevitably make mistakes along the way when watercolor pencil drawing. Have a paper towel available, so if you wish to redo an area or mark you simply need to wet the area and dab at it with the paper towel.
There you go! The above has outlined several techniques to attempt when working with watercolor pencils, as well as tips and tricks. Watercolor pencil art creates stunning work and can often be misunderstood. Now that you know how to paint with watercolor pencils, you can learn about the various approaches you can use with these particular media. This watercolor pencil tutorial illustrates a variety of watercolor pencil drawing/painting techniques as well as a simple watercolor painting that you can use as a template for your own. You can use a variety of mediums in conjunction with watercolor pencils that will aid you in refining your artwork.
Frequently Asked Questions
What Is Special About Watercolor Pencils?
Watercolor pencils are considered a unique medium that falls between drawing and painting. What is quite special about watercolor pencils is that they are a medium that offers you the freedom to combine drawing and painting in one artwork.
Can Watercolor Pencils Be Used Without Water?
Yes, you do not have to activate watercolor pencils with water. What creates an exciting image, is if you have an assortment of marks that form a diverse range of qualities. When you are working with watercolor pencil drawing, you can choose to not use water, apply water, or do both. There is no one specific way to paint with watercolor pencils, you want to experiment and be as creative as possible.
How Do You Use Watercolor Pencils?
A common application and great suggestion are for you to draw directly onto the surface of the paper using your watercolor pencils and then use water to paint over them and in doing so activate the pencil marks. Watercolor pencil drawings can be transformed into a more painterly style by using water. There are many techniques you can use when working with watercolor pencils, you want to try to be as creative as possible when using the medium.

Larissa Meyer is a 32-year-old mother from Michigan and creative spirit since childhood. Her passion for painting and drawing has led her to an education as an illustrator and a career as a freelance graphic designer. She has a Bachelor of Fine Arts in Illustration and a degree in Graphic Design. Larissa is a talented artist who is able to master a wide range of styles and techniques to bring her artistic vision to life. Her greatest passion is currently fluid painting and epoxy resin art. Larissa’s love for art and her knowledge and experience in illustration make her the perfect Creative Director for our fluid-painting.com team. She is the creative head of our team and shares her passion and knowledge with our community through articles and tutorials.
As a mother of a 2-year-old daughter, Larissa also understands the importance of fostering creativity in early childhood. She uses her experience and knowledge to help other parents inspire their children and develop their artistic skills as well.
Learn more about Larissa Meyer and about us.